Testing is an indispensable part of software development. It helps us analyze and evaluate products to ensure they satisfy our requirements. It helps us easily find and fix bugs. But manual testing is not easy. It requires patience, effort, and time to manually test any product.
So instead, we can go for automation!
Automatic testing is a technique in which the testing is carried out by automation tools like Selenium and Cucumber. They will considerably reduce the testing time and enhance efficiency.
In this blog post, we will see how to automate UI testing for a login module in an ASP.NET Core application.
Note: All data should be clear and gathered based on the module for automating UI testing.
Prerequisites
We are going to use the Selenium automation tool for UI testing. So, install the following packages in your application.
Note: Use the latest Chrome browser version to use the latest version of these packages.
Automate UI testing for login module
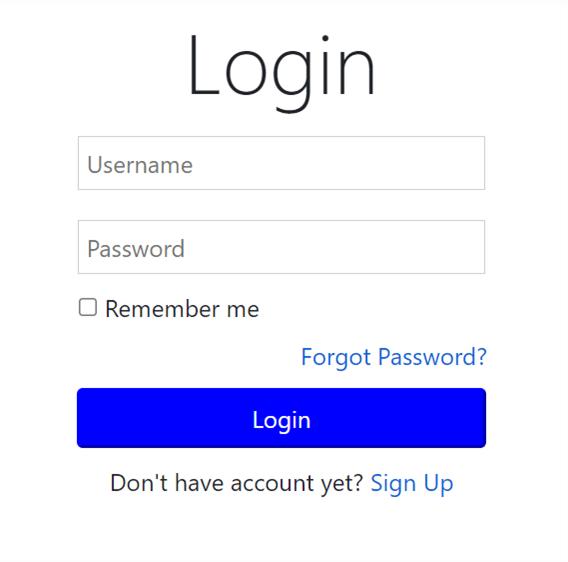
On the login page, we are going to validate the input fields, such as username and password, as well as the SEO-related items, such as page title and h1 tags.

Step #1: Initialize the login page details.
First, let’s connect to the login page to write the test cases. For each test case, we have to initialize the Chrome driver to navigate to the login page.
So, create a constructor for initialization. Then, define the code for disposing of the web driver after each test case execution.
Refer to the following code example.
public class Login : IDisposable
{
     private readonly IWebDriver _driver;
     public Login()
     {
         _driver = new ChromeDriver();
         _driver.Navigate().GoToUrl("http://localhost:1693/");  // URL should be your target site such as localhost or staging.
     }

     public void Dispose()
     {
         _driver.Quit();
         _driver.Dispose();
     }
}
Step #2: Write test cases.
While writing test cases, use the FindElement method to find the ID, class name, tag name, actual element name, link text, and page details such as page title and URL directly.
Basic scenarios
A login page should have a username field and its input should be in text format.
Refer to the following code example to validate a username.
[Test]
public void CheckUsernameField()
{
     var userNameField = _driver.FindElement(By.CssSelector("Input[type*='text'"));
     Assert.IsNotNull(userNameField);
}
A login page should also have a password field. Refer to the following code example to validate a password.
[Test]
public void CheckPasswordField()
{
   var passwordField = _driver.FindElement(By.CssSelector("Input[type*='password'"));
   Assert.IsNotNull(passwordField);
}
SEO scenarios
A webpage’s title is one of the elements that directly influence the SEO ranking of a page. Let’s validate the presence of the page title with the expected value.
[Test]
public void CheckTitle()
{
   Assert.IsNotEmpty(_driver.Title);
   Assert.IsNotNull(_driver.Title);
   Assert.AreEqual("Login Page", _driver.Title);
}
A login page should have an h1 title that describes the page content briefly. To confirm this, validate the h1 title with the expected value.
Refer to the following code example.
[Test]
public void CheckH1Title()
{
   var h1Text = _driver.FindElement(By.CssSelector("h1"));
   Assert.IsNotNull(h1Text);
   Assert.IsNotNull(h1Text.Text);
   Assert.IsNotEmpty(h1Text.Text);
   Assert.AreEqual("Login", h1Text.Text);
 }
Like these, we can perform testing based on the page details. For example, we can automate the UI testing for validating a submit button, sign-up option, forgot password link, and more.
Output
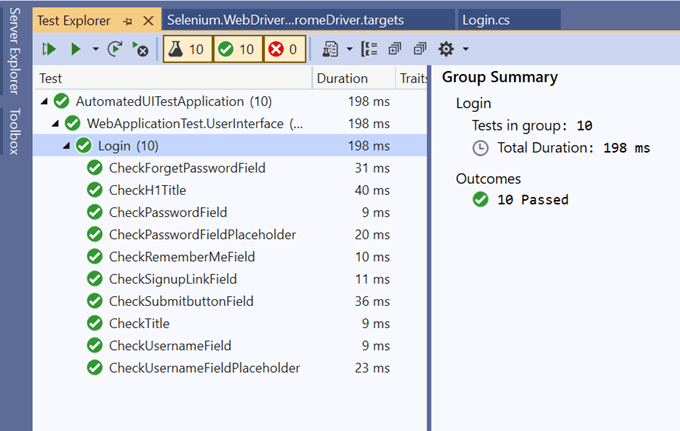
Now, we are going to use the NUnit testing framework to run the test cases.
After successful execution of the test cases, we will get output like in the following screenshot.

GitHub reference
For more details, refer to the example Automate UI testing in ASP.NET Core apps on GitHub.
Conclusion
Thanks for reading! In this blog, we have seen how to automate UI testing in an ASP.NET Core application for a login module. This will help us reduce testing time and enhance efficiency. Try out the steps in this blog post and enjoy hassle-free UI testing automation!
The Syncfusion ASP.NET Core UI controls library, powered by Essential JS 2, is the only suite you will ever need to build an app. It contains over 70 high-performance, lightweight, modular, and responsive UI controls in a single package. Use them to increase your productivity in app development!
If you’re already a Syncfusion user, you can download the product setup. If not, you can download a free 30-day trial to evaluate our products.
You can contact us through our support forum, support portal, or feedback portal. As always, we are happy to assist you!
