Welcome to this blog post on essential tips for using React Router. In this post, I will cover some crucial techniques for setting up and navigating routes in a React application. I will also introduce a UI component—the Syncfusion React Menu Bar component, which can be used for navigation in your application.
React Router is a popular library for handling routing in a React application. It allows you to define the different routes in your application and the components that should be rendered for each course.
One of the key benefits of using React Router is that it makes it easy to create dynamic, single-page applications (SPAs). With React Router, you can update the current URL in the browser without requiring a full page reload, which allows for a smooth and seamless navigation experience for the user.
Following are some basics you need to know about using React Router in your application.
Installing React Router
To use React Router in your application, you must install it using npm. Run the following command in your terminal to install React Router.
npm install react-router-dom
Setting up routes
To use React Router in your application, you must import the <Router> component from the react-router-dom library and wrap it around your list of <route> components. The <route> components should be placed inside the <Router> component as children.
Following is an example of how you can set up the <Router> component and define some routes.
import { BrowserRouter as Router } from 'react-router-dom';
<Router>
  <Route exact path="/" component={Home} />
  <Route path="/about" component={About} />
  <Route path="/products/:productId" component={ProductDetail} />
</Router>
Switch component
If you have multiple routes within your <Router> component, you can use the <Switch> component to ensure that only one route is rendered at a time. The <Switch> component will iterate through its children (which should be <Route> components) and only render the first one that matches the current URL.
For example:
<Router>
  <Switch>
    <Route exact path="/" component={Home} />
    <Route path="/about" component={About} />
  </Switch>
</Router>
Handling unknown routes
To handle a case when a user navigates to a route that does not have a corresponding <Route> component defined, you can create a catch-all route using an asterisk (*) as the path prop. This route should be placed inside the <Switch> component at the end of the list of routes.
For example:
<Router>
  <Switch>
    <Route exact path="/" component={Home} />
    <Route path="/about" component={About} />
    <Route path="*" component={NotFound} />
  </Switch>
</Router>
Link component
You can use the <Link> component from React Router to create links that allow the user to navigate different routes in your application. The <Link> component creates a clickable link that will navigate to the specified route when clicked.
function Navbar() {
  return (
    <nav>
      <Link to="/">Home</Link>
      <Link to="/about">About</Link>
    </nav>
  )
}
<Router>
  <Navbar />
</Router>
And there you have it! Now that I’ve covered the basics of React Router, let’s take a closer look at Syncfusion’s React Menu Bar component for creating navigation menus in your application.
The Syncfusion Menu Bar component is a powerful tool for creating a navigation menu in your React application. It offers a variety of customization options and can be easily integrated into any React app.
To use the Syncfusion Menu Bar component, you need to install it in your project using npm (or yarn). Run the following command in your terminal.
npm install @syncfusion/ej2-react-navigations
Once the component is installed, you can import it into your project and use it in your code. Before that, you need to add menu bar styles to the CSS page.
@import "../node_modules/@syncfusion/ej2-base/styles/material.css";
@import "../node_modules/@syncfusion/ej2-navigations/styles/material.css";
Following is an example of how to use the Menu Bar component to create a simple navigation menu.
import React from 'react';
import { MenuComponent, MenuItemModel } from '@syncfusion/ej2-react-navigations';
import './App.css';
function App() {
  const menuItems: MenuItemModel[] = [
    {
      text: "Home",
    },
    {
      text: 'About',
    },
    {
        text: 'Contact'
    }
  ]
    return (
    <div className="App">
      <MenuComponent items={menuItems}></MenuComponent>
    </div>
  );
}
export default App;
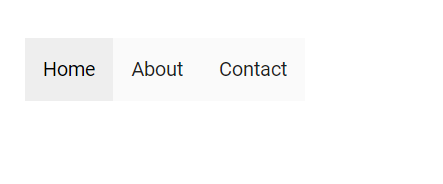
In the previous example, I imported the MenuComponent and MenuItemModel components from the @syncfusion/ej2-react-navigations library and used them to create a simple navigation menu with three items: Home, About, and Contact.
 The Menu Bar component offers a variety of customization options that allow you to adjust the appearance and behavior of your menu. For example, you can specify the menu’s width, height, and orientation, as well as the style and appearance of the menu items.
Reference
To learn more about the Syncfusion Menu Bar component and its various customization options, refer to the documentation and explore the demos and examples available.
Conclusion
Thank you for reading. In summary, React Router is a routing library that enables you to define and navigate among routes in a React application, while the Syncfusion React Menu Bar component is a UI component that allows you to create a navigation menu for accessing those routes.
The Syncfusion React UI components library in a single package provides over 75 high-performance, lightweight, modular, and responsive UI components. Use it to create great applications.
Contact us via our support forum, support portal, or feedback portal if you have any questions. We are always delighted to help you!
Related blogs
- Video-Calling React App with Agora and Syncfusion
- React Multicolumn MultiSelect Dropdown Component
- Create a Redux Form with Syncfusion React Components
- Introducing the New React Image Editor


