To reach people of different language groups, your application text should be localized for the different languages you’re targeting. This is easy to do for the text you’ve added in the application yourself. You just need to provide translated text in a language-specific .resx file. That said, your application is 100% localized only if all the text shown, including that within custom controls, is also localized. In Xamarin.Forms applications, this is already possible with Syncfusion Xamarin controls.
Previously, to localize our controls, you had to add the translated text separately for iOS, Android, and UWP in Xamarin.Forms in a separate file by following the platform-specific localization procedure. Though our users were fine with this approach, we felt that this was a little tedious. Therefore, we decided to make it simple by allowing you to localize the text by adding a .resx file in a .NET Standard project alone, which contains the App.xaml.cs file. This new approach is included in our 2018 Volume 2, SP 1 release. If you are an existing customer, don’t panic; we have implemented it with backward compatibility in mind.
This blog walks you through the steps required to localize the text in the image editor control using an .resx file. Note that the steps listed here are similar for other applicable controls.
Initial rendering
- Download this getting started application for the image editor and open it in Visual Studio.
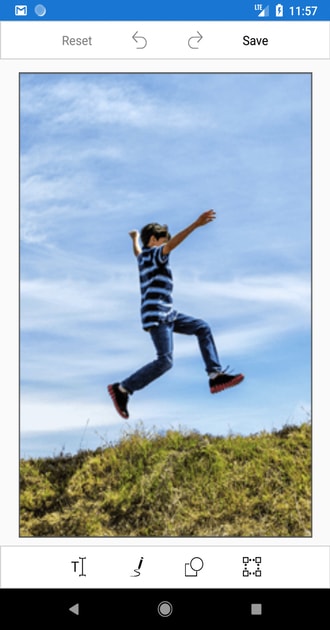
- Set Android as a startup project and run it. You will get the following output in which the text of the Reset and Save buttons will be in English.

Add required resource files
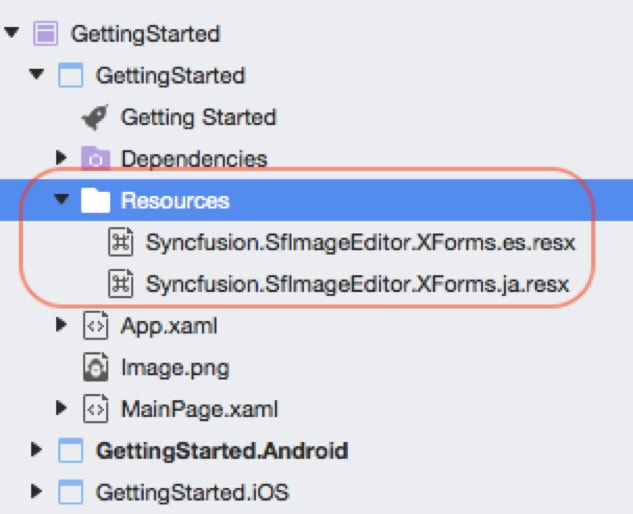
- Add a new folder in the .NET Standard project named Resources.
- Add resource files for the languages you wish to support and set their Build Action to EmbeddedResource. The name of the resource file should be $name of the Syncfusion component$+.$language code$+.resx.
- In this example, we are going to add resource files for Spanish and Japanese cultures. Add the Syncfusion.SfImageEditor.XForms.es.resx and Syncfusion.SfImageEditor.XForms.ja.resx files.

Adding Spanish and Japanese resource files
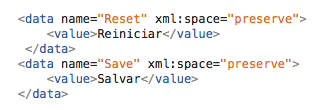
- Provide Spanish and Japanese values for each key in the respective .resx files. Here, “Reset” and “Save” are the keys, and “Reiniciar” and “Salvar” are their respective Spanish values.

Note: We have already created resources for some cultures and shared them on the Syncfusion GitHub for your convenience.
- Once it is done, set the resource manager to ‘ImageEditorResourceManager.Manager’. Similarly, we have specialized classes like ChartResourceManager, PopupLayoutResourceManager etc. with property ‘Manager’ in every component to get the resource manager from the user.
ImageEditorResourceManager.Manager = new ResourceManager("GettingStarted.Resources.Syncfusion.SfImageEditor.XForms", Application.Current.GetType().Assembly);Parameters of ResourceManager:
‘baseName’: Specifies the fully qualified name of the resource file without its extension. In this example, “GettingStarted.Resources.Syncfusion.SfImageEditor.XForms” is the the fully qualified name of the resource file. In which,
GettingStarted – namespace in which the resource files are kept.
Resources – folder name in which the resource files are kept.
Syncfusion.SfImageEditor.XForms – name of the resource file without extension.
‘assembly’: Specifies the assembly in which the resource files are kept. In this example, assembly is obtained using “Application.Current.GetType().Assembly”.
You can refer the ResourceManager class to know more details about it and the parameters passed in it.
Localized application
- Build and install the application.
- Change the language of the device to Spanish in the settings.
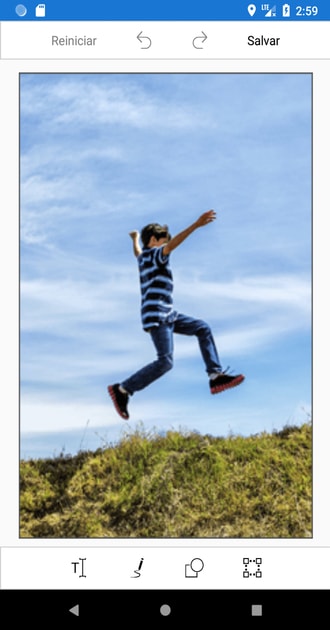
- Launch the application. All the predefined English strings will be changed to Spanish strings based on the key-value pairs defined in the Syncfusion.SfImageEditor.XForms.es.resx file. You can run the application and check in other platforms as well.

Image editor control with buttons in Spanish
Localize at the application level
We have seen how the application can be localized for the chosen language of the device. However, we can also localize the text at the application level regardless of the language selected on the device. The following platform-specific codes are needed to achieve this. Use the dependency services to set this from the .NET Standard project.
//For Android and iOS,
Thread.CurrentThread.CurrentUICulture = new CultureInfo("fr-FR");

//For UWP,
CultureInfo.CurrentUICulture = new CultureInfo("fr-FR");
You can download the complete sample from the Syncfusion website.
In this blog, we have manually added .resx files. However, this approach also opens a way to use the Multilingual App Toolkit to translate the text automatically.
We hope that this new approach will make the process easier to provide localization support to your application. If you have any queries, please post in the comments section below. You can also contact us through our support forum or Direct-Trac. We are always happy to assist you!
If you like this blog post, we think you’ll also like the following free e-books:
Xamarin.Forms Succinctly
Xamarin.Forms for macOS Succinctly
UWP Succinctly
Writing Native Mobile Apps in a Functional Language Succinctly


Comments (2)
Do we need to launch my app, everytime we change language? It works but everytime I need to force quit my app and start else it shows previous language labels.
To overcome this issue, please follow the steps given in the below documentation.
https://docs.microsoft.com/en-us/xamarin/xamarin-forms/app-fundamentals/localization/text?tabs=windows#displaying-the-correct-language
Before setting ImageEditorResourceManager.Manager, please call the below methods as mentioned.
if (Device.RuntimePlatform == Device.iOS || Device.RuntimePlatform == Device.Android)
{
var ci = DependencyService.Get().GetCurrentCultureInfo();
DependencyService.Get().SetLocale(ci);
}