“Time is the scarcest resource and unless it is managed, nothing else can be managed.”
– Peter Drucker
Almost all applications with time regions include features for setting lunch hours, nonworking hours, holidays, and nonworking days, but these features are often not flexible enough to be used for other application-specific use cases. To assist you in managing your valuable time more efficiently, we at Syncfusion have integrated the special time region feature into our Flutter Calendar widget. It allows or restricts user interaction, such as for selection and highlights, in certain time frames. This feature became available in our 2020 Volume 2 release.
Through this feature, you can:
- Restrict selection in single or multiple time slots.
- Set unique colors to specific time slots.
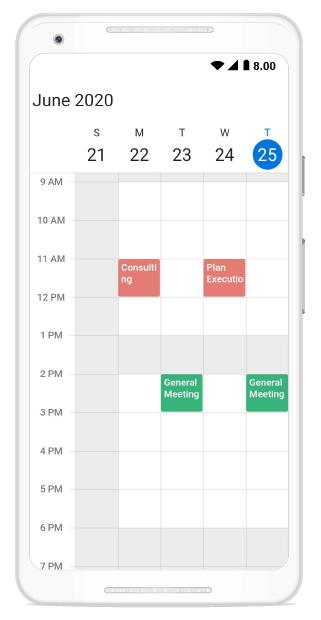
In this blog post, I will explain the key features of the special time region in the Calendar widget. If you are new to the Calendar control, please go through the Getting Started article in the Calendar documentation before proceeding.
Let’s get started!
Adding a special time region
You can create a special time region by using the TimeRegion class available in the Calendar widget. In it, you can set the start and end time of the time region. You can also set values to the created time regions collection to the specialTimeRegion property available in the Calendar.
Refer the following code example.
@override
  Widget build(BuildContext context) {
    return Container(
      child: SfCalendar(
         initialDisplayDate: DateTime(2020, 06, 18, 9, 0, 0),
        view: CalendarView.week,
        specialRegions: _getTimeRegions(),
      ),
    );
  }

  List<TimeRegion> _getTimeRegions() {
    final List<TimeRegion> regions = <TimeRegion>[];
    regions.add(TimeRegion(
        startTime: DateTime(2020, 06, 18, 14, 0, 0),
        endTime: DateTime(2020, 06, 18, 15, 0, 0),
        color: Colors.grey.withOpacity(0.2),
        text: 'Break'));

    return regions;
  }
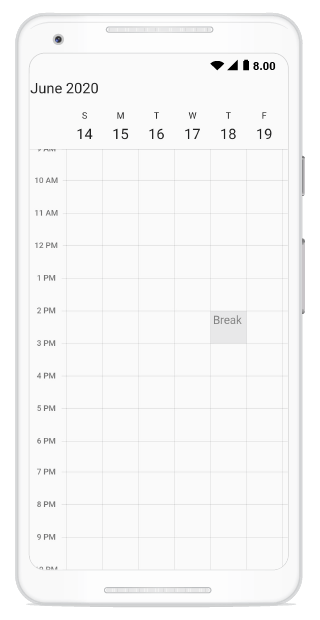
After executing the previous code, we will get the following output, in which the time between 2 p.m. and 3 p.m. on 18 June 2020, is labelled Break in the calendar.
Restrict user interaction in timeslots
The enablePointerInteraction property specifies whether the user interactions are restricted or not in timeslot cells. So, special time regions can function in both ways:
- To lock specific time cells to user interaction.
- To unlock them for user interaction.
Refer to the following code example.
@override
  Widget build(BuildContext context) {
    return Container(
      child: SfCalendar(
         initialDisplayDate: DateTime(2020, 06, 18, 9, 0, 0),
        view: CalendarView.week,
        specialRegions: _getTimeRegions(),
      ),
    );
  }

  List<TimeRegion> _getTimeRegions() {
    final List<TimeRegion> regions = <TimeRegion>[];
regions.add(TimeRegion(
        startTime: DateTime(2020, 06, 18, 14, 0, 0),
        endTime: DateTime(2020, 06, 18, 15, 0, 0),
        color: Colors.grey.withOpacity(0.3),
        text: 'Break'));
    regions.add(TimeRegion(
        startTime: DateTime(2020, 06, 18, 16, 0, 0),
        endTime: DateTime(2020, 06, 18, 17, 0, 0),
        color: Colors.black26,
        enablePointerInteraction: false,
        iconData: Icons.close,
        textStyle: TextStyle(
          color: Colors.red,
          fontSize: 15,
          fontWeight: FontWeight.bold,
        )));
    return regions;
  }
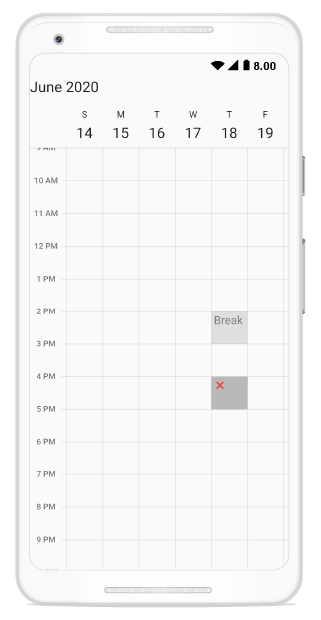
Executing this code will deliver the following output in which user interaction is restricted between 4 p.m. and 5 p.m. (represented by a cross symbol.)
Recurring time region
The time region has the same recurrence settings as appointments, the recurring time region being on a daily, weekly, monthly, or yearly interval. You can create recurring special time regions by setting the appropriate recurrence rule in the recurrenceRule property available in the TimeRegion of the Calendar widget.
If you want to learn more about the recurrence rule, refer to our Calendar widget documentation.
Refer to the following code example.
@override
  Widget build(BuildContext context) {
    return Container(
      child: SfCalendar(
         initialDisplayDate: DateTime(2020, 06, 18, 9, 0, 0),
        view: CalendarView.week,
        specialRegions: _getTimeRegions(),
      ),
    );
  }

  List<TimeRegion> _getTimeRegions() {
    final List<TimeRegion> regions = <TimeRegion>[];
regions.add(TimeRegion(
        startTime: DateTime(2020, 06, 14, 14, 0, 0),
        endTime: DateTime(2020, 06, 14, 15, 0, 0),
        color: Colors.grey.withOpacity(0.2),
        recurrenceRule: 'FREQ=WEEKLY;BYDAY=MO,TU,WE,TH,FR;INTERVAL=1',
        textStyle: TextStyle(color: Colors.black45, fontSize: 15),
        text: 'Break'));
    regions.add(TimeRegion(
        startTime: DateTime(2020, 06, 14, 0, 0, 0),
        endTime: DateTime(2020, 06, 14, 24, 0, 0),
        color: Colors.grey.withOpacity(0.2),
        enablePointerInteraction: false,
        recurrenceRule: 'FREQ=WEEKLY;BYDAY=SU,SA;INTERVAL=1',
        ));
 return regions;
  }
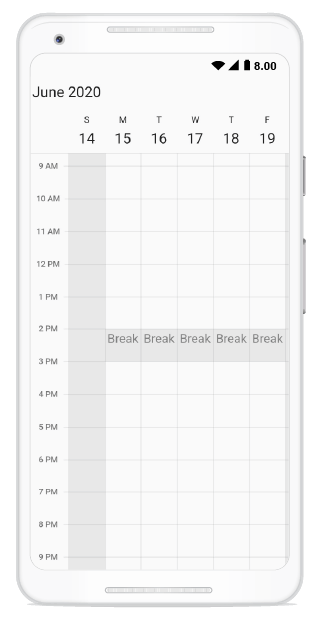
When executing this code, we will get the following output in which the Break time occurs from Monday to Friday, between 2 p.m. and 3 p.m.
Recurrence exception dates
You can delete any of the occurrences that are exceptions to the recurrence pattern time region. This can be done by setting the appropriate dates to the recurrenceExceptionDates property available in the TimeRegion of the Calendar widget. The deleted occurrence date will be considered a recurrence exception date.
Refer to the following code example.
@override
  Widget build(BuildContext context) {
    return Container(
      child: SfCalendar(
         initialDisplayDate: DateTime(2020, 06, 18, 9, 0, 0),
        view: CalendarView.week,
        specialRegions: _getTimeRegions(),
      ),
    );
  }

  List<TimeRegion> _getTimeRegions() {
    final List<TimeRegion> regions = <TimeRegion>[];

regions.add(TimeRegion(
        startTime: DateTime(2020, 06, 14, 14, 0, 0),
        endTime: DateTime(2020, 06, 14, 15, 0, 0),
        color: Colors.grey.withOpacity(0.2),
        recurrenceRule: 'FREQ=WEEKLY;BYDAY=MO,TU,WE,TH,FR;INTERVAL=1',
        recurrenceExceptionDates: [
          DateTime(2020, 06, 16),
          DateTime(2020, 06, 18)
        ],
        textStyle: TextStyle(color: Colors.black45, fontSize: 15),
        text: 'Break'));
    regions.add(TimeRegion(
      startTime: DateTime(2020, 06, 14, 0, 0, 0),
      endTime: DateTime(2020, 06, 14, 24, 0, 0),
      color: Colors.grey.withOpacity(0.2),
      enablePointerInteraction: false,
      recurrenceRule: 'FREQ=WEEKLY;BYDAY=SU,SA;INTERVAL=1',
    ));
    return regions;
  }
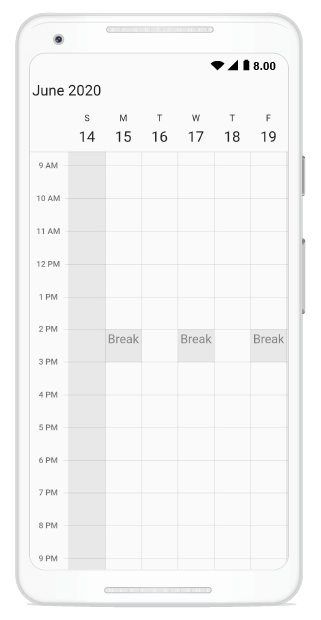
Executing this code will result in the following output in which the Break recurrence has been exempted for the 16 and 18 of June 2020.
View customization
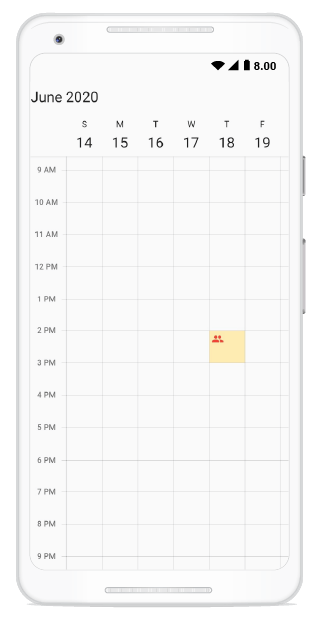
To provide a uniform and consistent look, the special time region feature allows you to customize the color and text style of the time regions.
Customize the background color of the specialTimeRegion by setting an appropriate color to the color property. Customize the text style for the text and icon using textStyle property of the specialTimeRegion.
Refer to the following code example.
@override
  Widget build(BuildContext context) {
    return Container(
      child: SfCalendar(
         initialDisplayDate: DateTime(2020, 06, 18, 9, 0, 0),
        view: CalendarView.week,
        specialRegions: _getTimeRegions(),
      ),
    );
  }

  List<TimeRegion> _getTimeRegions() {
    final List<TimeRegion> regions = <TimeRegion>[];
    regions.add(TimeRegion(
        startTime: DateTime(2020, 06, 18, 14, 0, 0),
        endTime: DateTime(2020, 06, 18, 15, 0, 0),
        enablePointerInteraction: false,
        textStyle: TextStyle(color: Colors.red, fontSize: 15),
        color: Color.fromRGBO(255, 236, 179, 1.0),
        iconData: Icons.group));

    return regions;
  }
Conclusion
In this blog post, we had a quick overview of the special time region’s key features introduced in the Flutter Calendar. This feature became available in the Essential Studio® 2020 Volume 2 release.
Try out these versatile custom features and manage your time efficiently!
You can explore other features in the Calendar widget’s documentation, where you can find detailed explanations of each feature with code examples.
Please feel free to try out the samples available in our GitHub location, and share your feedback or ask questions in the comments section below. You can also contact us through our support forum, Direct-Trac, or feedback portal. We are always happy to assist you!

