Handling CSV files can be essential for developers in applications using ASP.NET Core Web APIs. There are many approaches to handling CSV, and CSVHelper is a handy NuGet package for doing so easily. This article will discuss how to handle CSV files using the CSVHelper library in an ASP.NET Core Web API.
Prerequisites
Before creating the application, you need to have the following tools installed:
What is CSVHelper?
CSVHelper is an open-source .NET library for reading and writing CSV files. It is speedy, flexible, and easy to use. We can read and write CSV files using the model class. Also, some configurations can map the model class with the headers of the CSV files, if required.
Creating the ASP.NET Core Web API application
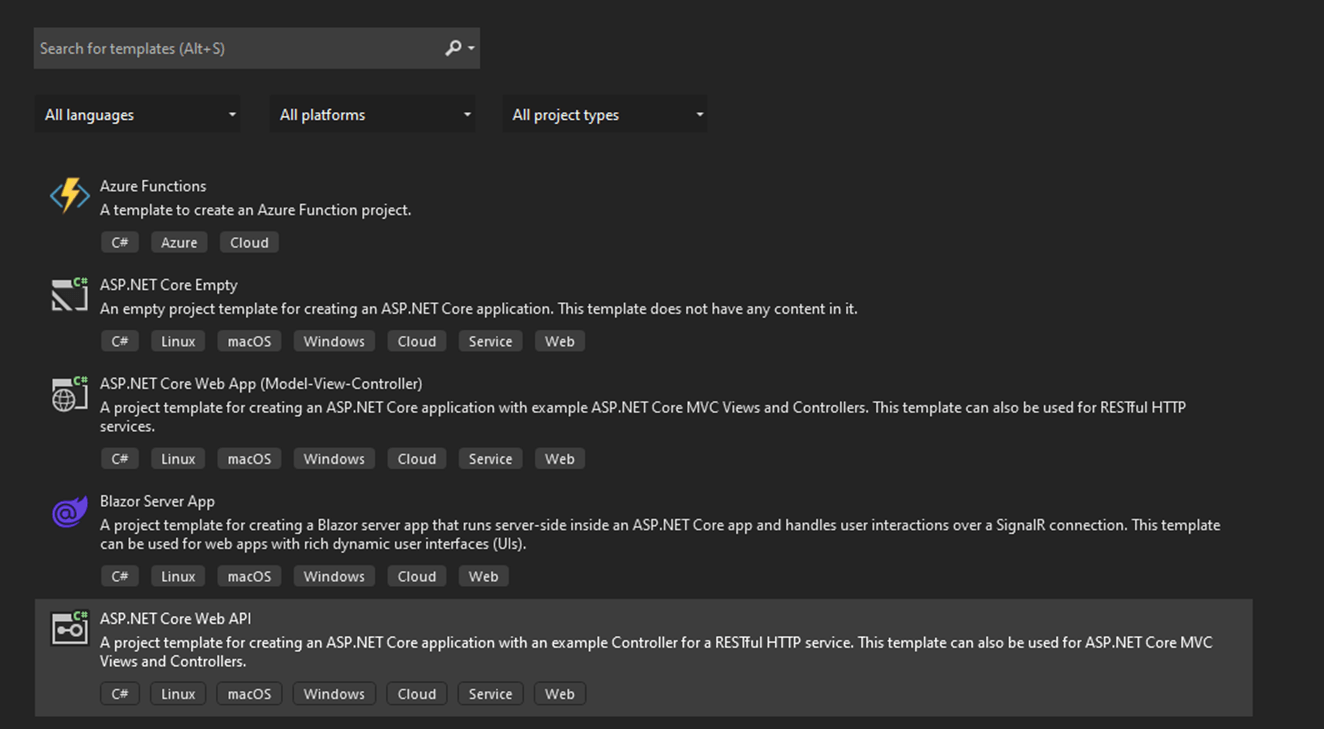
First, create an ASP.NET Core Web API project using Visual Studio 2022. To do so, open Visual Studio and select a new project with an ASP.NET Core Web API template, as in the following figure.
Now, select the .NET 6 framework for this project, like in the next figure. Then, create the project and run it to check if everything is working.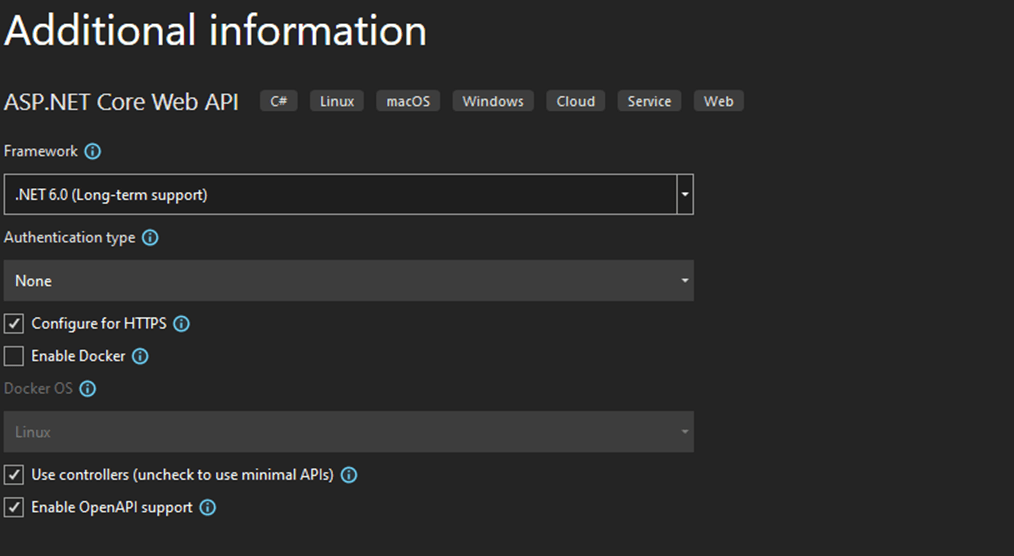
Installing the CSVHelper package
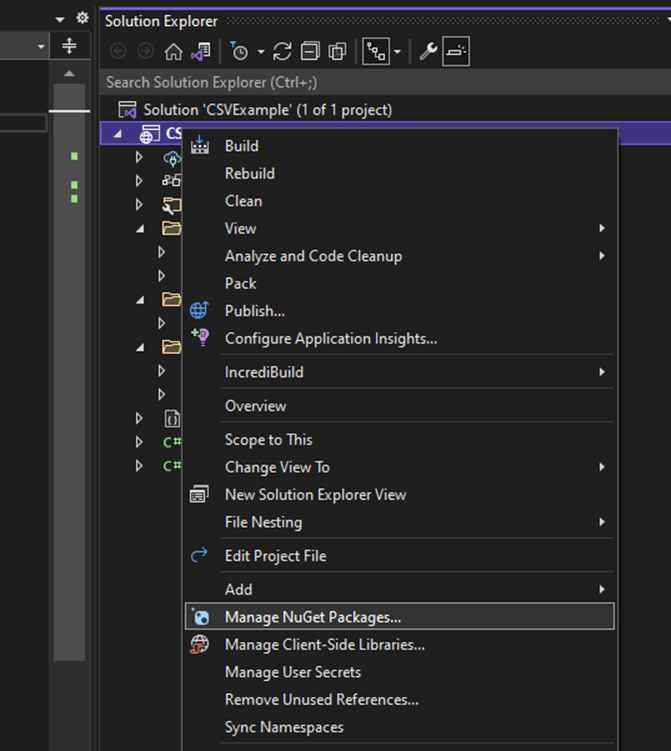
Then, to install the CSVHelper package in our project, click right on the project and select the Manage NuGet Packages… option, as shown in the figure.
Then, navigate to the Browse tab in the NuGet section, search for the CSVHelper version 28.0.1 package, and install it, like in the following figure.

Now, create a model class named Employee. This class is used to read and write CSV files.
public class Employee
{
    public int Id { get; set; }
    public string Name { get; set; }
    public int Age { get; set; }
    public string City { get; set; }
    public string JobPosition { get; set; }
}
Note: We have created the Employee model class only for demonstration purposes. You can use any model class you need for your project.
Reading CSV files using CSVHelper
Now, we create a service to read CSV files using the CSVHelper NuGet package. For this, create a folder named Services in the root directory. Then, create an interface named ICSVService, similar to the next sample.
public interface ICSVService
{
   public IEnumerable<T> ReadCSV<T>(Stream file);
}
Create a class named CSVService, inherited from ICSVService.
public class CSVService : ICSVService
{
    public IEnumerable<T> ReadCSV<T>(Stream file)
    {
        var reader = new StreamReader(file);
        var csv = new CsvReader(reader, CultureInfo.InvariantCulture);

        var records = csv.GetRecords<T>();
        return records;
    }
}
We have used a method-level generic to deal with the model class. We can use this method with any model class to read CSV files. We have also passed the file stream as a parameter to the ReadCSV method. The StreamReader reads the text and characters from the file stream. Later, we used CsvReader to transfer the content read from StreamReader into the memory. Then, the GetRecords method returned the data of CSV files. We don’t need any configurations if our class property names match the headers of CSV files.
After all this, register the CSV service in the Program.cs, as shown in the next code.
builder.Services.AddScoped<ICSVService, CSVService>();
Next, create a controller class named EmployeeController inside the Controllers folder. Then, create the HttpPost request to read the CSV file using the ICSVService.
[ApiController]
[Route("[controller]")]
public class EmployeeController : Controller
{
   private readonly ICSVService _csvService;

   public EmployeeController(ICSVService csvService)
   {
       _csvService = csvService;
   }

   [HttpPost("read-employees-csv")]
   public async Task<IActionResult> GetEmployeeCSV([FromForm] IFormFileCollection file)
    {
        var employees = _csvService.ReadCSV<Employee>(file[0].OpenReadStream());

        return Ok(employees);
    }
}
We injected the ICSVService to use the read operation for CSV files. Also, EmployeeController uses the ApiController attribute to implement the Web API controller in ASP.NET Core. Then, we used the ReadCSV method of the CSVService to get the data of the CSV file after reading it.
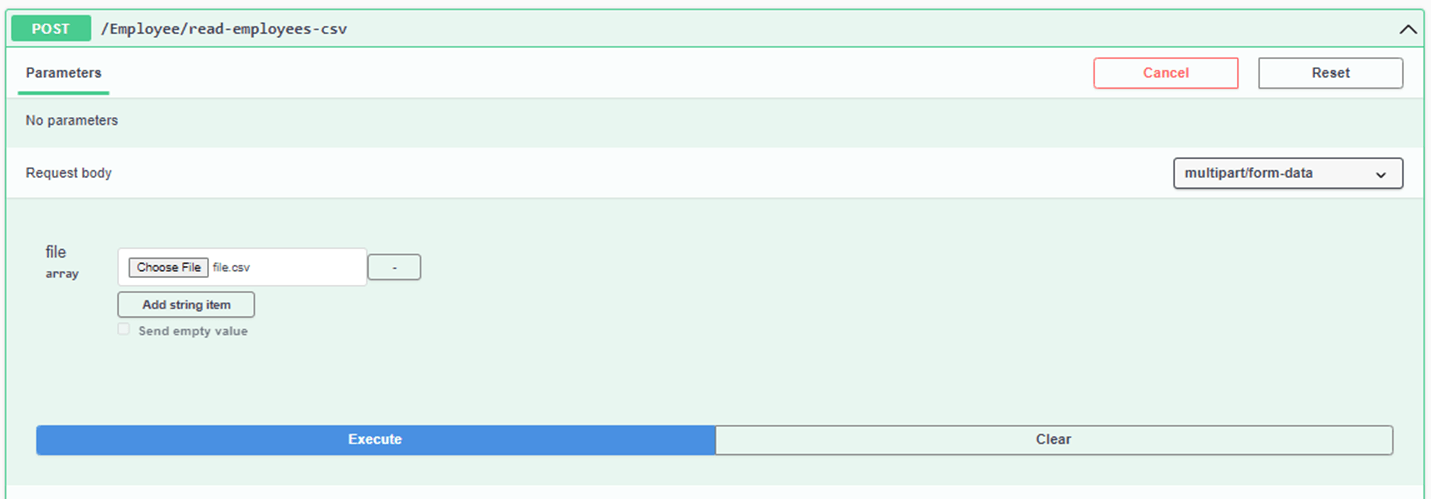
First, let’s run the application. The following is the screenshot of the CSV file we use to read the data.
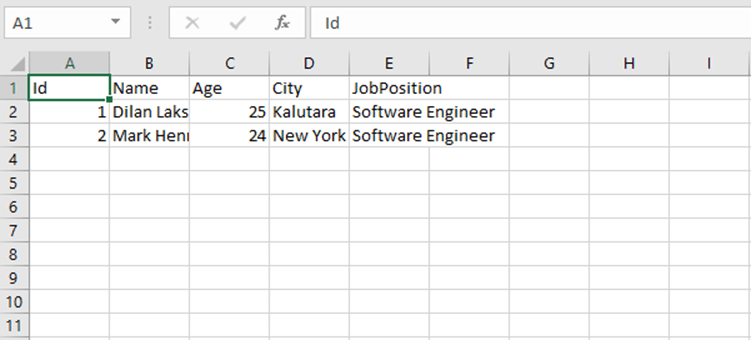
Then, run the read-employees-csv endpoint to read the CSV file like in the following figure.
Here we have attached the CSV file we use to run the read.
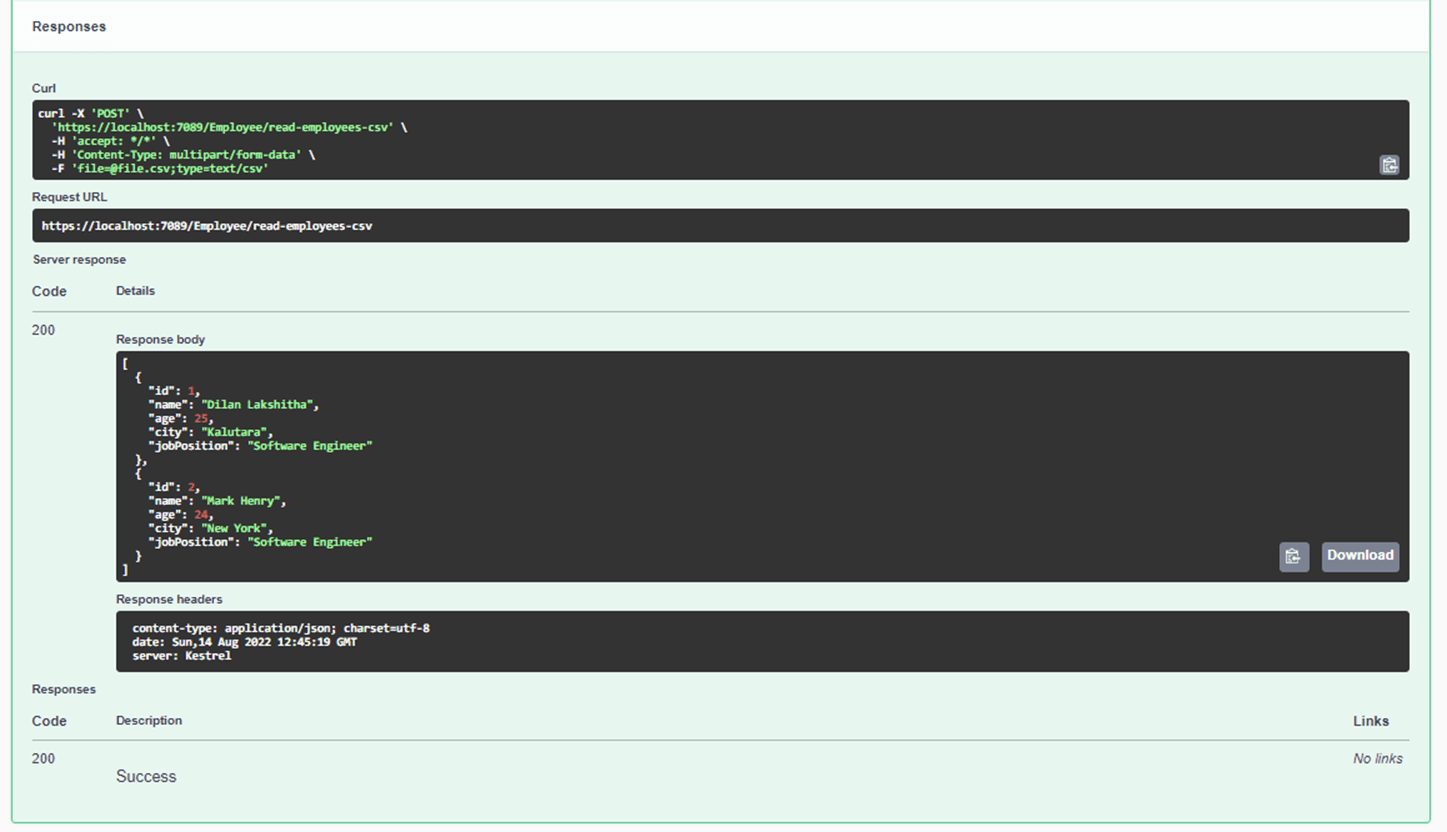
We received a response after running the API successfully.
Writing CSV files using CSVHelper
We use CSVService to create a CSV write method using the CSVHelper. For this, add an abstract method named WriteCSV<T> in the ICSVService interface.
public interface ICSVService
{
    public IEnumerable<T> ReadCSV<T>(Stream file);
    void WriteCSV<T>(List<T> records);
}
After that, implement the WriteCSV method in the CSVService class like in the following code.
public class CSVService : ICSVService
{
    public IEnumerable<T> ReadCSV<T>(Stream file)
    {
        var reader = new StreamReader(file);
        var csv = new CsvReader(reader, CultureInfo.InvariantCulture);

        var records = csv.GetRecords<T>();
        return records;
    }

    public void WriteCSV<T>(List<T> records)
    {
        using (var writer = new StreamWriter("D:\\file.csv"))
        using (var csv = new CsvWriter(writer, CultureInfo.InvariantCulture))
        {
            csv.WriteRecords(records);
        }
    }
}
In the WriteCSV<T> method, the StreamWriter is used to create and write files in the path specified in the parameter. The CsvWriter is used to create the actual CSV files using the StreamWriter instance created. The WriteRecords method writes all the data into the files.
Now, use EmployeeController to create a HttpPost request to create and write the CSV file.
[ApiController]
[Route("[controller]")]
public class EmployeeController : Controller
{
    private readonly ICSVService _csvService;


    public EmployeeController(ICSVService csvService)
    {
        _csvService = csvService;
    }

    [HttpPost("write-employee-csv")]
    public async Task<IActionResult> WriteEmployeeCSV([FromBody] List<Employee> employees)
    {
        _csvService.WriteCSV<Employee>(employees);

        return Ok();
    }

    [HttpPost("read-employees-csv")]
    public async Task<IActionResult> GetEmployeeCSV([FromForm] IFormFileCollection file)
    {
        var employees = _csvService.ReadCSV<Employee>(file[0].OpenReadStream());

        return Ok(employees);
    }
}
We implemented the new HttpPost request to write the CSV files using the WriteCSV<Employee> method of CSVService.
Let’s run the Web API application. Then, we run the write-employee-csv endpoint to test the service.
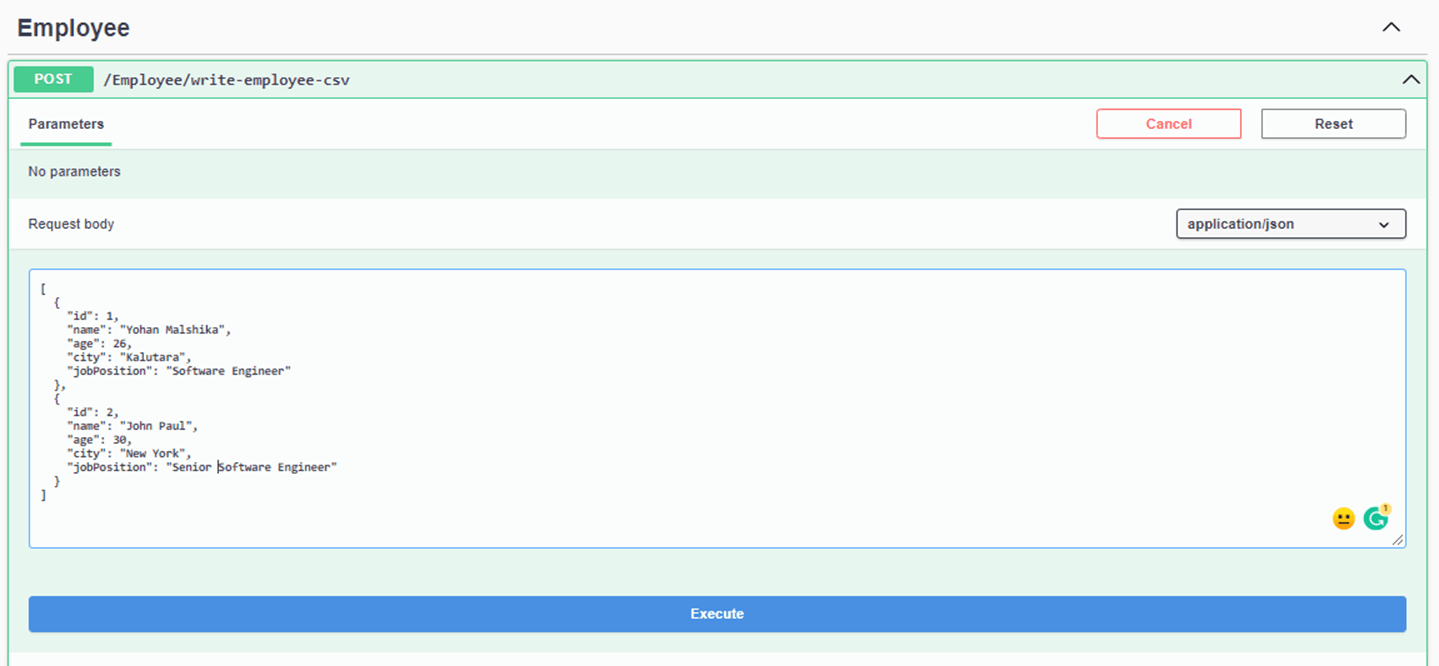
We used Swagger to run and test the API to write the CSV. We passed a list with two employee objects.
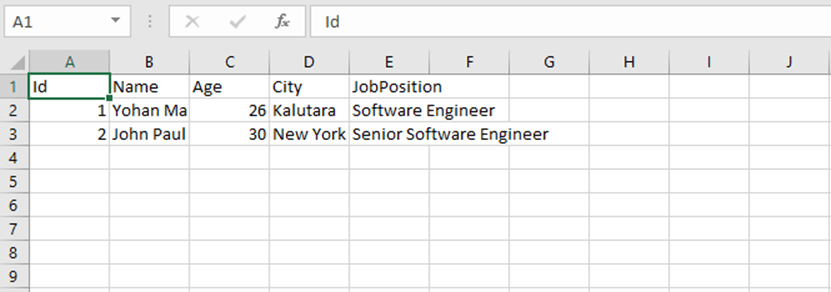
And so, we have successfully created a CSV file in the directory path. The employee data is in the CSV file, like in the next figure.
Conclusion
This article discussed handling CSV files using the CSVHelper package with an ASP. NET Core Web API application. This included performing read and write operations in the CSV file using the CSVHelper package.
I hope this article will help you handle your next project’s CSV files. Thank you for reading.
The Syncfusion ASP.NET Core UI control library, powered by Essential JS 2, is the only suite you will ever need to build an app. It contains over 70 high-performance, lightweight, modular, and responsive UI controls in a single package. Use them to build stunning web apps!
If you’re already a Syncfusion user, you can download the product setup. If not, you can download a free 30-day trial to evaluate our products.
You can contact us through our support forum, support portal, or feedback portal. As always, we are happy to assist you!
Comments (1)
Thanks for the article , this is very helpful. Does CSV helper provides any options to validate the file ?How to validate CSV file?