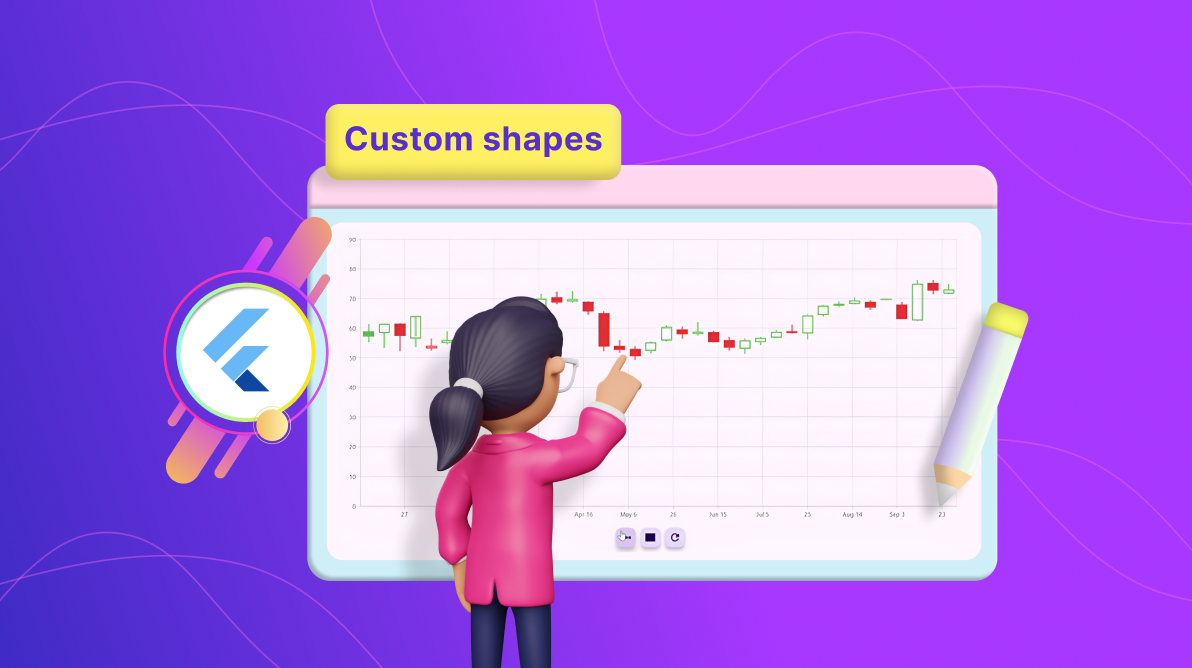
TL;DR: Let’s see how to draw custom shapes in Syncfusion Flutter Cartesian Charts. This blog shows how to add connector lines, rectangles, and other shapes to the plot area. You’ll also learn how to extend chart behaviors for custom gestures and refresh shapes easily. Enhance your charts with interactive visualizations!
Syncfusion Flutter Charts is a well-crafted charting widget for visualizing data. It contains a rich gallery of 30+ charts and graphs, ranging from line to financial charts, that cater to all charting scenarios.
In this blog, we’ll walk you through the process of drawing custom shapes in the plot area using the CrosshairBehavior in the Syncfusion Flutter Cartesian Charts. You can also explore other available behaviors, such as ZoomPanBehavior and TrackballBehavior, to achieve unique drawing effects within the plot area of the SfCartesianChart.
Let’s see the steps to draw custom shapes, such as connector lines and rectangles, in the plot area based on the selected shape in the Flutter Cartesian Charts.
Step 1: Create a Flutter Cartesian Chart
To begin with, we need to integrate the SfCartesianChart into our project. This will involve configuring it to display a candle series derived from the provided data points.
Refer to the following code example.
late List<_CandleStickData> _candleStickData;

@override
void initState() {
  _candleStickData = _candleStickSampleDataPoints();
  super.initState();
}

@override
Widget build(BuildContext context) {
  SfCartesianChart(
    . . .
    series: [
      CandleSeries<_CandleStickData, DateTime>(
        dataSource: _candleStickData,
        xValueMapper: (_CandleStickData data, int index) => data.x,
        lowValueMapper: (_CandleStickData data, int index) => data.low,
        highValueMapper: (_CandleStickData data, int index) => data.high,
        openValueMapper: (_CandleStickData data, int index) => data.open,
        closeValueMapper: (_CandleStickData data, int index) => data.close,
      ),
    ],
  );
}
Next, assign an instance of the CrosshairBehaviorExt class (which extends the CrosshairBehavior class) to the crosshairBehavior property.
final CrosshairBehaviorExt crosshairBehavior = CrosshairBehaviorExt();

SfCartesianChart(
  crosshairBehavior: crosshairBehavior,
  . . .
);
Step 2: Add shape selection buttons
To empower users to draw custom shapes within the SfCartesianChart, we’ll implement two shape buttons in the _ShapeButtons class: one for creating a connector line and another for drawing a rectangle shape. These buttons allow users to select their preferred shape for custom drawing in the plot area.
Additionally, we’ll include a Refresh button that clears any previously drawn shapes, making it easy for users to reset their work.
@override
Widget build(BuildContext context) {
  return Row(
    . . .
    children: List.generate(
      buttonIcons.length,
      (int index) {
        . . .
        FloatingActionButton.small(
          onPressed: buttonsOnPressedEvent[index],
          child: Icon(buttonIcons[index]),
        );
      },
    ),
  );
}
Upon selecting a shape button, the chosen shape will be stored in the _selectedShape variable using the Shapes enumeration. To manage the state of _selectedShape, we’ll use ValueNotifier and ValueListenableBuilder within the _CustomShapePainter class.
This approach guarantees that the SfCartesianChart will rebuild whenever the selected shape changes. For instance, when the rectangle shape is selected, Shapes.rectangle will be assigned to _selectedShape.value, rebuilding the ValueListenableBuilder to update the chart.
enum Shapes { connectorLine, rectangle }

. . .
@override
Widget build(BuildContext context) {
  final List<void Function()?> buttonsOnPressedEvent = <void Function()?>[
    () => _selectedShape.value = Shapes.connectorLine,
    () => _selectedShape.value = Shapes.rectangle,
    () {
      crosshairBehavior.refreshDrawnShapes();
      _selectedShape.value = null;
    },
  ];
  final List<IconData> buttonIcons = <IconData>[
    Icons.linear_scale,
    Icons.rectangle,
    Icons.refresh,
  ];

  . . .
  Column(
    children: <Widget>[
      . . .
      ValueListenableBuilder(
        valueListenable: _selectedShape,
        builder:
         (BuildContext context, Shapes? selectedShape, Widget? child) {
           crosshairBehavior.selectedShape = selectedShape;
           return SfCartesianChart(
             crosshairBehavior: crosshairBehavior,
             . . .
           );
         },
      ),
      . . .
      _ShapeButtons(
        selectedShape: _selectedShape,
        buttonIcons: buttonIcons,
        buttonsOnPressedEvent: buttonsOnPressedEvent,
      ),
    ],
  );
}
However, to enhance your app, feel free to modify the user interface and use any state management technique available in Flutter that suits your needs.
Step 3: Extend the CrosshairBehavior functionality
Next, we will create the CrosshairBehaviorExt class by extending the CrosshairBehavior class and overriding the enable boolean property by setting it to true.
class CrosshairBehaviorExt extends CrosshairBehavior {
  @override
  bool get enable => true;
}
Within this class, you can create various custom shapes by overriding the public methods implemented in the CrosshairBehavior class. These include handleTapUp, handleTapDown, handleLongPressStart, handleLongPressMoveUpdate, and handleLongPressEnd. This allows you to customize the gesture methods inherited from the CrosshairBehavior class to suit your needs.
Additionally, the _isWithinBounds method ensures that shapes are drawn only within the plot area, preventing overflow beyond its edge.
Refer to the following code example.
bool _isWithinBounds(details) {
  final Offset currentPosition =
      parentBox!.globalToLocal(details.globalPosition);
  final Rect paintBounds = parentBox!.paintBounds;
  final double left = max(currentPosition.dx, paintBounds.left);
  final double right = min(currentPosition.dx, paintBounds.right);
  final double top = max(currentPosition.dy, paintBounds.top);
  final double bottom = min(currentPosition.dy, paintBounds.bottom);
  return (left > paintBounds.left &&
      right < paintBounds.right &&
      top > paintBounds.top &&
      bottom < paintBounds.bottom);
}
Step 4: Drawing custom shapes
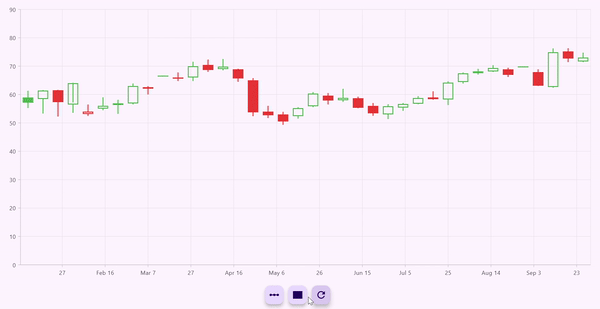
Connecter line
We’ll customize the handleTapUp and handleTapDown methods to draw a connector line within the plot area of the SfCartesianChart using a single tap gesture.
The handleTapDown method captures the pointer’s position when the user taps the screen. Once the user lifts their finger, the handleTapUp method stores this final position in a shapes list and calls the markNeedsPaint method. This action triggers the onPaint method to repaint with the gathered positions.
In summary, we will draw the connector line in the plot area based on the tapped position, extending it across the width of the area using the drawLine method.
@override
void handleTapDown(TapDownDetails details) {
  if (_isWithinBounds(details)) {
    startPosition = parentBox!.globalToLocal(details.globalPosition);
    _currentShapeData = ShapeData(selectedShape, startPosition!);
  }
}

@override
void handleTapUp(TapUpDetails details) {
  if (_isWithinBounds(details)) {
    endPosition = null;
    if (_currentShapeData != null) {
      shapes.add(_currentShapeData!);
      _currentShapeData = null;
    }
    parentBox!.markNeedsPaint();
  }
}

void _drawConnectorLine(
  PaintingContext context, Paint paint, ShapeData shape) {
    final Rect paintBounds = parentBox!.paintBounds;
    final double y = shape.startPosition.dy;
    final Offset start = Offset(paintBounds.left, y);
    final Offset end = Offset(paintBounds.right, y);
    context.canvas.drawLine(start, end, paint);
  }
)
Refer to the following image.
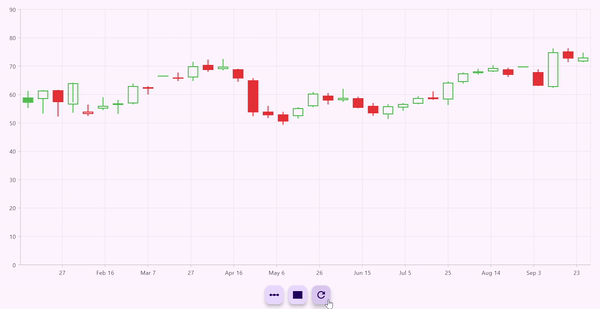
Rectangle
Next, we’ll create a rectangle shape in the plot area of the SfCartesianChart using long-press gestures. This involves overriding three methods: handleLongPressStart, handleLongPressMoveUpdate, and handleLongPressEnd.
The handleLongPressStart method is triggered when the user touches the screen and holds their finger down. The handleLongPressMoveUpdate method responds to any movement while the finger is still in contact with the screen. Finally, the handleLongPressEnd method is activated when the user lifts their finger off the screen.
To accurately determine where the long press gesture starts and ends, we’ll record the pointer’s position when it first touches the screen and when it is released. Using these two points, we can create a rectangle shape and store it in the shapes list when the pointer is lifted. Afterward, we call the markNeedsPaint method to invoke the onPaint method, which will redraw the custom shapes (rectangle).
The rectangle is drawn in the plot area using the drawRect method based on the long press gestures.
@override
void handleLongPressStart(LongPressStartDetails details) {
  if (_isWithinBounds(details)) {
    startPosition = parentBox!.globalToLocal(details.globalPosition);
    _currentShapeData = ShapeData(selectedShape, startPosition!);
  }
}

@override
void handleLongPressMoveUpdate(LongPressMoveUpdateDetails details) {
  if (_isWithinBounds(details)) {
    endPosition = parentBox!.globalToLocal(details.globalPosition);
    if (_currentShapeData != null) {
      _currentShapeData!.endPosition = endPosition!;
    }
    parentBox!.markNeedsPaint();
  }
}

@override
void handleLongPressEnd(LongPressEndDetails details) {
  if (_isWithinBounds(details)) {
    if (_currentShapeData != null) {
      shapes.add(_currentShapeData!);
      _currentShapeData = null;
    }
    parentBox!.markNeedsPaint();
  }
}

void _drawRectangle(PaintingContext context, Paint paint, ShapeData shape) {
  if (shape.endPosition != null) {
    final Rect rect =
        Rect.fromPoints(shape.startPosition, shape.endPosition!);
    context.canvas.drawRect(rect, paint);
  }
}
Refer to the following image.
Rendering the multiple custom shapes
To draw multiple custom shapes within the plot area without erasing previously drawn custom shapes, first, gather all the necessary positions to be drawn as mentioned above. We then override the onPaint method of the CrosshairBehavior class. In this method, loop through the shapes list and utilize the drawLine and drawRect methods to place each shape at its designated position according to its type.
Refer to the following code example.
void _drawShape(PaintingContext context, Paint paint, ShapeData shape) {
switch (shape.shapeType) {
case Shapes.connectorLine:
return _drawConnectorLine(context, paint, shape);
case Shapes.rectangle:
return _drawRectangle(context, paint, shape);
default:
return;
}
}
@override
void onPaint(PaintingContext context, Offset offset,
SfChartThemeData chartThemeData, ThemeData themeData) {
final Paint paint = Paint()
..color = themeData.primaryColor.withOpacity(0.5)
..strokeWidth = 2;
for (final ShapeData shape in shapes) {
_drawShape(context, paint, shape);
}
if (_currentShapeData != null) {
_drawShape(context, paint, _currentShapeData!);
}
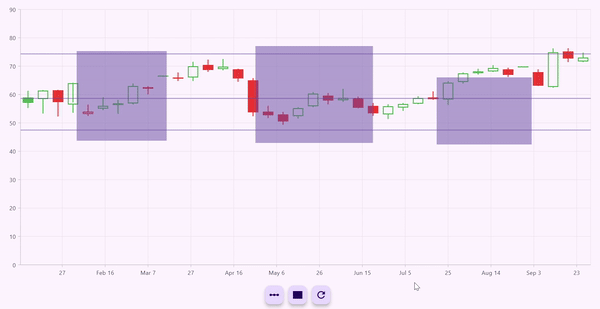
}Refer to the following image.
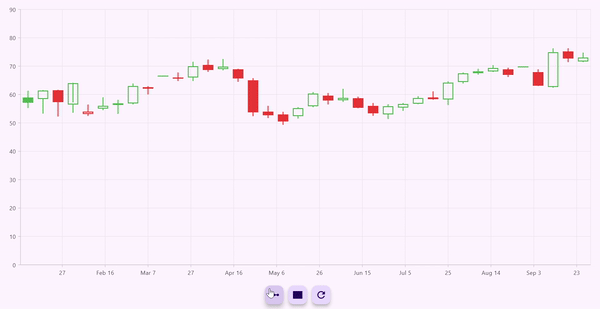
When the refresh button is pressed, the refreshDrawnShapes method in the CrosshairBehaviorExt class is called. This method clears all previously stored positions and resets the selected shape, effectively refreshing the drawn custom shapes in the plot area of the SfCartesianChart.
void refreshDrawnShapes() {
  shapes.clear();
  _currentShapeData = null;
}
Refer to the following image.
GitHub references
For more details, refer to drawing custom shapes in the Flutter Cartesian Charts GitHub demo.

Conclusion
Thanks for reading! In this blog, we’ve learned how to draw custom shapes in the Syncfusion Flutter Cartesian Charts. This feature is available in our 2024 Volume 3 release. Give it a try, and leave your feedback in the comment section below.
The new version is available for existing customers on the License and downloads page. If you are not a Syncfusion customer, try our 30-day free trial to check out our available features.
If you need a new widget for the Flutter framework or new features in our existing widgets, you can contact us through our support forums, support portal, or feedback portal. As always, we are happy to assist you!


 No spam, just valuable updates.