TLDR: Exploring the robust features of the new Syncfusion .NET MAUI Chat control, highlighting its modern UI, data binding, message types, and customization options for dynamic conversations. You can also find the steps to integrate it into your .NET MAUI app.
In Syncfusion’s Essential Studio® 2024 Volume 1 release, we introduced a ground-breaking new Chat control in our .NET MAUI platform.
The .NET MAUI Chat (SfChat) is a conversational UI control. It provides a modern, conversational chatbot experience. It is a flexible control that shows the conversation between two or more users in a fully customizable layout. The messages can be a different combination of text, images, hyperlinks, cards, and more.
Let’s explore this new astonishing .NET MAUI Chat control!
Key features
The key features of .NET MAUI Chat control are as follows:
Data binding
The .NET MAUI Chat control allows you to bind any existing collection of data objects as a message collection using the ItemsSource and ItemsSourceConverter properties.
Message types
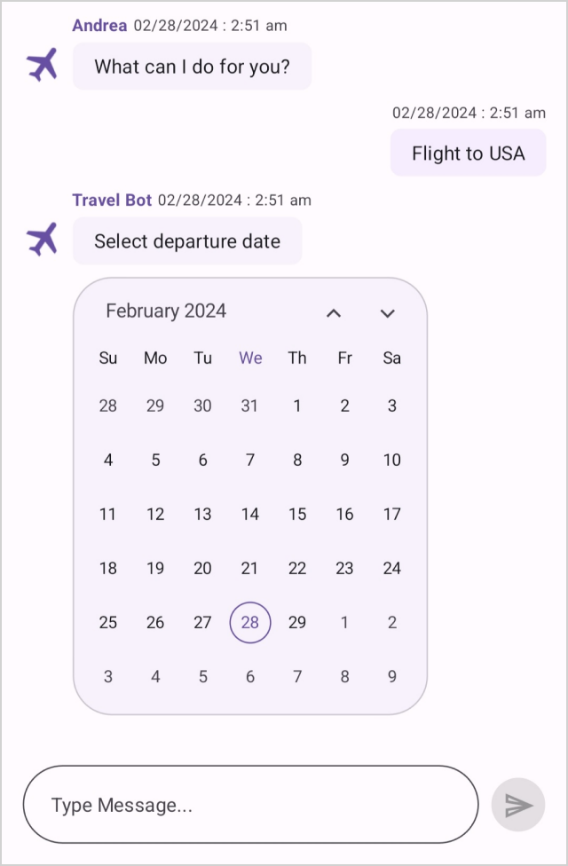
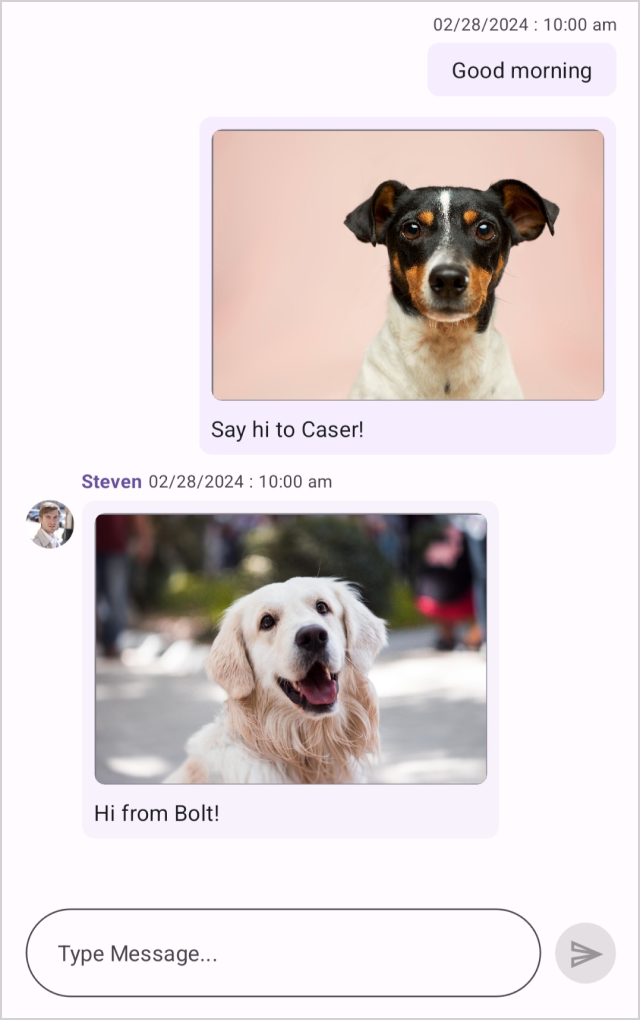
The .NET MAUI Chat control lets users display messages in different formats, such as text, images, hyperlinks, cards, calendars, and time pickers. By enabling the Author.Name and Author.Avatar properties, we can show the author’s name and image in all messages.
 |  |
 |  |
Different message types supported in the .NET MAUI Chat control
Time break
We can group messages based on the date and time they are created. This helps us to locate messages from different periods quickly. To display the time break view in Chat control, set the ShowTimeBreak property to True.

Typing indicator
The chat control supports typing indicators that provide an interactive user experience. To enable the typing indicator view, set the ShowTypingIndicator property as True. You can easily customize the avatar and text for the indicator by creating a new ChatTypingIndicator class instance, setting the Authors and Text properties, and assigning the typing indicator instance to the TypingIndicator property of SfChat.

Suggestions
We can display the response suggestions below a message or at the Chat control’s bottom. To show suggestions in a message, create a ChatSuggestions instance and assign it to the desired message’s Suggestions property. You can also include images with suggestions and arrange them vertically or horizontally.

Load more
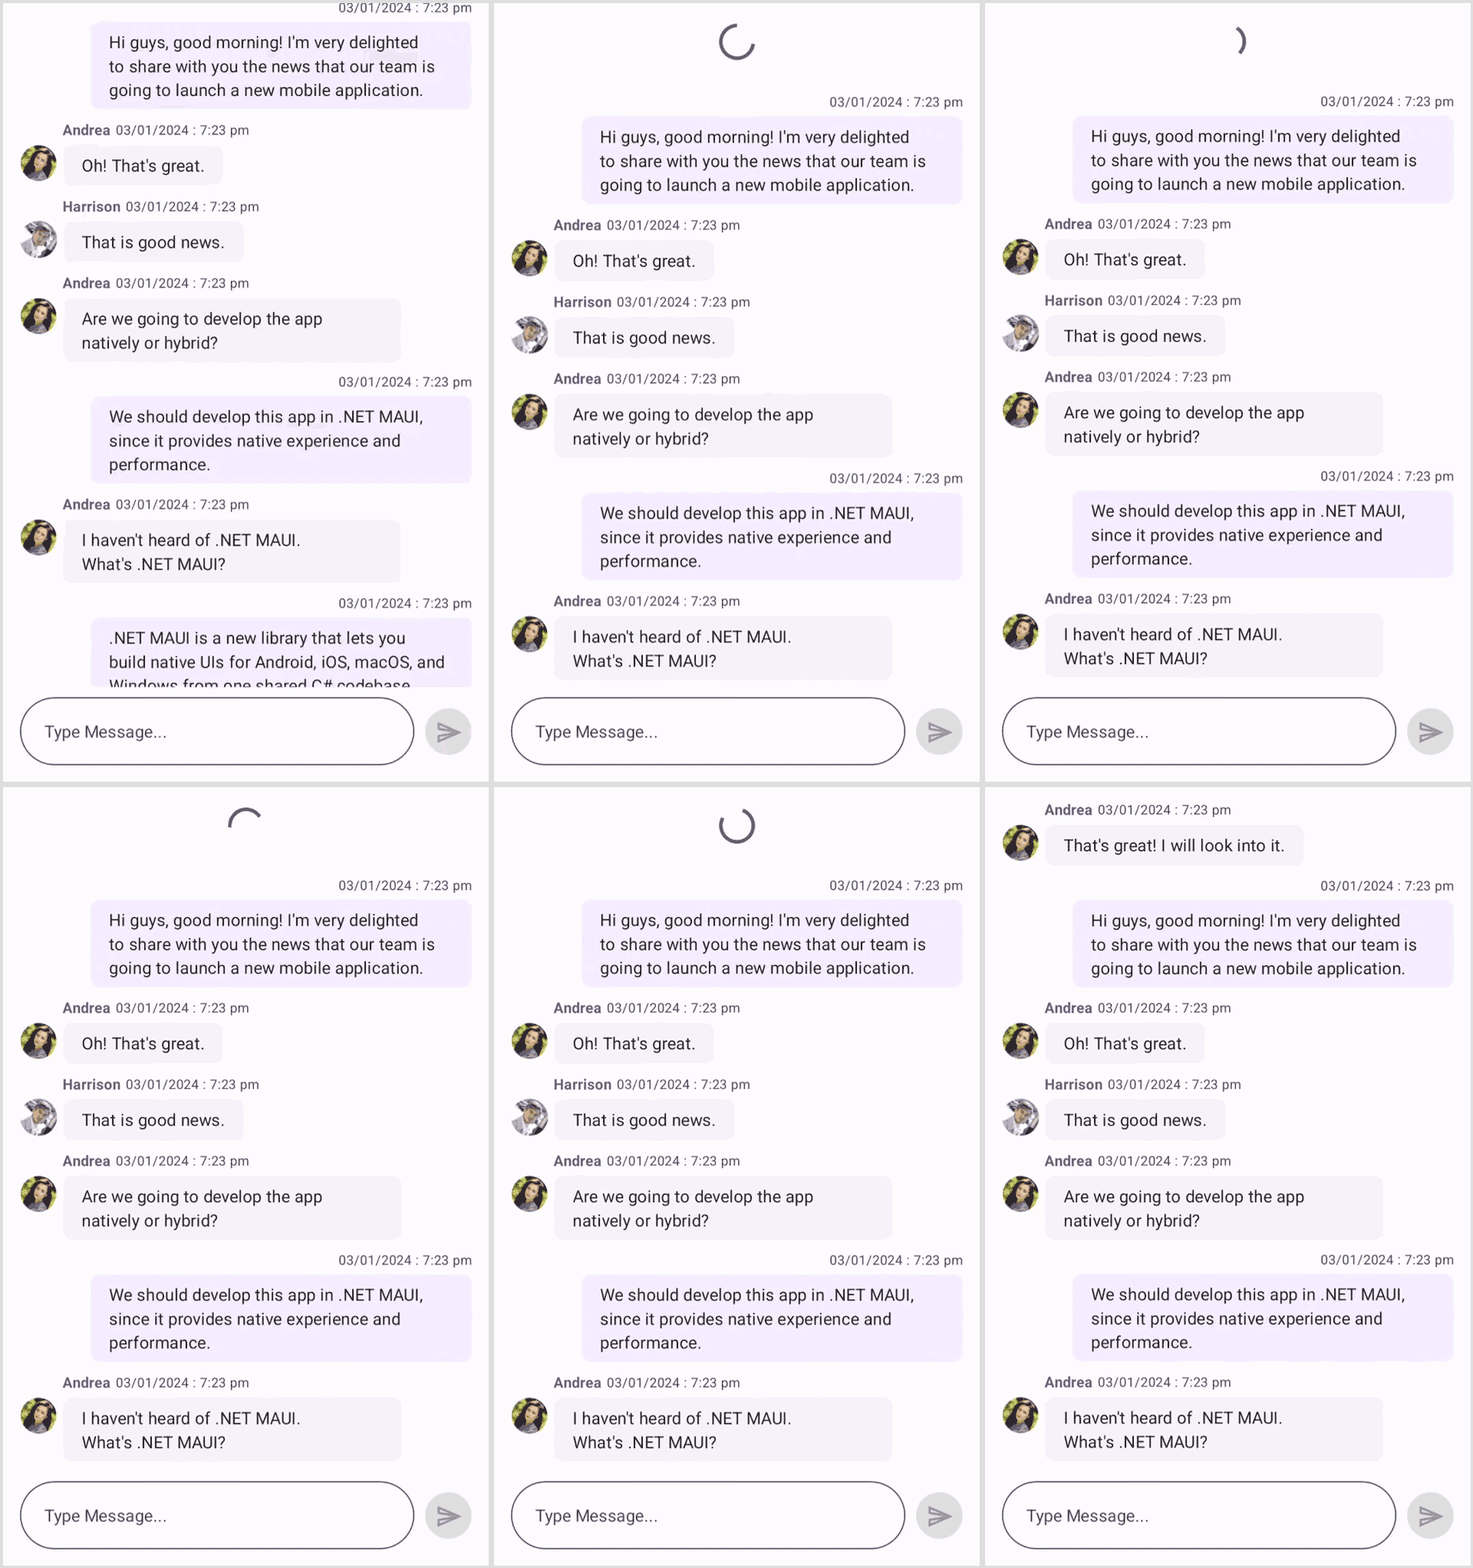
The Chat control lets users load or fetch old messages on demand by scrolling to the top of the message list automatically or manually (by tapping the load more button) by setting the LoadMoreBehavior as LoadMoreOption.Auto or LoadMoreOption.Manual, respectively, and using the LoadMoreCommand property.
Styling
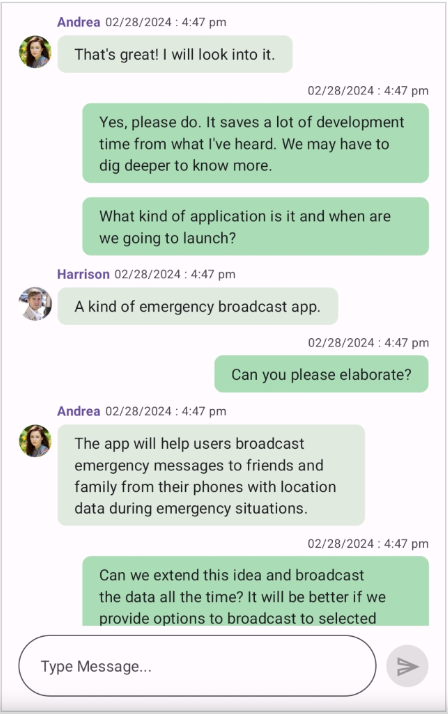
You can customize the appearance of the elements of the Chat control by creating a resource dictionary and assigning values to the built-in keys assigned for each element.
Note: For more details, refer to the .NET MAUI Chat control documentation.
Getting started with the .NET MAUI Chat control
We have seen the top features of the .NET MAUI Chat control. Let’s see how to add it to your application.
Step 1: Create a .NET MAUI project
Begin by creating a .NET MAUI project.
Step 2: Add the .NET MAUI Chat NuGet package
Syncfusion .NET MAUI controls are available in the NuGet Gallery. To include the .NET MAUI Chat control in your project, access the NuGet package manager in Visual Studio and search for Syncfusion.Maui.Chat and install it.
Step 3: Register the handler
In the MauiProgram.cs file, register the Syncfusion core handler.
using Syncfusion.Maui.Core.Hosting;

public static class MauiProgram
{
	public static MauiApp CreateMauiApp()
	{
		var builder = MauiApp.CreateBuilder();
		builder
			.UseMauiApp<App>()
			.ConfigureSyncfusionCore()

		return builder.Build();
	}
}
Step 4: Add the namespace
Next, add the Syncfusion.Maui.Chat namespace into your XAML page.
<xmlns:syncfusion ="clr-namespace:Syncfusion.Maui.Chat;assembly=Syncfusion.Maui.Chat"/>Step 5: Initialize the .NET MAUI Chat control
Then, initialize the .NET MAUI Chat control. Refer to the following code example.
<syncfusion:SfChat x:Name="sfChat" />Step 6: Bind the current user
The CurrentUser property helps distinguish between the message senders and receivers. In each chat window, the CurrentUser property represents the sender (author of the outgoing message).
Create the CurrentUser property of type Author in the ViewModel class and bind it to the SfChat control by referring to the following code example.
public class GettingStartedViewModel : INotifyPropertyChanged
{

        public Author CurrentUser
        {
            get
            {
                return this.currentUser;
            }
            set
            {
                this.currentUser = value;
                RaisePropertyChanged("CurrentUser");
            }
        }

        public GettingStartedViewModel()
        {
            . . .
            this.currentUser = new Author() { Name = "Nancy"};
            . . .
        }
        . . .
        . . .
}
XAML
<sfchat:SfChat x:Name="sfChat" CurrentUser="{Binding CurrentUser}"/>We can populate the data in the .NET MAUI Chart control using the Messages or ItemSource property. Let’s see how to achieve it with separate code examples.
Step 7: Data population using Messages property
Generate the messages
Begin by creating a TextMessage instance. Set the values for the Message.Author and Message.Text properties, and add them to the ViewModel.Messages collection.
For other messages like hyperlinks, images, cards, calendars, and time pickers, create instances for HyperlinkMessage, ImageMessage, CardMessage, CalendarMessage, and TimePickerMessage, respectively. Add these instances to the ViewModel.Messages collection as well.
Refer to the following code example.
public class GettingStartedViewModel : INotifyPropertyChanged
{
        . . .
        . . .
        public ObservableCollection<object> Messages
        {
            get
            {
                return this.messages;
            }

            set
            {
                this.messages = value;
                RaisePropertyChanged(nameof(this.messages));
            }
        }

        . . .
        . . .

        private void GenerateMessages()
        {
            this.messages.Add(new TextMessage()
            {
                Author = currentUser,
                Text = "Hi guys, good morning! I'm very delighted to share with you the news that our team is going to launch a new mobile application.",
            });

            this.messages.Add(new TextMessage()
            {
                Author = new Author() { Name = "Andrea", Avatar = "Andrea.png" },
                Text = "Oh! That's great.",
            });
            this.messages.Add(new TextMessage()
            {
                Author = new Author() { Name = "Margaret", Avatar = "Margaret.png" },
                Text = "I haven't heard of .NET MAUI. What's .NET MAUI?",
            });
            this.messages.Add(new TextMessage()
            {
                Author = currentUser,
                Text = ".NET MAUI is a new library that lets you build native UIs for Android, iOS, macOS, and Windows from one shared C# codebase.",
            });

            . . .
            . . .
            . . .
        }
}
Bind the SfChat.Messages property
Next, set the binding context using a ViewModel. Establish a connection to the SfChat’s control by configuring its Messages and CurrentUser properties in the Content section of the XAML page.
Refer to the following code example.
<ContentPage.BindingContext>
 <local:ViewModel/>
</ContentPage.BindingContext>

<ContentPage.Content>

 <sfchat:SfChat x:Name="sfChat"
                Messages="{Binding Messages}"
                CurrentUser="{Binding CurrentUser}"/>
</ContentPage.Content>
Step 7: Data population using ItemsSource property
The .NET MAUI Chat control allows us to bound data collection using the ItemsSource and ItemsSourceConverter properties.
To do so, repeat the previous steps from 1 to 6. Then, follow the below instructions.
Create a data model
Create a simple data model to bind the data for SfChat, as shown in the following code example.
public class MessageModel
{
        public Author User { get; set; }
        public string Text { get; set; }
}
Create a View Model
Then, create a model repository class and initialize its Messages collection property with the required number of data objects.
public class ViewModel : INotifyPropertyChanged
{
        private Author currentAuthor;

        ObservableCollection<MessageModel> messages;

        public ViewModel()
        {
            messages = new ObservableCollection<MessageModel>();
            currentAuthor = new Author() { Name = "Stevan" };
            GenerateMessages();
        }

        public ObservableCollection<MessageModel> Messages
        {
            get
            {
                return messages;
            }

            set
            {
                messages = value;
                RaisePropertyChanged("Messages");
            }
        }
        . . .
        . . .

        private void GenerateMessages()
        {
            messages.Add(new MessageModel()
            {
                User = currentAuthor,
                Text = "Hi guys, good morning! I'm very delighted to share with you the news that our team is going to launch a new mobile application.",
            });

            messages.Add(new MessageModel()
            {
                User = new Author() { Name = "Andrea", Avatar = "peoplecircle16.png" },
                Text = "Oh! That's great.",
            });

            messages.Add(new MessageModel()
            {
                User = new Author() { Name = "Harrison", Avatar = "peoplecircle14.png" },
                Text = "That is good news.",
            });
        }
        . . .
        . . .
}
Define a custom message converter
Next, create a class MessageConverter derived from the IChatMessageConverter interface and add conversion logic to convert data to message and vice versa using the ConvertToChatMessage and ConvertToData methods, respectively.
public class MessageConverter : IChatMessageConverter
    {
        public IMessage ConvertToChatMessage(object data, SfChat chat)
        {
            var message = new TextMessage();
            var item = data as MessageModel;

            message.Text = item.Text;
            message.Author = item.User;
            message.Data = item;
            return message;
        }

        public object ConvertToData(object chatMessage, SfChat chat)
        {
            var message = new MessageModel();
            var item = chatMessage as TextMessage;

            message.Text = item.Text;
            message.User = chat.CurrentUser;
            return message;
        }
    }
Set the binding context and add a custom converter to resources
Now, set the ViewModel instance as the BindingContext to your XAML page to bind the ViewModel properties to SfChat.
Add the MessageConverter class to the Resources page.
<ContentPage.BindingContext>
 <local:ViewModel/>
</ContentPage.BindingContext>

<ContentPage.Resources>
 <ResourceDictionary>
  <local:MessageConverter x:Key="messageConverter"/>
 </ResourceDictionary>
</ContentPage.Resources>
Binding data collection and message converter to SfChat
Finally, connect the data collection and message converter to the SfChat, as demonstrated in the following code example.
<ContentPage.Content>
 <sfChat:SfChat x:Name="sfChat"
                CurrentUser="{Binding CurrentUser}"
                ItemsSource="{Binding Messages}"
                ItemsSourceConverter="{StaticResource messageConverter}"/>
</ContentPage.Content>
After executing the above code examples, we will get the following output.

References
For more details, refer to getting started with .NET MAUI Chat and converting data objects to messages in MVVM in .NET MAUI Chat GitHub demos.

Supercharge your cross-platform apps with Syncfusion's robust .NET MAUI controls.
Conclusion
Thanks for reading! We trust you found Syncfusion’s new .NET MAUI Chat control fascinating, with its modern UI, data binding, message types, and customization options. Explore more updates in our Essential Studio®2024 Volume 1 by visiting our Release Notes and What’s New pages.
If you are not a Syncfusion customer, we invite you to try our 30-day free trial to experience these latest features. Feel free to share any feedback or questions in the comments section below.
You can also reach us through our support forums, support portal, or feedback portal. We are always happy to assist you!
Related blogs
- Syncfusion Essential Studio® 2024 Volume 1 Is Here!
- Streamline Your Progress Navigation with the New .NET MAUI StepProgressBar
- Introducing the New .NET MAUI Rotator Control
- Introducing the New .NET MAUI Radial Menu Control


