Hello! Today, we’ll walk you through operating and managing the Syncfusion customer support and ticket management system.
If you downloaded an evaluation copy of our software or if you’re a customer, you’ll receive a confirmation email containing your login information.
Once you receive the email, take the password we sent and log into your Syncfusion account.
Upon logging in, you’ll be taken to your dashboard.
Profile
Let’s start by editing your profile. You can find it in the blue panel on the left or in your dashboard, both under My Account.
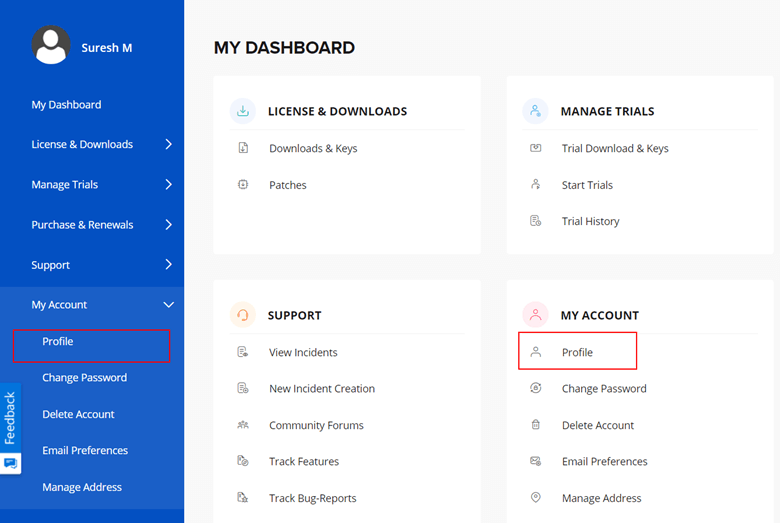
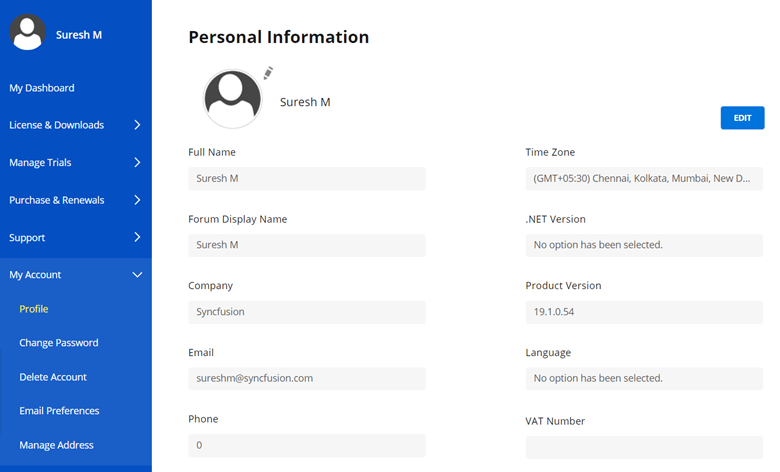
Here, you can update your personal information, account details, and password.
 License and Downloads
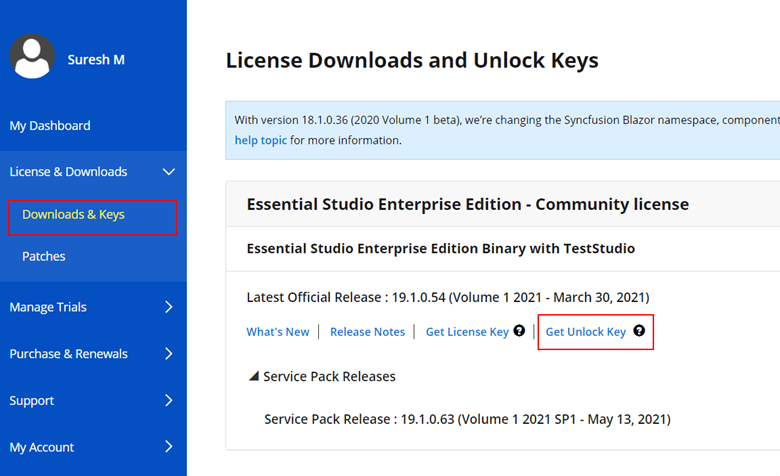
Under License & Downloads, you’ll be able to get an unlock key for your license. Select Downloads & Keys under License & Downloads. Click Get Unlock Key.
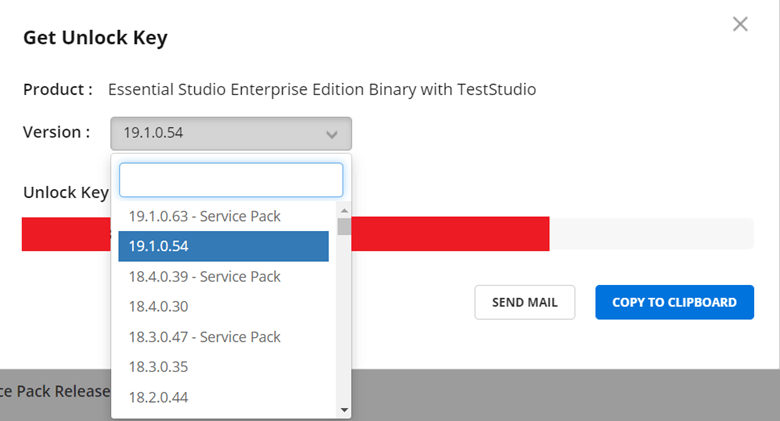
A pop-up will appear, allowing you to pick the version of Essential Studio® for which you need the license key. You can either send the license key to the registered email or copy it to the clipboard.
 When downloading the setup from the Syncfusion® site, you may or may not be asked to provide your unlock key. The same goes for downloading from an open-source platform or NuGet.
You’ll need to provide this license key when developing your application using Syncfusion® controls. Please remember that your license key is specific to both the platform and version.
Downloads
After retrieving your key, you may click More Download Options and select your preference, or you can click Download to download the installer for Windows.
Now, let’s head to support.
Support
Go to Support > View Tickets to access the View Tickets page, where you will see a list of support tickets that are open, closed, or pending. This is your hub for managing your support tickets.
When creating a new ticket, you can describe your issue in the Subject, Type, Description, and Product/Platform boxes. If you have any images, videos, or documents, you can attach them by using the file-drop area below the Description box.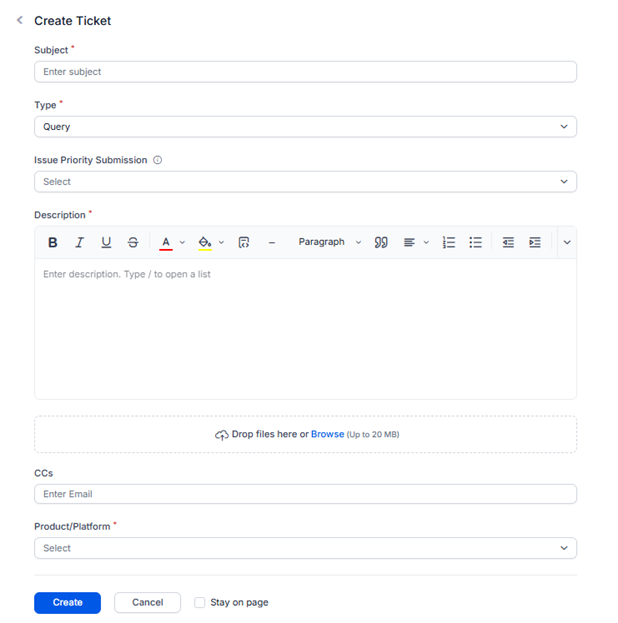
After filling out your ticket, just click Create.
We offer support five days a week, Monday through Friday, to make sure we’re there when you need help.
You’ll receive an email confirming that your support ticket has been created, which will include the ticket ID number.
Within your newly created support ticket, you’ll be able to review your incident information and have a direct means of contact with our support team throughout the problem-solving process.
Our support system is built on BoldDesk®, our AI-powered platform for delivering customer support. If you enjoy the simplicity of collaborating with the Syncfusion® support team, we encourage you to check out BoldDesk® to see how it can help you deliver excellent service and streamline your workflows.
Feedback
After solving your problem, simply close the ticket. Then, a support feedback page will open. We always welcome feedback, so please feel free to answer the questions and post your comments.
Thank you for your support, and welcome to the Syncfusion® support system!


