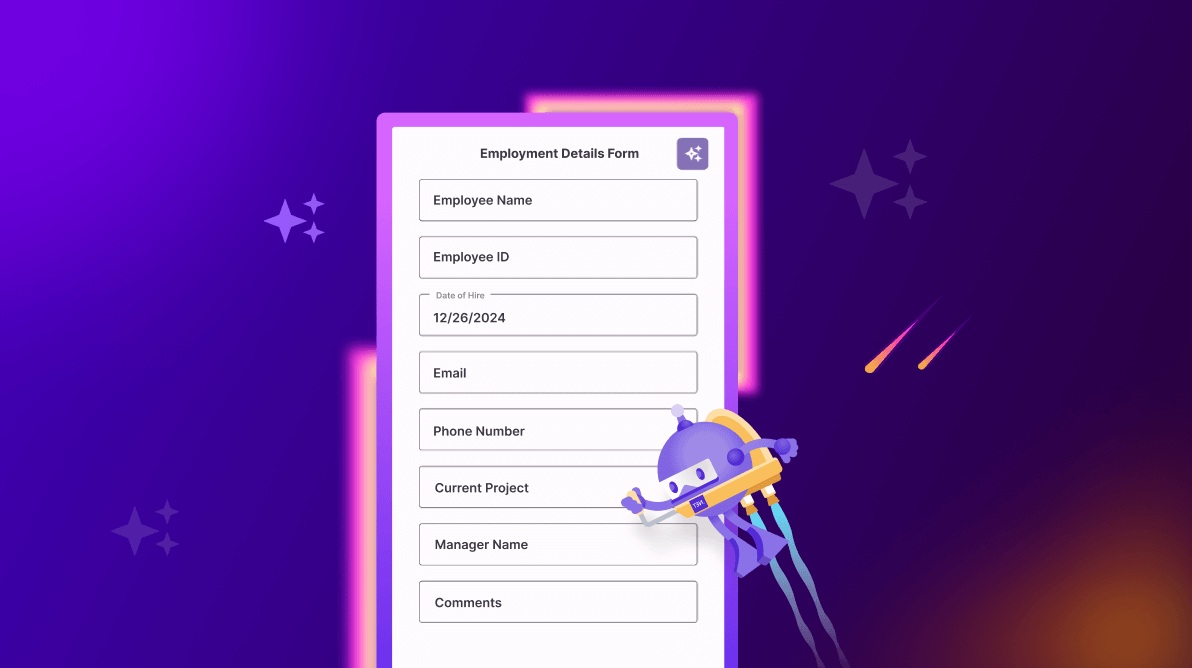
TL;DR: Let’s create AI-powered smart data forms in .NET MAUI for seamless form generation. We’ll design an input view, integrate a busy indicator, and create a data form, using AI AssistView to analyze user inputs. Azure OpenAI helps dynamically generate form fields, reducing manual effort and improving accuracy. This blog walks through the setup using Syncfusion .NET MAUI controls for an efficient and interactive user experience.
Creating data forms manually can be time-consuming and error-prone. Developers must define each field, configure validation rules, and ensure the correct layout for different use cases. This process often leads to repetitive coding, inconsistencies, and increased development effort, especially when handling dynamic forms that change based on user input.
AI-powered Smart Data Forms simplify this process by automatically generating form editors based on user-defined categories like Contact Forms or Employee Information. AI analyzes the data structure and selects the appropriate fields, reducing manual work and ensuring accuracy. This approach enhances productivity, minimizes errors, and accelerates form creation for seamless user experiences.
In this blog, we’ll learn to create an AI-powered smart Data Form using the Microsoft AI services, Syncfusion .NET MAUI Data Form, and AI AssistView chatbot controls to improve productivity.
Let’s explore the process!
Benefits of AI-powered smart Data Forms
- Enhanced user experience: Dynamic and responsive forms simplify input, making the process more intuitive and user-friendly.
- Boosted efficiency: automate data analysis and categorization to save time and reduce manual effort.
Integrating Azure OpenAI in a .NET MAUI app
Getting started
- First, open Visual Studio and create a new .NET MAUI app.
- Ensure you have access to Azure OpenAI service and have set up a deployment in the Azure portal.
- Next, install the Microsoft.Extensions.AI.OpenAI, Azure.AI.OpenAI, and Azure.Identity NuGet packages from the NuGet Gallery.
Step 1: Connect to Azure OpenAI
Replace your API key, AZURE_OPENAI_ENDPOINT, with your Azure OpenAI endpoint and modelId with your deployment name.
Note: Syncfusion never stores the API key you provide, nor is it sent to OpenAI, Google, or any third party. It remains only in your session and is cleared when the session ends.
Refer to the following code example to connect the .NET MAUI app with Azure OpenAI using the AzureOpenAIClient class.
internal class AzureOpenAIBaseService
{
    #region Fields

    /// <summary>
    /// The Azure OpenAI EndPoint
    /// </summary>
    private const string endpoint = "AZURE_OPENAI_ENDPOINT";

    /// <summary>
    /// The Deployment name
    /// </summary>
    private const string deploymentName = "DEPLOYMENT_NAME";

    /// <summary>
    /// The API key
    /// </summary>
    private const string key = "API_KEY";

    /// <summary>
    /// The OpenAI
    /// </summary>
    private IChatClient? client;

    /// <summary>
    /// The already credential validated field
    /// </summary>
    private bool isAlreadyValidated = false;

    #endregion

    internal AzureOpenAIBaseService()
    {
        ValidateCredential();
    }

    #region Properties

    /// <summary>
    /// Gets or sets a value indicating whether the credentials are valid or not.
    /// Returns <c>true</c> if the credentials are valid; otherwise, <c>false</c>.
    /// </summary>
    internal bool IsCredentialValid { get; set; }

    #endregion

    #region Methods

    /// <summary>
    /// Validate Azure Credentials
    /// </summary>
    private async void ValidateCredential()
    {
        #region Azure OpenAI
        // Use the below method for Azure Open AI
        this.GetAzureOpenAIKernal();
        #endregion

        if (isAlreadyValidated)
        {
            return;
        }

        try
        {
            if (client != null)
            {
                await client!.CompleteAsync("Hello, Test Check");
                chatHistory = string.Empty;
                IsCredentialValid = true;
                isAlreadyValidated = true;
            }
        }
        catch (Exception)
        {
            return;
        }
    }

    /// <summary>
    /// To get the Azure OpenAI method
    /// </summary>
    private void GetAzureOpenAIKernal()
    {
        try
        {
            var client = new AzureOpenAIClient(new Uri(endpoint), new Az-ureKeyCredential(key)).AsChatClient(modelId: deploymentName);
            this.client = client;
        }
        catch (Exception)
        {
        }
    }

    #endregion
}
Step 2: Get a response from Azure OpenAI
Use the following code example to send a prompt to Azure OpenAI and retrieve the completion result.
internal class AzureOpenAIBaseService
{
    private string? chatHistory;

    /// <summary>
    /// Gets the AI response.
    /// </summary>
    /// <param name="userPrompt">The prompt.</param>
    /// <returns>The AI response.</returns>
    internal async Task<string> GetAIResponse(string userPrompt)
    {
        if (IsCredentialValid && client != null)
        {
            chatHistory = string.Empty;
            // Add the system message and user message to the options
            chatHistory = chatHistory + "You are a predictive analytics assistant.";
            chatHistory = chatHistory + userPrompt;
            try
            {
                var response = await client.CompleteAsync(chatHistory);
                return response.ToString();
            }
            catch
            {
                return string.Empty;
            }
        }
        return string.Empty;
    }
}
Then, refer to the following code example to declare the AzureOpenAIBaseService.
DataFormAssistViewBehavior.cs
  /// <summary>
/// Holds the Azure AI services.
/// </summary>
private AzureOpenAIBaseService azureOpenAIBaseService = new AzureOpenAIBaseService();
That’s it! The AzureOpenAIClient class simplifies interactions with Azure OpenAI, making it easy to retrieve completion results based on user-provided prompts.
Generate Data Form fields from user input with Azure OpenAI service
Let’s follow these steps to design an input view, add a Busy Indicator, a Data Form, an AI Assist View, and generate data form fields using Azure OpenAI. These steps ensure a seamless and efficient user experience.
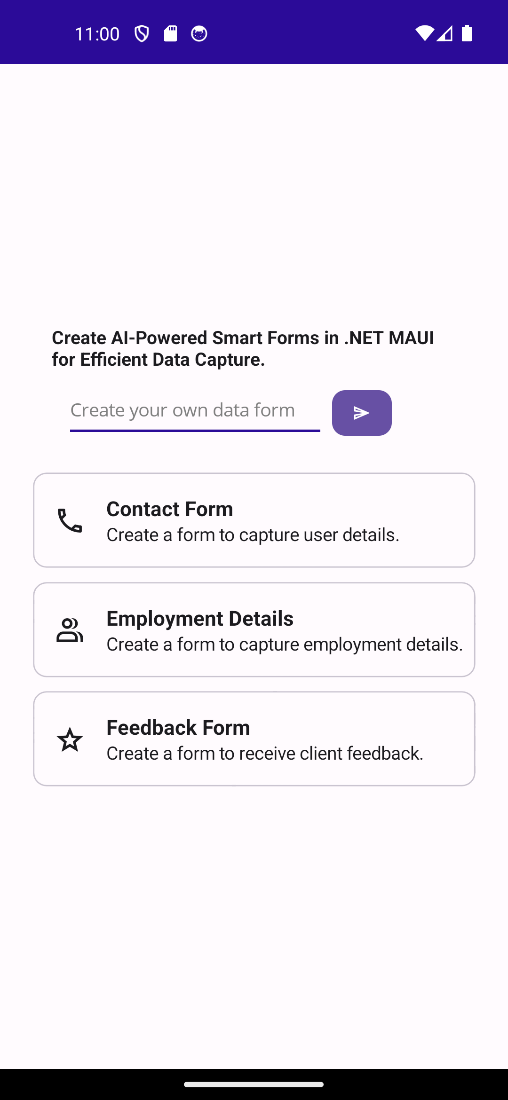
Step 1: Designing the input view to get a user prompt
First, we’ll design an input view that includes an Editor to capture the user prompt and a submit button.
DataFormMobileUI.xaml
<VerticalStackLayout Margin="20" VerticalOptions="Center" HorizontalOptions="Center">
<Label x:Name="describeLabel"
Text="Create AI-Powered Smart Forms in .NET MAUI for Efficient Data Capture."
LineBreakMode="WordWrap" FontSize="Small" FontAttributes="Bold" />
<Grid ColumnDefinitions="0.7*,0.3*" Margin="10" ColumnSpacing="5">
<Editor AutoSize="TextChanges" x:Name="entry"
PlaceholderColor="Gray"
VerticalOptions="Center"
HorizontalOptions="Fill" TextColor="{AppThemeBinding Default={StaticResource ContentForeground}}"
Placeholder="Create your own data form" />
<Button x:Name="createButton"
Grid.Column="1" CornerRadius="10"
HeightRequest="35" Text=""
FontSize="Small"
FontFamily="MauiMaterialAssets"
VerticalOptions="Center" HorizontalOptions="Start" />
</Grid>
</VerticalStackLayout>Refer to the following image.
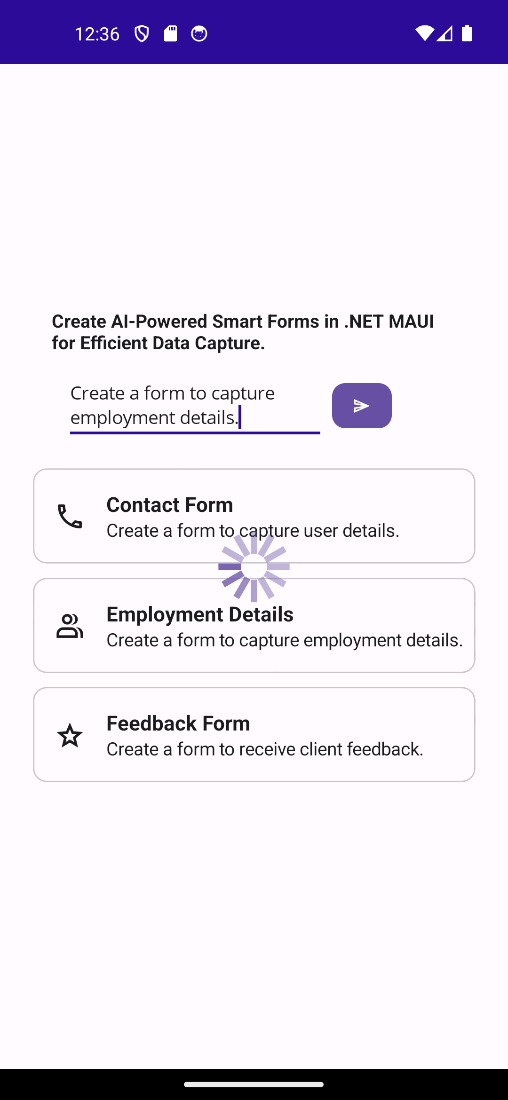
Step 2: Integrate the .NET MAUI Busy Indicator
Now, integrate the .NET MAUI Busy Indicator to enhance the user experience by signaling ongoing processes, such as loading or data retrieval.
DataFormMobileUI.xaml
xmlns:core="clr-namespace:Syncfusion.Maui.Core;assembly=Syncfusion.Maui.Core"

<core:SfBusyIndicator IsVisible="False"
                       x:Name="busyIndicator"
                       IsRunning="False"
                       AnimationType="Cupertino" />
Refer to the following image.
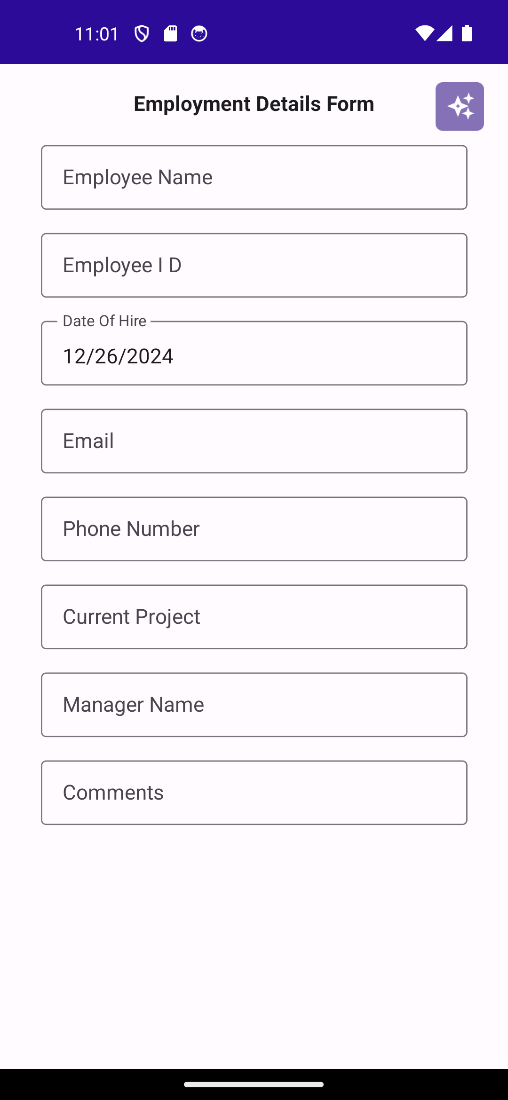
Step 3: Integrate the .NET MAUI Data Form
Then, add the .NET MAUI Data Form control to streamline data entry with a structured, user-friendly interface for efficient input validation.
DataFormMobileUI.xaml
xmlns:dataform="clr-namespace:Syncfusion.Maui.DataForm;assembly=Syncfusion.Maui.DataForm"

<dataform:SfDataForm x:Name="dataForm"
                       Grid.RowSpan="1" Grid.ColumnSpan="2"
                       Grid.Row="1" AutoGenerateItems="False"
                       ValidationMode="PropertyChanged"
                       LayoutType="TextInputLayout"
                       HorizontalOptions="Center">
    <dataform:SfDataForm.TextInputLayoutSettings>
        <dataform:TextInputLayoutSettings ShowHelperText="True" />
    </dataform:SfDataForm.TextInputLayoutSettings>
</dataform:SfDataForm>
Refer to the following image.
Step 4: Integrate the .NET MAUI AI AssistView
Integrate the .NET MAUI AI AssistView control to enhance user experience with intelligent suggestions and context-aware assistance for streamlined workflows.
DataFormMobileUI.xaml
xmlns:aiassistview="clr-namespace:Syncfusion.Maui.AIAssistView;assembly=Syncfusion.Maui.AIAssistView"
<Grid RowDefinitions="auto, *">
<Grid RowDefinitions="auto,auto" BackgroundColor="{DynamicResource SfDataFormNormalBackground}">
<Grid ColumnDefinitions="*,Auto" Margin="5" BackgroundColor="{DynamicResource SfDataFormNormalBackground}">
<Label Text="AI Assistant"
Grid.Column="0"
FontSize="16"
FontFamily="Roboto-Medium"
Padding="16,0,0,0"
FontAttributes="Bold"
VerticalOptions="Center" />
<Button x:Name="close"
Grid.Column="1"
BorderWidth="0"
CornerRadius="20"
HeightRequest="{OnPlatform Android=30, iOS=40}"
WidthRequest="{OnPlatform Android=30, iOS=40}"
FontSize="15"
Text=""
BackgroundColor="{AppThemeBinding Default={StaticResource SfDataFormNormalBackground}}"
TextColor="{AppThemeBinding Default={StaticResource ContentForeground}}"
HorizontalOptions="End"
FontFamily="MauiMaterialAssets"
ToolTipProperties.Text="Close"
Padding="0"
Margin="0"/>
<Button x:Name="refreshButton"
Grid.Column="1"
BorderWidth="0"
CornerRadius="20"
HeightRequest="{OnPlatform Android=30, iOS=40}"
WidthRequest="{OnPlatform Android=30, iOS=40}"
FontSize="15"
Text=""
BackgroundColor="{AppThemeBinding Default={StaticResource SfDataFormNormalBackground}}"
TextColor="{AppThemeBinding Default={StaticResource ContentForeground}}"
HorizontalOptions="End"
FontFamily="MauiSampleFontIcon"
ToolTipProperties.Text="Refresh"
Padding="0"
Margin="0,0,30,0"/>
</Grid>
<BoxView Grid.Row="1" HeightRequest="1" BackgroundColor="{AppThemeBinding Light=#CAC4D0, Dark=#CAC4D0}"/>
</Grid>
<aiassistview:SfAIAssistView x:Name="aiAssistView"
Grid.Row="1"
HorizontalOptions="Fill"
ShowHeader="False"
AssistItems="{Binding Messages}" />
</Grid>Now, add the behavior to interact with the UI elements and manage progress functionality.
<aiassistview:SfAIAssistView.Behaviors>
<local:DataFormAssistViewBehavior
x:Name="dataFormAssistViewModel"
AIActionButton="{x:Reference aiActionButton}"
RefreshButton="{x:Reference refreshButton}"
CloseButton="{x:Reference close}"
DataFormNameLabel="{x:Reference dataFormNameLabel}"
BusyIndicator="{x:Reference busyIndicator}"
DataForm="{x:Reference dataForm}"
DataFormGeneratorModel="{x:Reference dataFormGeneratorModel}"
Entry="{x:Reference entry}"
CreateButton="{x:Reference createButton}" />
</aiassistview:SfAIAssistView.Behaviors>
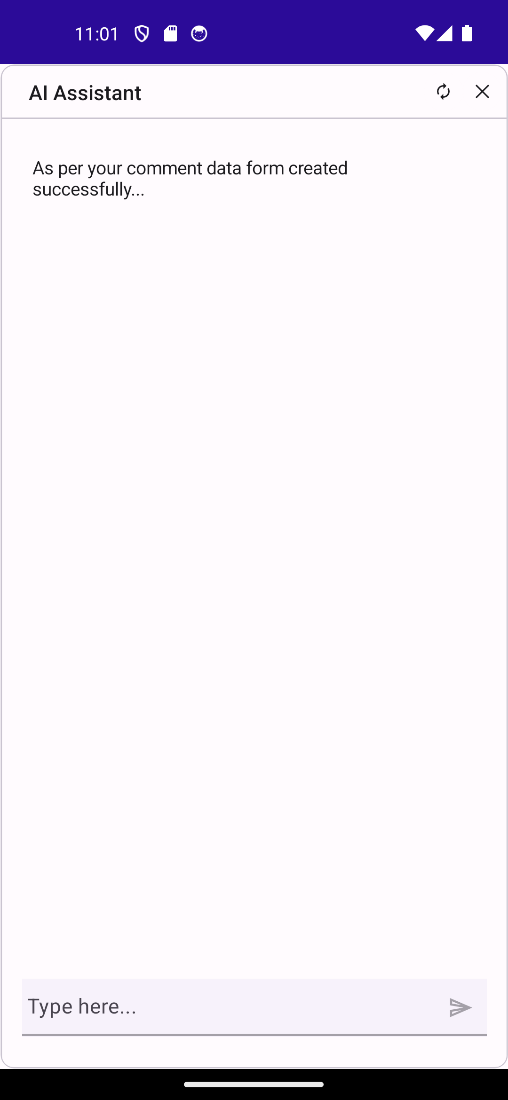
</aiassistview:SfAIAssistView>Refer to the following image.
Step 5: Create the Data Form items using Azure OpenAI
Let’s create the data form items based on the provided user prompt with the Azure OpenAI service.
Refer to the following code to trigger the data form item generation via a button click event.
DataFormAssistViewBehavior.cs
public Button? CreateButton { get; set; }

protected override void OnAttachedTo(SfAIAssistView assistView)
{
    base.OnAttachedTo(assistView);

    if (this.CreateButton != null)
    {
        this.CreateButton.Clicked += this.OnCreateButtonClicked;
    }
}

private async void OnCreateButtonClicked(object? sender, EventArgs e)
{
    UpdateBusyIndicator(true);

    if (azureOpenAIBaseService.IsCredentialValid)
    {
        this.GetDataFormFromAI(this.Entry.Text);
    }
}
Then, generate the data form items based on user prompts entered with Azure OpenAI.
DataFormAssistViewBehavior.cs
internal async void GetDataFormFromAI(string userPrompt)
{
    string prompt = $"Given the user's input: {userPrompt}, determine the most appropriate single action to take. " +
        $"The options are 'Add', 'Add Values', 'PlaceholderText', 'Remove', 'Replace', 'Insert', 'New Form', 'Change Title', or 'No Change'" +
        " Without additional formatting and special characters like backticks, newlines, or extra spaces.";

    var response = await this.azureOpenAIBaseService.GetAIResponse(prompt);

    if (string.IsNullOrEmpty(response))
    {
        AssistItem subjectMessage = new AssistItem() { Text = "Please try again...", ShowAssistItemFooter = false };
        this.DataFormGeneratorModel?.Messages.Add(subjectMessage);
        UpdateCreateVisibility();
        UpdateBusyIndicator(false);
    }
    else
    {
        if (response == string.Empty)
        {
            UpdateBusyIndicator(false);
            if (Application.Current != null)
            {
                var mainWindow = Application.Current.Windows.FirstOrDefault();
                if (mainWindow != null && mainWindow.Page != null)
                {
                    await mainWindow.Page.DisplayAlert("", "Please enter valid inputs.", "OK");
                }
            }
        }
        else if (response == "New Form")
        {
            if (this.DataFormGeneratorModel != null)
                this.DataFormGeneratorModel.ShowOfflineLabel = false;
            this.GenerateAIDataForm(userPrompt);
        }
        else if (response == "Change Title")
        {
            string dataFormNamePrompt = $"Change the title for data form based on user prompt: {userPrompt}. Provide only the title, with no additional explanation";
            string getDataFormName = await this.azureOpenAIBaseService.GetAIResponse(dataFormNamePrompt);
            this.DataFormNameLabel!.Text = getDataFormName;
            AssistItem subjectMessage = new AssistItem() { Text = "The Data Form title changed successfully...", ShowAssistItemFooter = false };
            this.DataFormGeneratorModel?.Messages.Add(subjectMessage);
        }
        else
        {
            this.EditDataForm(userPrompt, response);
        }
    }
}
Refer to the following code to generate new data form items based on the user prompt entered using Azure OpenAI.
The GetAIResponse method declared in the AzureOpenAIBaseService class, processes user input and interacts with Azure OpenAI to generate the required items. [Refer to Step 2: Get a response from Azure OpenAI]
DataFormAssistViewBehavior.cs
/// <summary>
/// Method to generate the data form using AI.
/// </summary>
/// <param name="userPrompt">The user prompt.</param>
private async void GenerateAIDataForm(string userPrompt)
{
    string dataFormNamePrompt = $"Generate a title for a data form based on the following string: {userPrompt}. The title should clearly reflect the purpose of the data form in general term. Provide only the title, with no additional explanation";
    string getDataFormName = await this.azureOpenAIBaseService.GetAIResponse(dataFormNamePrompt);
    this.DataFormNameLabel!.Text = getDataFormName;

    string prompt = $"Generate a data form based on the user prompt: {userPrompt}.";
    string condition = "Property names must be in PascalCase. " +
        "Must be property names and its value " +
        "Without additional formatting characters like backticks, new-lines, or extra spaces. " +
        "and map each property to the most appropriate DataForm available item type includes: DataFormTextItem, DataFormMultiLineTextItem, DataFormPasswordItem, DataFormNumericItem, DataFormMaskedTextItem, DataFormDateItem, DataFormTimeItem, DataFormCheckBoxItem, DataFormSwitchItem, DataFormPickerItem, DataFormComboBoxItem, DataFormAutoCompleteItem, DataFormRadioGroupItem, DataFormSegmentItem" +
        "The result must be in JSON format" +
        "Without additional formatting characters like backticks, new-lines, or extra spaces.";

    var typeResponse = await this.azureOpenAIBaseService.GetAIResponse(prompt + condition);

    var dataFormTypes = JsonConvert.DeserializeObject<Dictionary<string, object>>(typeResponse);

    if (this.DataForm != null && dataFormTypes != null)
    {
        var items = new ObservableCollection<DataFormViewItem>();
        foreach (var data in dataFormTypes)
        {
            DataFormItem? dataFormItem = GenerateDataFormItems(data.Value.ToString(), data.Key);
            if (dataFormItem != null)
                items.Add(dataFormItem);
        }

        this.DataForm.Items = items;
    }

    AssistItem subjectMessage = new AssistItem() { Text = "As per your comment data form created successfully...", ShowAssistItemFooter = false };
    this.DataFormGeneratorModel?.Messages.Add(subjectMessage);

    UpdateCreateVisibility();
    UpdateBusyIndicator(false);
}
Refer to the following code example to implement the logic for editing an existing data form item based on user input.
DataFormAssistViewBehavior.cs
/// <summary>
/// Method to edit the data form.
/// </summary>
/// <param name="userPrompt">The user prompt.</param>
private async void EditDataForm(string userPrompt, string action)
{
    if (this.DataForm!.Items != null)
    {
        userPrompt = userPrompt.Replace(action, "", StringComparison.OrdinalIgnoreCase).Trim();
        if (action == "Add")
        {
            string prompt = $"Generate a Property name based on the user prompt: {userPrompt}.";
            string condition = "The result must be in string" +
                "Property name must be in PascalCase, without asking questions, or including extra explanations. " +
                "Without additional formatting characters like backticks, newlines, or extra spaces." +
                $" and map that property to the most appropriate DataForm available item type includes: DataFormTextItem , DataFormMultiLineTextItem, DataFormPasswordItem, DataFormNumericItem, DataFormMaskedTextItem, DataFormDateItem, DataFormTimeItem, DataFormCheckBoxItem, DataFormSwitchItem, DataFormPickerItem, DataFormComboBoxItem, DataFormAutoCompleteItem, DataFormRadioGroupItem, DataFormSegmentItem" +
                "The result must be in JSON format" +
                "Without additional formatting characters like backticks, newlines, or extra spaces.";
            var typeResponse = await this.azureOpenAIBaseService.GetAIResponse(prompt + condition);

            var dataFormTypes = JsonConvert.DeserializeObject<Dictionary<string, object>>(typeResponse);
            if (dataFormTypes != null)
            {
                if (dataFormTypes != null && dataFormTypes.Count > 0)
                {
                    var newItem = dataFormTypes.FirstOrDefault();
                    if (newItem.Value != null)
                    {
                        DataFormItem? dataFormItem = GenerateDataFormItems(newItem.Value.ToString(), newItem.Key);
                        if (dataFormItem != null)
                        {
                            this.DataForm.Items.Add(dataFormItem);
                            UpdateChangesResponse();
                        }
                    }
                }
            }
        }
        else if (action == "Remove")
        {
            string prompt = $"Generate a Property name based on the user prompt: {userPrompt}.";
            string condition = "The result must be in string" +
                "Property name must be in PascalCase, without asking questions, or including extra explanations. " +
                "Without additional formatting characters like backticks, newlines, or extra spaces.";
            string response = await this.azureOpenAIBaseService.GetAIResponse(prompt + condition);

            var removeItem = this.DataForm!.Items.FirstOrDefault(x => x != null && (x is DataFormItem dataFormItem) && dataFormItem.FieldName == response);
            if (removeItem != null)
            {
                this.DataForm.Items.Remove(removeItem);
                UpdateChangesResponse();
            }
        }
        else if (action == "Replace")
        {
            string pattern = @"Replace\s+(.*?)\s+(with|by|to)\s+(.*)";
            Match match = Regex.Match(userPrompt, pattern, RegexOptions.IgnoreCase);

            if (match.Success && match.Groups.Count == 4)
            {
                string prompt = $"Based on the user input '{match.Groups[1].Value.Trim()}', generate a Property name.";
                string condition = "The result must be a valid Property name in PascalCase format. " +
                                   "Do not include explanations, questions, or additional characters like backticks, newlines, or spaces. " +
                                   "Return only the Property name in PascalCase.";

                string response = await this.azureOpenAIBaseService.GetAIResponse(prompt + condition);

                string prompt1 = $"Generate a Property name from {match.Groups[3].Value.Trim()}.";
                string condition1 = "The result must be in string and Property name must be in PascalCase,  without asking questions, or including extra explanations. " +
                    "Without additional formatting characters like backticks, newlines, or extra spaces." +
                    " map that generated property to the most appropriate DataForm available item type includes: DataFormTextItem , DataFormMultiLineTextItem, DataFormPasswordItem, DataFormNumericItem, DataFormMaskedTextItem, DataFormDateItem, DataFormTimeItem, DataFormCheckBoxItem, DataFormSwitchItem, DataFormPickerItem, DataFormComboBoxItem, DataFormAutoCompleteItem, DataFormRadioGroupItem, DataFormSegmentItem" +
                    "The result must be in JSON format" +
                    "without extra formatting like backticks, newlines, or special characters.";
                var typeResponse = await this.azureOpenAIBaseService.GetAIResponse(prompt1 + condition1);

                var dataFormTypes = JsonConvert.DeserializeObject<Dictionary<string, object>>(typeResponse);

                if (dataFormTypes != null && !string.IsNullOrEmpty(response))
                {
                    if (dataFormTypes != null && dataFormTypes.Count > 0)
                    {
                        var newItem = dataFormTypes.FirstOrDefault();
                        var removeItem = this.DataForm.Items.FirstOrDefault(x => x != null && x is DataFormItem dataFormItem && dataFormItem.FieldName == response);
                        if (removeItem != null && newItem.Value != null)
                        {
                            int index = DataForm.Items.IndexOf(removeItem);
                            var replcaeItem = GenerateDataFormItems(newItem.Value.ToString(), newItem.Key);
                            if (replcaeItem != null)
                                this.DataForm.Items[index] = replcaeItem;
                            UpdateChangesResponse();
                        }
                    }
                }
            }
        }
        else if (action == "Add Values" || action == "Add Value")
        {
            string prompt = $"Generate a Property name and a Values based on the user prompt: {userPrompt}." +
                " Output the result in the exact format: 'PropertyName: PropertyName, Values: value1, value2, ...'.";

            string condition = "The PropertyName must be in PascalCase, without extra questions, explanations, or formatting characters.";
            string response = await this.azureOpenAIBaseService.GetAIResponse(prompt + condition);

            if (response != null)
            {
                var match = Regex.Match(response, @"PropertyName: (?<propertyName>[^,]+), Values: (?<values>.+)");
                if (match.Success)
                {
                    string propertyName = match.Groups["propertyName"].Value.Trim();
                    string values = match.Groups["values"].Value.Trim();

                    List<string> itemsSource = match.Groups["values"].Value
                        .Split(',')
                        .Select(v => v.Trim())
                        .ToList();

                    var removeItem = this.DataForm!.Items.FirstOrDefault(x => x != null && x is DataFormItem dataFormItem && dataFormItem.FieldName.Equals(propertyName));
                    if (removeItem != null && removeItem is DataFormListItem pickerItem)
                    {
                        pickerItem.ItemsSource = itemsSource;
                        UpdateChangesResponse();
                    }
                }
            }
        }
    }
}
Refer to the following code to edit the form based on the user prompt entered in AI AssistView.
DataFormAssistViewBehavior.cs
protected override void OnAttachedTo(SfAIAssistView assistView)
{
    base.OnAttachedTo(assistView);
    this.assistView = assistView;

    if (this.assistView != null)
    {
        this.assistView.Request += this.OnAssistViewRequest;
    }
}

private async void OnAssistViewRequest(object? sender, RequestEventArgs e)
{
    string requestText = e.RequestItem.Text;
    if (azureOpenAIBaseService.IsCredentialValid && this.DataFormGeneratorModel != null)
    {
        this.GetDataFormFromAI(requestText);
        return;
    }
}
Refer to the following gif image.

GitHub reference
For more details, refer to the AI-powered smart .NET MAUI Data Form GitHub demo.
Conclusion
Thank you for reading! In this blog, we’ve explored how to create an AI-powered smart Data Form using the Syncfusion .NET MAUI controls to enhance user experience and productivity. Give it a try, and don’t forget to share your feedback in the comments section below!
Existing customers can access the new version of Essential Studio® on the License and Downloads page. If you aren’t a Syncfusion customer, try our 30-day free trial to experience our fantastic features.
Feel free to reach out via our support forum, support portal, or feedback portal. We’re here to help!