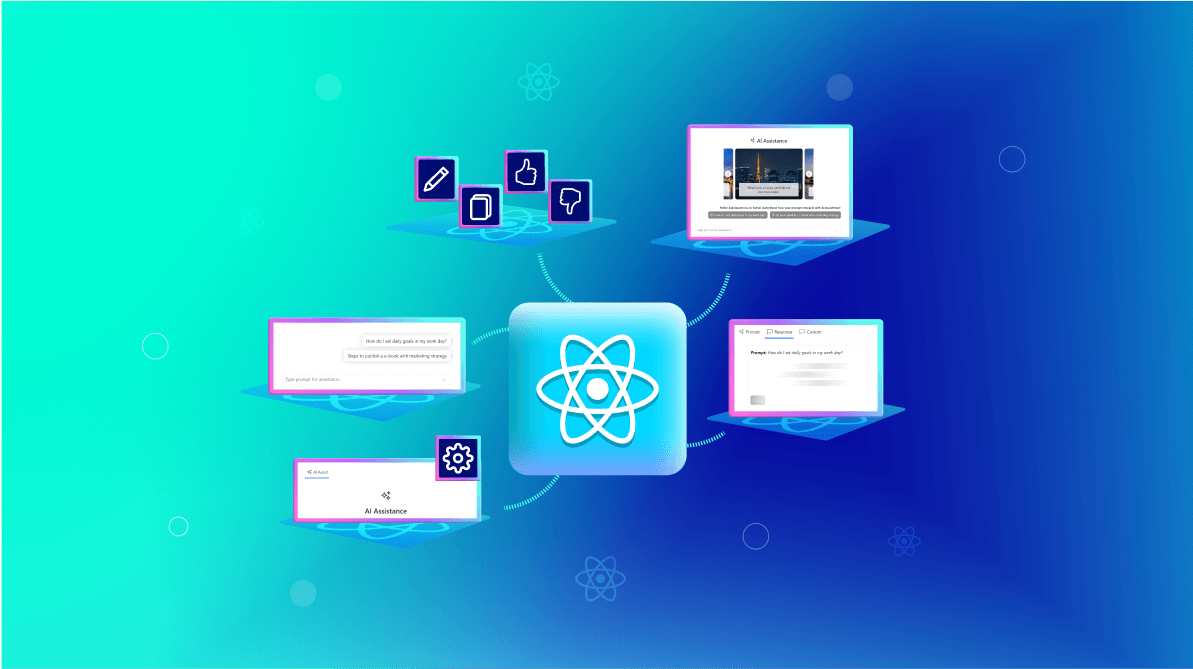
TL;DR: Introducing the new React AI AssistView component! It enables users to send prompts, execute commands, and effortlessly view AI-generated responses in web apps. This blog walks you through the setup process, providing code examples to help you seamlessly integrate this component into your React apps.
We are thrilled to announce the release of the new React AI AssistView component in our 2024 Volume 3 release. The React AI AssistView is designed to seamlessly integrate with AI services, offering more functionality and a modern user interface for your web apps. This component enables users to easily send prompts, execute commands via a toolbar, and view AI-generated responses in an intuitive, user-friendly view.
In this blog, we will explore the key features of the React AI AssistView component, highlight its UI design, and provide code examples to help you quickly integrate it into your React apps.

Use cases
The React AI AssistView component excels in a variety of apps, including:
- Customer support chatbots: Use AI AssistView to provide real-time, context-aware responses to user inquiries, helping customers resolve issues efficiently.
- Content creation assistance: Integrate AI services to assist with drafting emails, creating reports, generating code snippets based on user prompts, and streamlining content creation tasks.
- Data querying and insights: Empower users to query their data and receive AI-generated insights, aiding in more informed and data-driven decision-making.
Key features
The React AI AssistView component offers the following standout features:
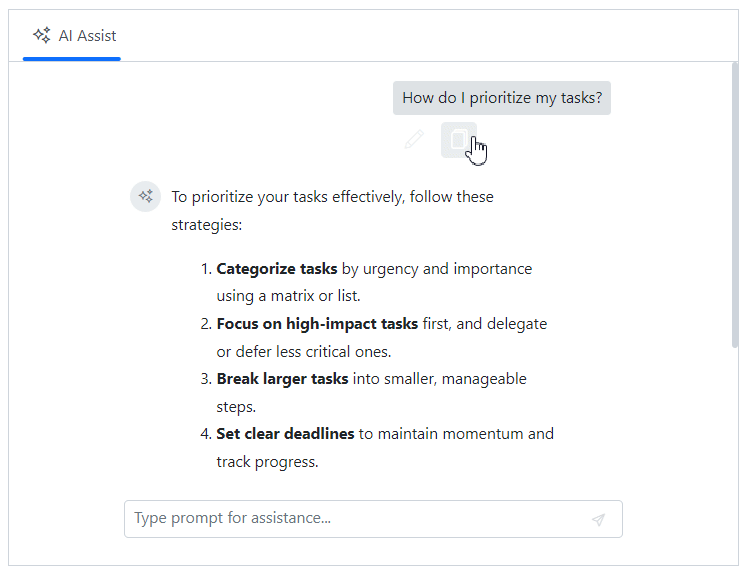
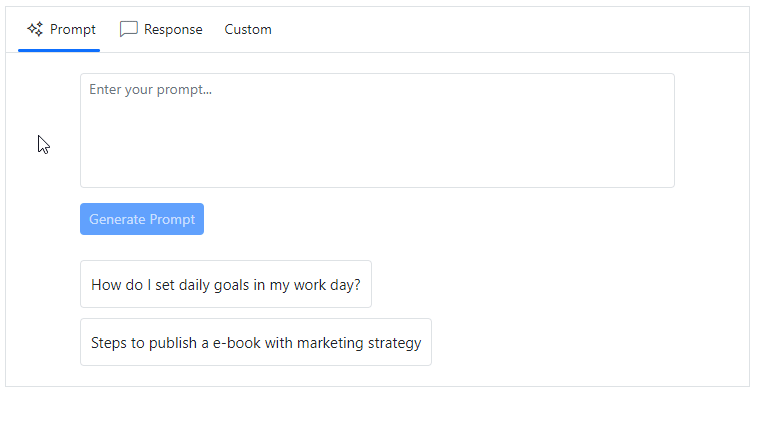
Pre-defined toolbars
This component includes pre-defined toolbar items for both prompts and responses, such as copy, edit, and like/dislike options. These tools enable seamless interaction, allowing users to quickly perform common actions directly within the interface.
Refer to the following image.
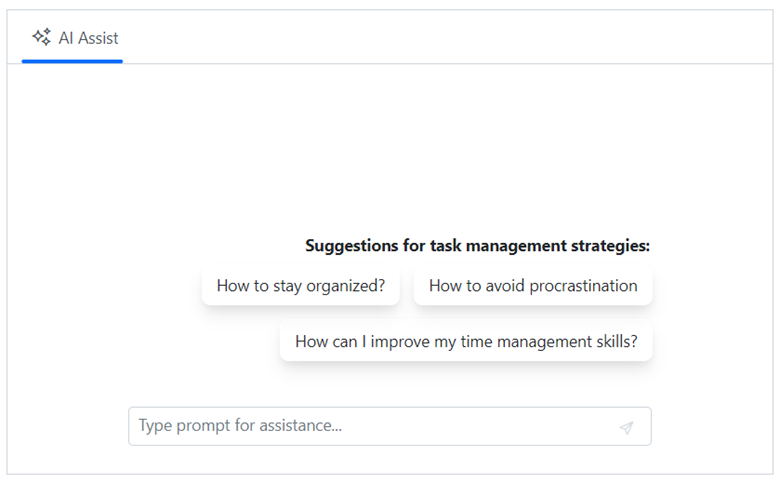
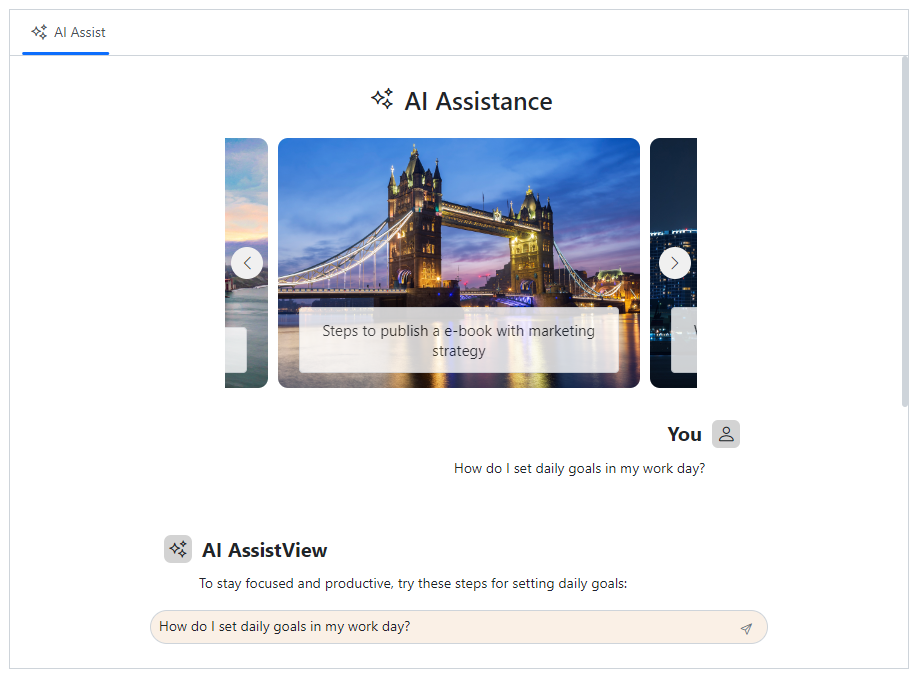
Suggested prompts
This component supports both initial and on-demand prompt suggestions with a customizable header. This feature enhances user experience by providing relevant and timely prompts, which can be tailored to specific contexts or user needs. These personalized suggestions make interactions more intuitive and engaging.
Refer to the following image.
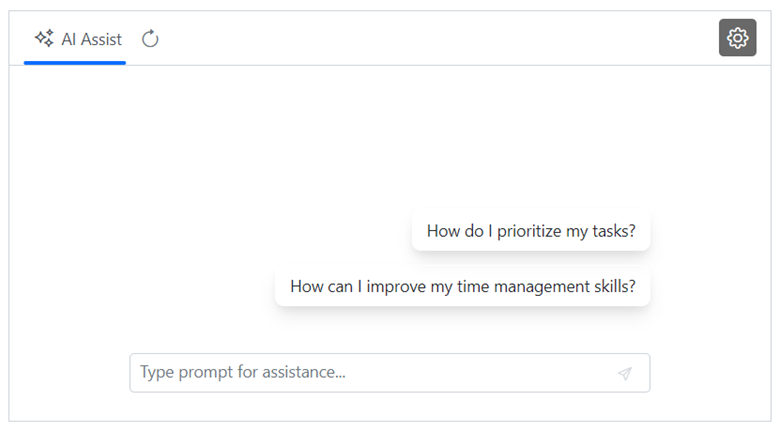
Header toolbar options
This header toolbar offers flexibility by allowing the addition of various toolbar items to execute custom commands. This feature enables developers to customize the toolbar for specific functionalities, enhancing the component’s adaptability to diverse use cases.
Refer to the following image.
Customized views
The React AI AssistView component offers extensive customization options, enabling developers to create customized views that go beyond the default setup. It can be tailored to suit a variety of use cases and user preferences, allowing for the creation of unique interfaces that align perfectly with your app’s specific requirements.
Refer to the following image.
Flexible customization
This component offers extensive customization options, allowing you to modify the default appearance. You can easily adjust prompts, responses, suggestions, banners, and footers, providing a cohesive and personalized user experience.
Refer to the following image.
Getting started with React AI AssistView component
Let’s create a React app and configure the Syncfusion React AI AssistView component.
Step 1: Create a new React app
First, ensure you have all the prerequisites to run a React app. Then, create a React app using the following command.
npx create-react-app my-app

cd my-app
Step 2: Add Syncfusion packages
Syncfusion React packages are available in the NPM registry. To install the packages required for the React AI AssistView component, use the following command.
npm install @syncfusion/ej2-react-interactive-chat --save Step 3: Add CSS reference
Now, import the required CSS styles for the AI AssistView component and dependency styles in the src/App.css file. Refer to the following code.
@import "../node_modules/@syncfusion/ej2-base/styles/bootstrap5.css";
@import "../node_modules/@syncfusion/ej2-inputs/styles/bootstrap5.css";
@import "../node_modules/@syncfusion/ej2-navigations/styles/bootstrap5.css";
@import "../node_modules/@syncfusion/ej2-interactive-chat/styles/bootstrap5.css";
Step 4: Add React AI AssistView component to the app
We have completed all the necessary configurations for rendering the Syncfusion React components. Now, let’s add the AI AssistView component by following these steps:
- Import the AIAssistViewComponent from the ej2-react-interactive-chat package in the App.js file.
- Then, add the promptSuggestions and bannerTemplate properties to the AIAssistView component.
- Use the promptRequest event to display the prompts and responses as shown in the following code example.
App.js
import { AIAssistViewComponent } from '@syncfusion/ej2-react-interactive-chat'; import * as React from "react"; import * as ReactDOM from "react-dom"; import "./App.css"; function App() { const assistInstance = React.useRef(null); const bannerViewTemplate = () => { return ( <div className="banner-content"> <div className="e-icons e-assistview-icon"></div> <h2 style={{margin: 0}}>AI Assistance</h2> <div className="ai-assist-banner-subtitle">Your everyday AI companion</div> </div> ); } const promptSuggestions = [ "How do I prioritize my tasks?", "How can I improve my time management skills?" ]; const prompts = [ { prompt: "How do I prioritize my tasks?", response: "Prioritize tasks by urgency and impact: tackle high-impact tasks first, delegate when possible, and break large tasks into smaller steps. For more assistance, feel free to ask—I’m here to help!" }, { prompt: "How can I improve my time management skills?", response: "To improve time management skills, try setting clear goals, using a planner or digital tools, prioritizing tasks, breaking tasks into smaller steps, and minimizing distractions. Regularly review and adjust your approach for better efficiency." } ]; const onPromptRequest = (args) => { setTimeout(() => { let foundPrompt = prompts.find((promptObj) => promptObj.prompt === args.prompt); let defaultResponse = 'For real-time prompt processing, connect the AI AssistView component to your preferred AI service, such as OpenAI or Azure Cognitive Services. Ensure you obtain the necessary API credentials to authenticate and enable seamless integration.'; assistInstance.current.addPromptResponse(foundPrompt ? foundPrompt.response : defaultResponse); }, 1000); }; return ( <div id='assistView' style={{ height: "350px", Width: "650px" }}> <AIAssistViewComponent id="aiAssistView" ref={assistInstance} promptRequest={onPromptRequest} promptSuggestions={promptSuggestions} bannerTemplate={bannerViewTemplate}></AIAssistViewComponent> </div> ); } const root = ReactDOM.createRoot(document.getElementById("element")); root.render(<App />); - Add the following CSS styles in the App.css file to customize the appearance of the banner template.
App.css
#assistview .banner-content .e-assistview-icon:before {
    font-size: 30px;
}

#assistview .banner-content {
    display: flex;
    flex-direction: column;
    justify-content: center;
    text-align: center;
    align-items: center;
    padding: 10px 10px;
    width: 65%;
    margin: 0 auto;
    height: 270px;
}
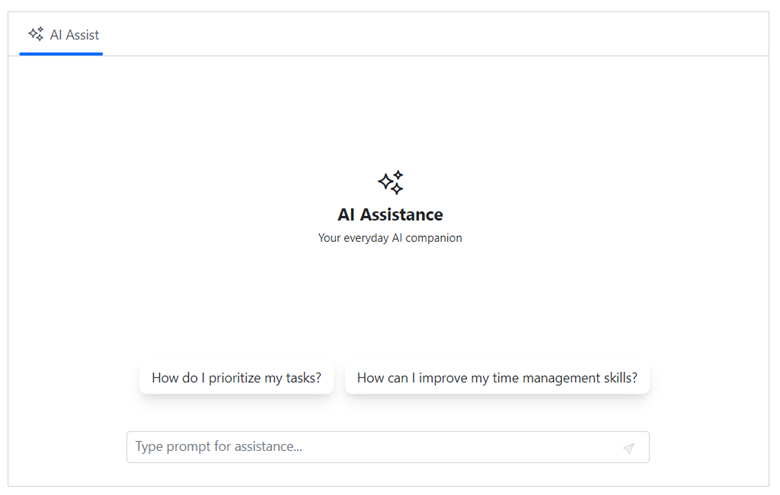
Step 5: Run the app
Finally, run the app in the browser using the following command.
npm start Once the web server is loaded, you can find the following output by opening the React app in the browser at port localhost:3000.
References
For more details, refer to the React AI AssistView component demos and documentation.
Supported platforms
The AI AssistView component is also available in the following platforms.
Platform | Live demo | Documentation |
Conclusion
Thanks for reading! We hope you enjoyed learning about the new Syncfusion React AI AssistView component and its exciting features! This component is now part of our 2024 Volume 3 release.
To explore all the new updates in this release, don’t forget to visit our Release Notes and What’s New pages. We’d love to hear your thoughts, so please share your feedback in the comments section below!
For any questions or support, feel free to contact us through our support forum, feedback portal, or support portal. We are always happy to assist you!