TL;DR: The Syncfusion Blazor Diagram now supports Swimlane diagrams, facilitating visualizing complex business processes with ease. With detailed code examples, learn to create headers, phases, lanes, and add nodes programmatically or interactively. Dive into the blog for comprehensive insights.
A Swimlane diagram is a powerful visualization tool that illustrates the intricate connections between various components of a business process and the corresponding departments responsible for each stage. By highlighting the logical relationships among different activities, it provides a clear and comprehensive overview, simplifying the comprehension of the process dynamics and the associated departmental responsibilities.
Syncfusion Blazor Diagram component is a fast and powerful library for visualizing, creating, and editing interactive diagrams. It supports creating flowcharts, organizational charts, mind maps, and more.
From the 2024 Volume 1 onwards, the Syncfusion Blazor Diagram component supports creating beautiful swimlane diagrams.
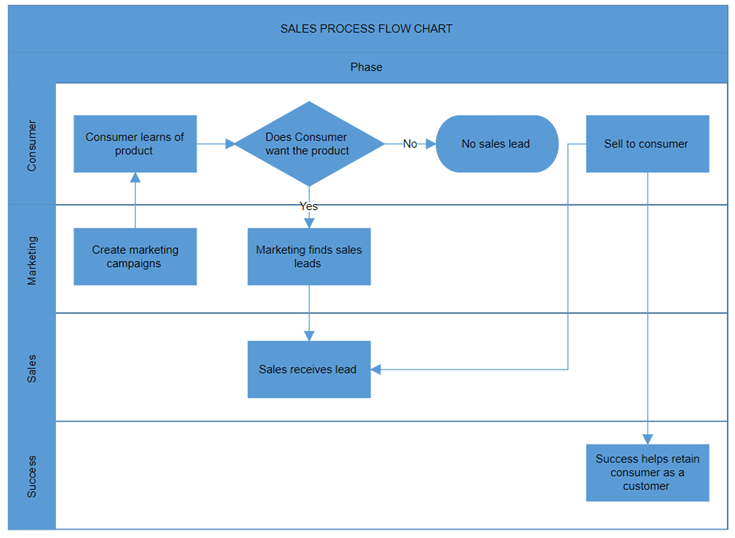
Let’s see how to create a swimlane diagram using the Syncfusion Blazor Diagram component!
Brief introduction of swimlane elements
Before diving into the technical details, let’s take a moment to familiarize ourselves with the fundamental Swimlane elements such as header, phases, lanes, and their respective children.
Swimlane header
The swimlane header is key in defining the purpose of swimlanes. The Header property of a swimlane allows you to specify its textual description and customize its appearance.
Phases
The phase represents a subprocess that divides each lane horizontally or vertically, depending on the orientation of the swimlane. Within the swimlane, multiple phases can be incorporated to delineate different stages or subprocesses within the overall workflow.
Lanes
A lane represents a distinct functional unit or department within a business process, facilitating the mapping of activities within the unit itself or between different units.
We can add the required number of lanes to a swimlane and render them in the diagram. The lanes are automatically stacked inside the swimlane based on their order of addition. This ensures a structured representation of the process flow, enhancing clarity and organization within the diagram.
Lane children
To add nodes to a lane, simply include them in the lane’s children collection. These nodes represent tasks, decisions, events, gateways, milestones, or annotations, organizing the lane’s content for clear visualization of the workflow.
How to create a swimlane diagram using the Blazor Diagram component?
Let’s follow these steps to create a swimlane diagram easily using the Blazor Diagram component:
Step 1: Creating a basic swimlane diagram
We can create a swimlane diagram programmatically or interactively using the symbol palette.
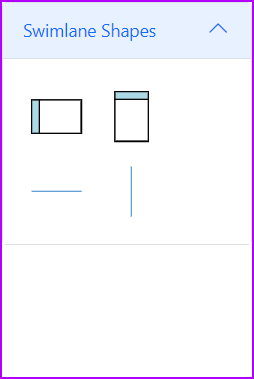
Creating a swimlane is effortless with the shapes from the symbol palette. The Blazor Diagram component supports adding lanes, phases, and other elements to the symbol palette.
The following code example demonstrates how to add swimlane shapes to the symbol palette.
@using Syncfusion.Blazor.Diagram
@using Syncfusion.Blazor.Diagram.SymbolPalette

<div class="control-section">
    <div style="width:20%;">
        <div id="palette-space" class="sb-mobile-palette" style="border: 2px solid #b200ff">
            <SfSymbolPaletteComponent @ref="@symbolpalette" Height="300px" Width="200px"
                                      Palettes="@Palettes" SymbolHeight="60" SymbolWidth="60" SymbolMargin="@SymbolMargin">
            </SfSymbolPaletteComponent>
        </div>
    </div>
</div>

@code
{
    //Reference the symbol preview.
    DiagramSize SymbolPreview;
    //Define symbol margin.
    SymbolMargin SymbolMargin = new SymbolMargin { Left = 15, Right = 15, Top = 15, Bottom = 15 };

    SfSymbolPaletteComponent symbolpalette;

    //Define palette collection.
    DiagramObjectCollection<Palette> Palettes = new DiagramObjectCollection<Palette>();

    // Defines palette's swimlane-shape collection.
    DiagramObjectCollection<NodeBase> SwimlaneNodes = new DiagramObjectCollection<NodeBase>();

    protected override void OnInitialized()
    {
        InitPaletteModel();
    }

    private void InitPaletteModel()
    {
        Palettes = new DiagramObjectCollection<Palette>();

        SwimlaneNodes = new DiagramObjectCollection<NodeBase>();

        //create a horizontal lane.
        Lane horizontalLane = new Lane()
            {
                ID = "HorizontalSwimlane",
                Orientation = Orientation.Horizontal,
                Height = 100,
                Width = 150,
                // Style = new TextStyle() { Fill = "orange", StrokeColor = "black" },
                Header = new SwimlaneHeader()
                {
                    Annotation = new ShapeAnnotation() { Content = "Lane Title" },
                    Style = new TextStyle() { Fill = "lightblue", StrokeColor = "black" },
                    Width = 25,
                    Height = 100
                },
            };

        //create a vertical lane.
        Lane verticalLane = new Lane()
            {
                ID = "VerticalSwimlane",
                Orientation = Orientation.Vertical,
                Height = 150,
                Width = 100,
                // Style = new TextStyle() { Fill = "orange", StrokeColor = "black" },
                Header = new SwimlaneHeader()
                {
                    Annotation = new ShapeAnnotation() { Content = "Lane Title" },
                    Style = new TextStyle() { Fill = "lightblue", StrokeColor = "black" },
                    Width = 100,
                    Height = 25
                },
            };

        //create a horizontal phase.
        Phase horizontalPhase = new Phase() { ID = "HorizontalPhase", Orientation = Orientation.Horizontal, Width = 80, Height = 1, Style = new ShapeStyle() { Fill = "#5b9bd5", StrokeColor = "#5b9bd5" } };

        //create a vertical phase.
        Phase verticalPhase = new Phase() { ID = "VerticalPhase", Orientation = Orientation.Vertical, Width = 1, Height = 80, Style = new ShapeStyle() { Fill = "#5b9bd5", StrokeColor = "#5b9bd5" } };

        SwimlaneNodes = new DiagramObjectCollection<NodeBase>()
        {
            horizontalLane,
            verticalLane,
            horizontalPhase,
            verticalPhase
        };

        Palettes = new DiagramObjectCollection<Palette>()
        {
            new Palette(){Symbols =SwimlaneNodes,Title="Swimlane Shapes",ID="SwimlaneShapes" },
        };
      }
}
Refer to the following image.
The following GIF image demonstrates how to create a swimlane diagram with phase, lane, and children nodes using the symbol palette.
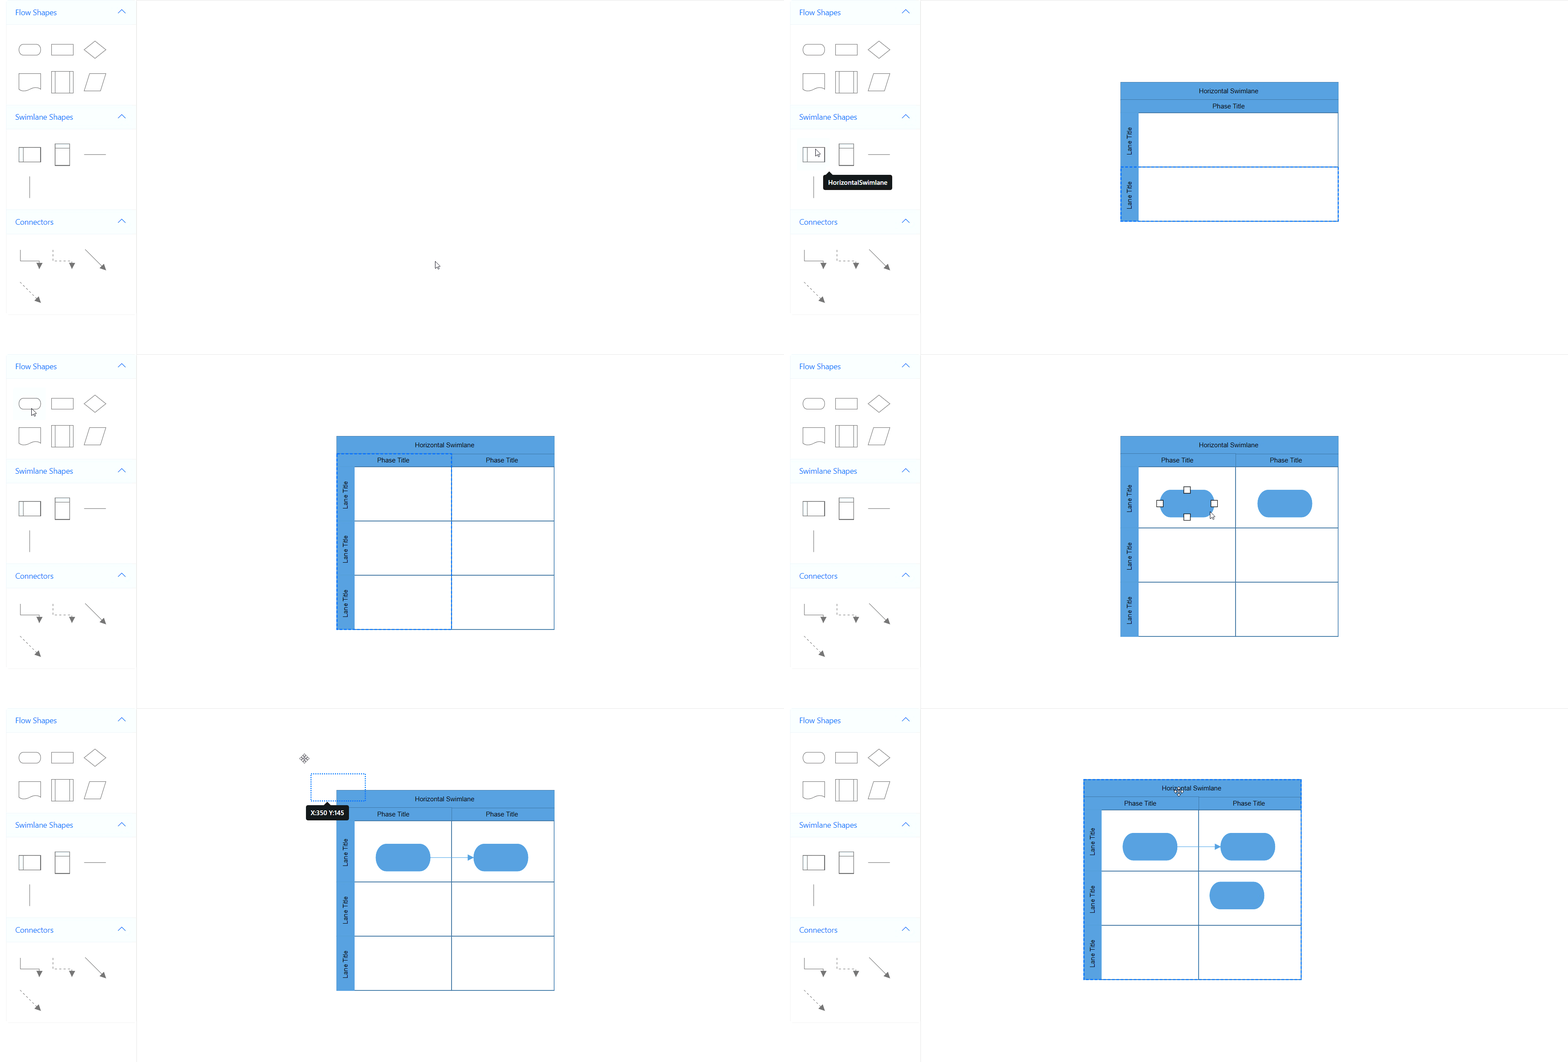
To create a swimlane programmatically, you need to define the swimlane object and then add it to the swimlanes collection of the diagram. When a swim lane is created, one lane and one phase are automatically added by default.
The following code example demonstrates how to create a swimlane diagram programmatically.
@using Syncfusion.Blazor.Diagram

<SfDiagramComponent Height="600px" Swimlanes="@SwimlaneCollections" />

@code
{
    //Define the diagram's swimlane collection.
    DiagramObjectCollection<Swimlane> SwimlaneCollections = new DiagramObjectCollection<Swimlane>();

    protected override void OnInitialized()
    {
        // A swimlane is created and stored in the swimlanes collection.
        Swimlane swimlane = new Swimlane()
        {
            OffsetX = 400, OffsetY = 200, Height = 120, Width = 450,
        };
        // Add swimlane.
        SwimlaneCollections.Add(swimlane);
    }
}
Refer to the following image.

Step 2: Adding a lane
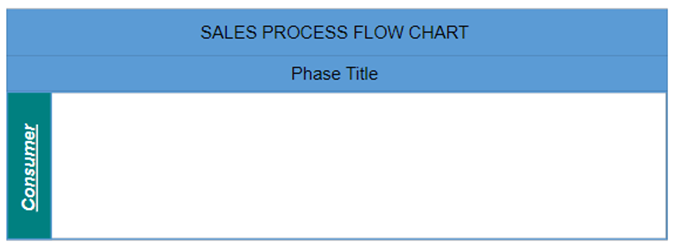
We can create a lane and add it to the lanes collection. For the horizontal swimlane, we should set its Height. For the vertical swimlane, we should set its Width. Furthermore, we can customize the lane and its header using the Style property.
The following code example explains how to define and customize a lane and its header.
@using Syncfusion.Blazor.Diagram

<SfDiagramComponent Height="600px" Swimlanes="@SwimlaneCollections" />

@code
{
    // Define the diagram's swimlane collection.
    DiagramObjectCollection<Swimlane> SwimlaneCollections = new DiagramObjectCollection<Swimlane>();

    protected override void OnInitialized()
    {
        // A swimlane is created and stored in the swimlanes collection.
        Swimlane swimlane = new Swimlane()
        {
            Header = new SwimlaneHeader()
            {
                Annotation = new ShapeAnnotation()
                {
                    Content = "SALES PROCESS FLOW CHART"
                },
                Height = 50,
            },
            OffsetX = 400,
            OffsetY = 200,
            Height = 120,
            Width = 450,
            Lanes = new DiagramObjectCollection<Lane>()
            {
                new Lane()
                {
                    Height = 100,
                    Header = new SwimlaneHeader()
                    {
                        Width = 30,
                        Style = new TextStyle()
                        {
                            Fill = "Teal"
                        },
                        Annotation = new ShapeAnnotation()
                        {
                            Content = "Consumer",
                            Style = new TextStyle()
                            {
                                Color = "White",
                                TextDecoration = TextDecoration.Underline,
                                Italic = true,
                                Bold = true
                            }
                        }
                    }
                }
            }
        };

        // Add swimlane.
        SwimlaneCollections.Add(swimlane);
    }
}
Refer to the following image.
Step 3: Adding a phase
You can create a phase and add it to the swimlane phases collection. For a horizontal swimlane, we should set the Width of the phase. For a Vertical swimlane, we should set the Height of the phase. Furthermore, we can customize the phase and its header using the Style property.
The following code example explains how to define and customize a phase and its header.
@using Syncfusion.Blazor.Diagram
<SfDiagramComponent Height="600px" Swimlanes="@SwimlaneCollections" />

@code
{
    //Define the diagram's swimlane collection.
    DiagramObjectCollection<Swimlane> SwimlaneCollections = new DiagramObjectCollection<Swimlane>();

    protected override void OnInitialized()
    {
        // A swimlane is created and stored in the swimlanes collection.
        Swimlane swimlane = new Swimlane()
            {
                Header = new SwimlaneHeader()
                {
                    Annotation = new ShapeAnnotation()
                    {
                        Content = "SALES PROCESS FLOW CHART"
                    },
                    Height = 50,
                },
                OffsetX = 400,
                OffsetY = 200,
                Height = 150,
                Width = 450,
                Phases = new DiagramObjectCollection<Phase>()
                {
                    new Phase()
                    {
                        Width = 450,
                        Header = new SwimlaneHeader()
                        {
                            Annotation = new ShapeAnnotation(){Content = "Phase 1", Style = new TextStyle(){ Color = "White", TextDecoration = TextDecoration.Underline, Italic = true, Bold = true} },
                            Height = 30
                        },
                        Style = new TextStyle(){Fill = "Teal"},
                    }
                }
            };
        // Add swimlane.
        SwimlaneCollections.Add(swimlane);
    }
}
Refer to the following image.

Step 4: Adding nodes into a lane
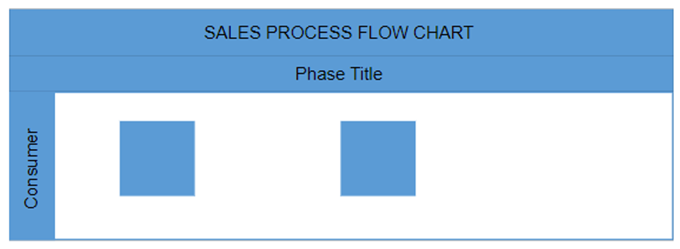
To add nodes to a lane, we should add a node collection to the lane’s children collection. The node’s LaneOffsetX and LaneOffsetY properties will position the element in the lane canvas. By default, lane children will maintain a 20px padding from the lane canvas.
The following code example explains how to add nodes to a lane.
@using Syncfusion.Blazor.Diagram

<SfDiagramComponent Height="600px" Swimlanes="@SwimlaneCollections" />

@code
{
    //Define the diagram's swimlane collection.
    DiagramObjectCollection<Swimlane> SwimlaneCollections = new DiagramObjectCollection<Swimlane>();

    protected override void OnInitialized()
    {
        // A swimlane is created and stored in the swimlanes collection.
        Swimlane swimlane = new Swimlane()
            {
                Header = new SwimlaneHeader()
                {
                    Annotation = new ShapeAnnotation()
                    {
                        Content = "SALES PROCESS FLOW CHART"
                    },
                    Height = 50,
                },
                OffsetX = 400,
                OffsetY = 200,
                Height = 120,
                Width = 450,
                Lanes = new DiagramObjectCollection<Lane>()
                {
                    new Lane(){Height = 100,
                    Header = new SwimlaneHeader(){
                        Width = 30,
                        Annotation = new ShapeAnnotation(){ Content = "Consumer" }
                    },
                    Children = new DiagramObjectCollection<Node>()
                    {
                        new Node(){Height = 50, Width = 50, LaneOffsetX = 100, LaneOffsetY = 30},
                        new Node(){Height = 50, Width = 50, LaneOffsetX = 250, LaneOffsetY = 30},
                    }
                    },
                }
            };
        // Add swimlane.
        SwimlaneCollections.Add(swimlane);
    }
}
Refer to the following image.
References
For more details, refer to the Blazor Swimlane Diagram documentation and web and GitHub demos.
Conclusion
Thanks for reading! This blog explores the new Swimlane feature added in the Syncfusion Blazor Diagram component as part of the 2024 Volume 1 release. Mastering Swimlane diagrams opens opportunities for enhanced process visualization and improved decision-making. Incorporating Swimlane diagrams into your apps empowers users to understand complex business processes efficiently and drive organizational efficiency.
Also, check out the other new updates in this 2024 volume 1 release through our Release Notes and What’s New pages.
Try out these features and share your feedback as comments on this blog. You can also reach us through our support forums, support portal, or feedback portal. We are always happy to assist you!
Related blogs
- Easily Customize the Toolbar in Blazor PDF Viewer
- Introducing the New Blazor Timeline Component
- Effortless Remote Debugging with Dev Tunnel in Visual Studio 2022
- What’s New in Syncfusion Blazor: 2024 Volume 1

