In Syncfusion’s Essential Studio® 2022 Volume 4 release, we introduced a new MaskedTextBox control for the WinUI platform.
The WinUI MaskedTextBox control is an advanced input control that restricts the input of certain characters by using a mask pattern. We can use this control to create templates for providing information such as telephone numbers, email IDs, IP addresses, and product keys.
Let’s look at the features of the new WinUI MaskedTextBox control, and then I’ll demonstrate how to get started with it.
Key features
The key features of the WinUI MaskedTextBox control are:
Mask types
There are two types of masks, simple and regex. Each has a different set of mask elements combined to form a mask expression:
- Simple: To create expressions with specific mask elements for fixed-length inputs.
- Regex: To create more complex expressions for input data.


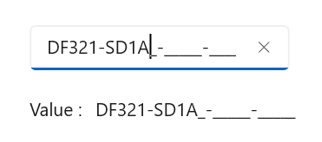
PromptChar
You can customize the default prompt character (_), which is used in the absence of input.

Formatting value
The WinUI MaskedTextBox control provides the following options to format the input values with literals, prompts, and typed characters:
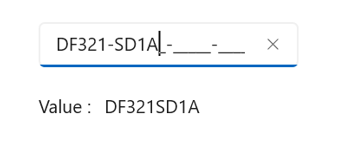
- ExcludePromptAndLiterals: Excludes the prompt and literal characters, preserving only the typed characters.
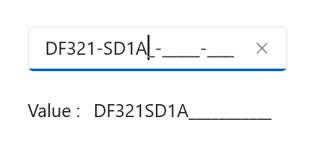
- IncludePrompt: Keeps typed and prompt characters, excluding literals.
- IncludeLiterals: Keeps typed and literal characters, excluding prompt characters.
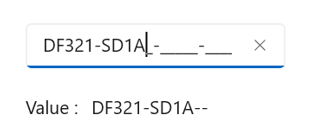
- IncludePromptAndLiterals: Maintains typed, prompt, and literal characters in the input.
Refer to the following images.
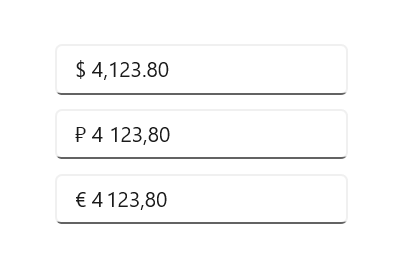
Cultures
You can set any culture to currency symbols, date separators, time separators, group separators, and decimal separators.
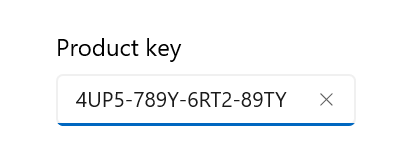
Header
You can set a title for the MaskedTextBox control and customize the title’s appearance with the header template.
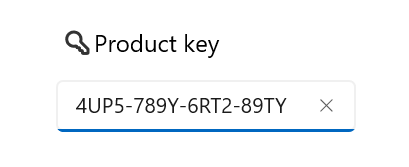
Description
You can set the description for the MaskedTextBox control to guide the user to enter the expected input.
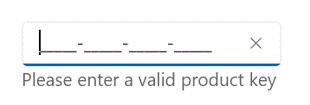
Getting started with the WinUI MaskedTextBox control
We have seen the features of the WinUI MaskedTextBox control. Let’s learn how to integrate it into your WinUI app and utilize its features by following these steps.
Step 1: Create a WinUI application.
First, create a simple WinUI app using the Windows App SDK.
Step 2: Add the Syncfusion.Editors.WinUI NuGet package.
Then, install the latest Syncfusion.Editors.WinUI NuGet package in your project from the NuGet Gallery or from the installed location, C:\Program Files (x86)\Syncfusion\Essential Studio®\WinUI\xx.x.x.xx\NuGetPackages.
Note: The xx.x.x.xx denotes the version of the installed Syncfusion WinUI Editors package.
Step 3: Add the namespace.
Now, include the Syncfusion.UI.Xaml.Editors namespace in your XAML file with the following code.
xmlns:syncfusion= “using:Syncfusion.UI.Xaml.Editors”Step 4: Initialize the WinUI MaskedTextBox control.
Finally, initialize the WinUI MaskedTexBox control. Here, we’ll use the regex mask type for the email ID field. Refer to the following code example.
<Page
    x:Class="GettingStarted.MainPage"
    xmlns="http://schemas.microsoft.com/winfx/2006/xaml/presentation"
    xmlns:x="http://schemas.microsoft.com/winfx/2006/xaml"
    xmlns:local="using:GettingStarted"
    xmlns:d="http://schemas.microsoft.com/expression/blend/2008"
    xmlns:mc="http://schemas.openxmlformats.org/markup-compatibility/2006"
    xmlns:syncfusion="using:Syncfusion.UI.Xaml.Editors"
    mc:Ignorable="d"
    Background="{ThemeResource ApplicationPageBackgroundThemeBrush}">

    <Grid>
      <syncfusion:SfMaskedTextBox Width="200"
                                   MaskType="RegEx"
                                   Mask="[A-Za-z0-9._%-]+@[A-Za-z0-9]+\.[A-Za-z]{2,3}" />
    </Grid>
</Page>
This code example will create a MaskedTextbox control like the following image.

Conclusion
Thanks for reading! I hope learning about the new Syncfusion WinUI MaskedTextBox control and its features was enjoyable. Our 2022 Volume 4 release included this control. To see all the new upgrades in this release, look at our Release Notes and What’s New pages. Try them out, then share your thoughts in the comments section below.
You can download and check our WinUI demo app in the Microsoft Store.
The new version of Essential Studio® is available for current customers from the License and Downloads page. If you are not a Syncfusion customer, you can try our 30-day free trial to check out our newest features.
You can contact us through our support forums, support portal, or feedback portal. We are always happy to assist you!

