TL;DR: Let’s see how to save chat conversations using Firebase Realtime Database in a .NET MAUI app. We’ll set up Firebase, configure the database, and integrate it with the .NET MAUI Chat control. Messages will be stored and retrieved in real time using Firebase queries. This guide helps you build a seamless and interactive chat experience.
Syncfusion .NET MAUI Chat control, or conversational UI, provides a modern chat experience. It is a flexible control that displays conversations between two or more users in a fully customizable layout. You can show messages with all types of content, such as text, images, hyperlinks, cards, and more, and even integrate the component with chatbot frameworks.
In this blog, we’ll see how to save chat conversions to the Firebase Realtime Database using the .NET MAUI Chat control.
Setting up the Firebase Realtime Database
Creating a Firebase Realtime Database involves a few simple steps, including setting up your Firebase project, enabling the database, and configuring it for your app. Here’s a detailed guide:
Create a Firebase project
- First, go to the Firebase console.
- Click on the Create a Project option.
- Then, enter the project name and click continue. Refer to the following image.

Create the database
Let’s set up a Firebase Realtime Database by following these steps:
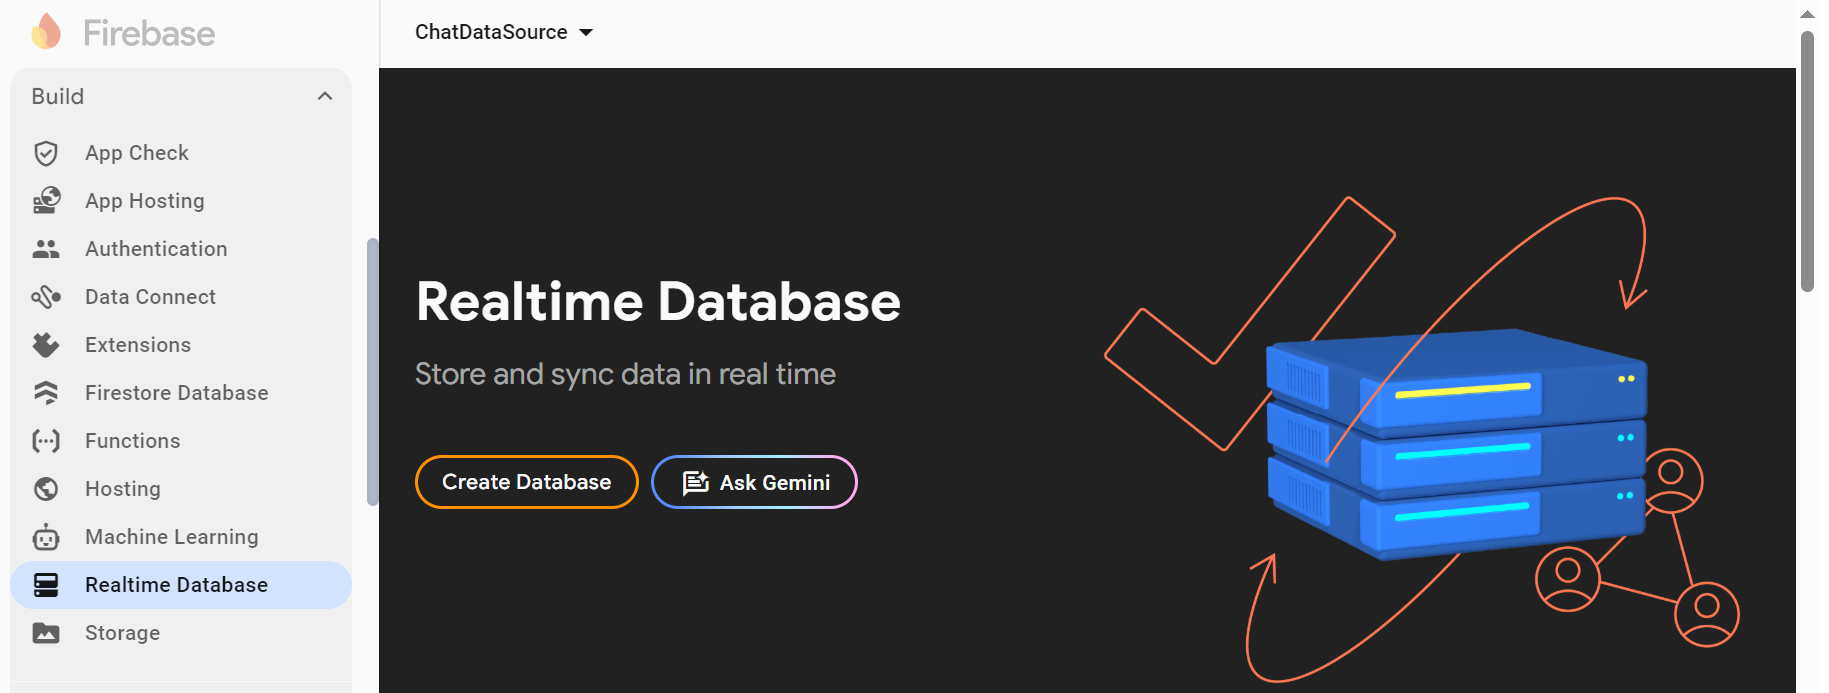
- Navigate to the Realtime Database section under the Build menu.
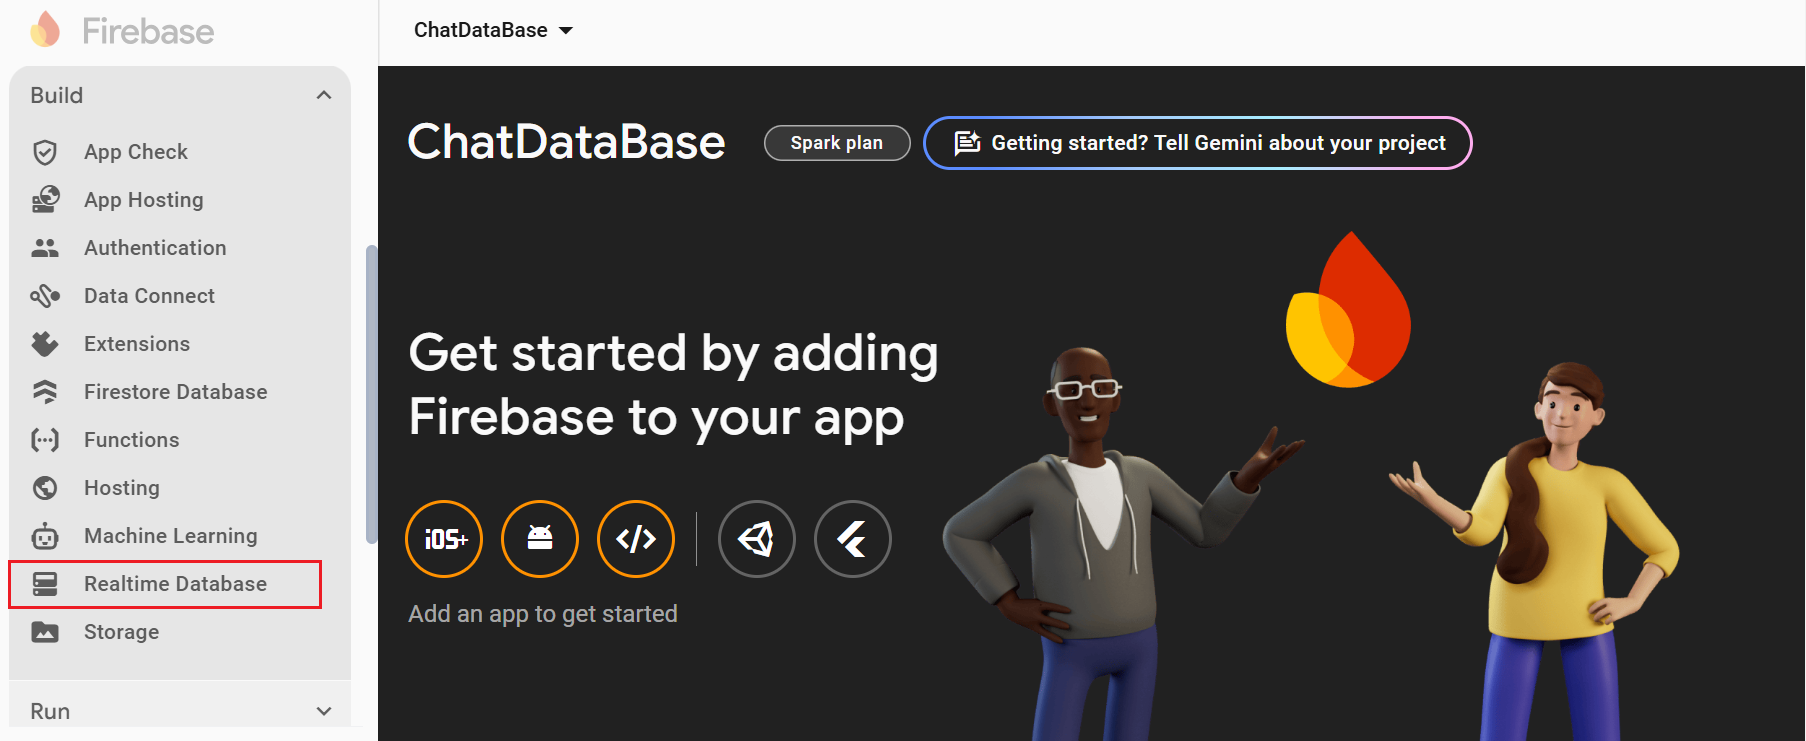

- Choose the Create Database option.

- Choose a database location and configure the initial security rules for access.
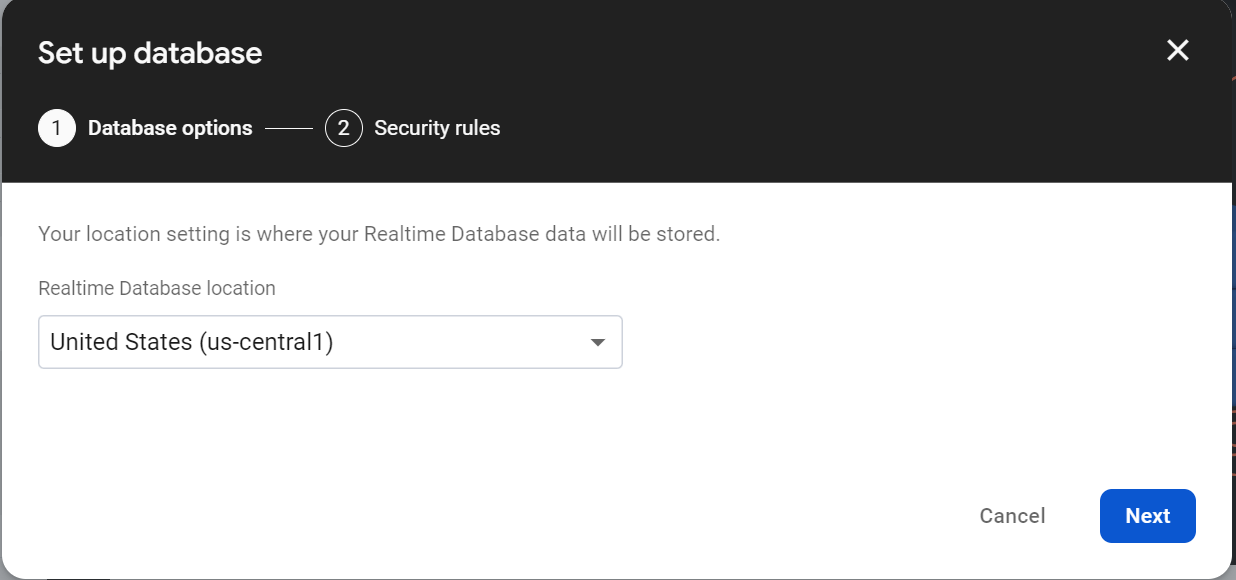

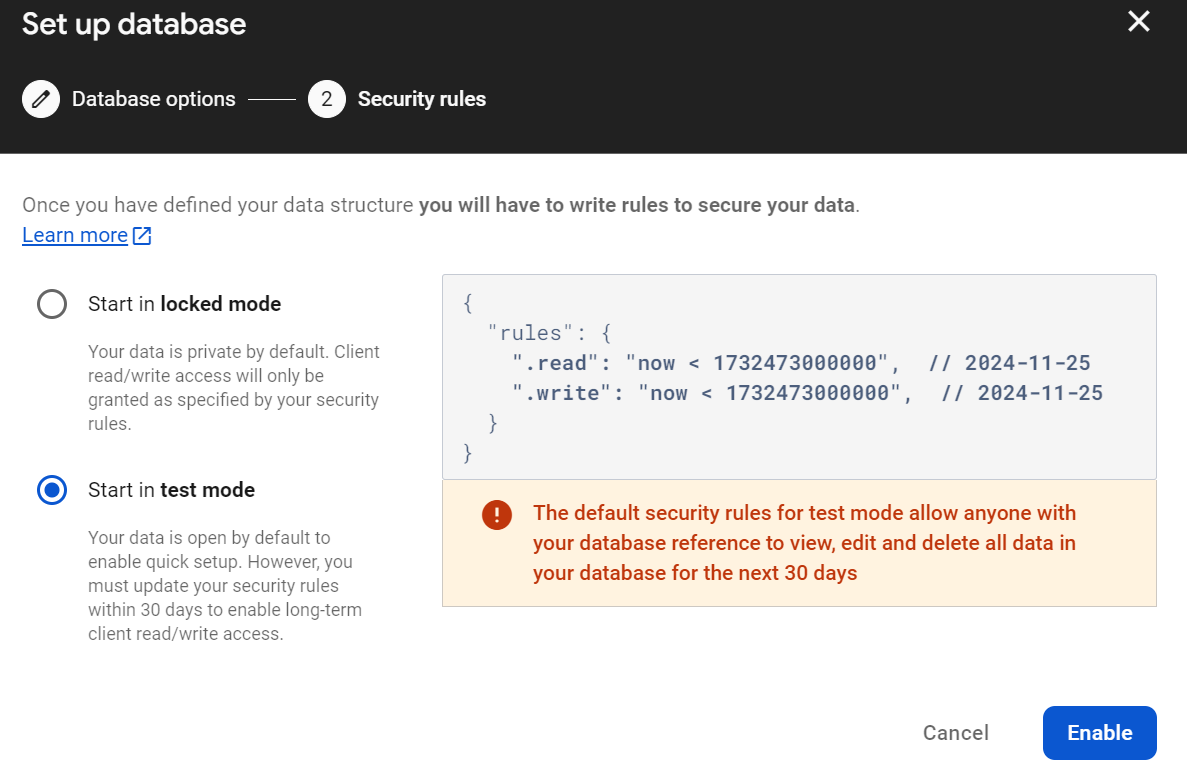
- Click Next to configure the security rules for your database to secure your data.
- Then, select the Start in test mode option and choose the Enable option at the bottom.

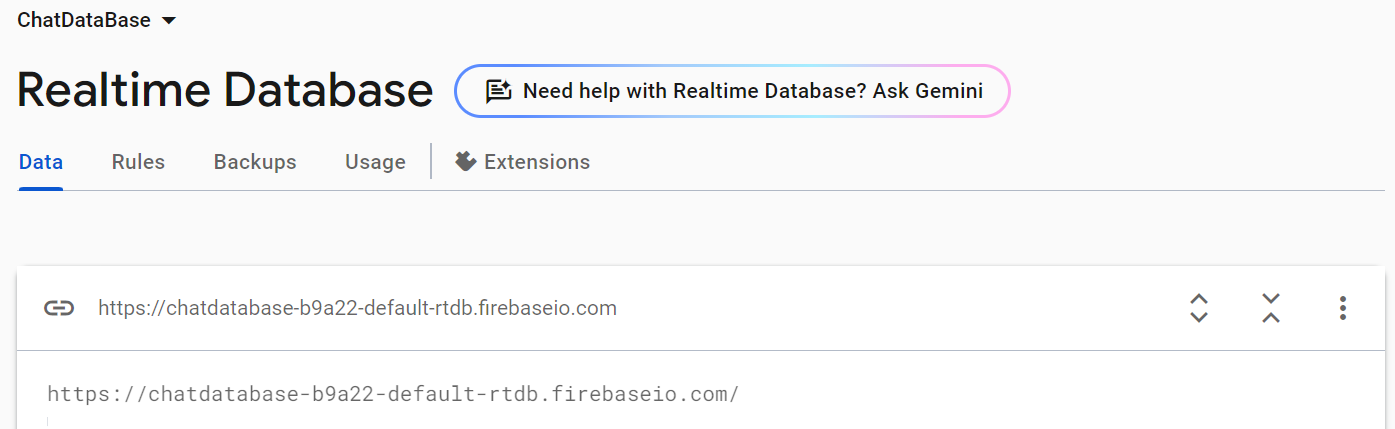
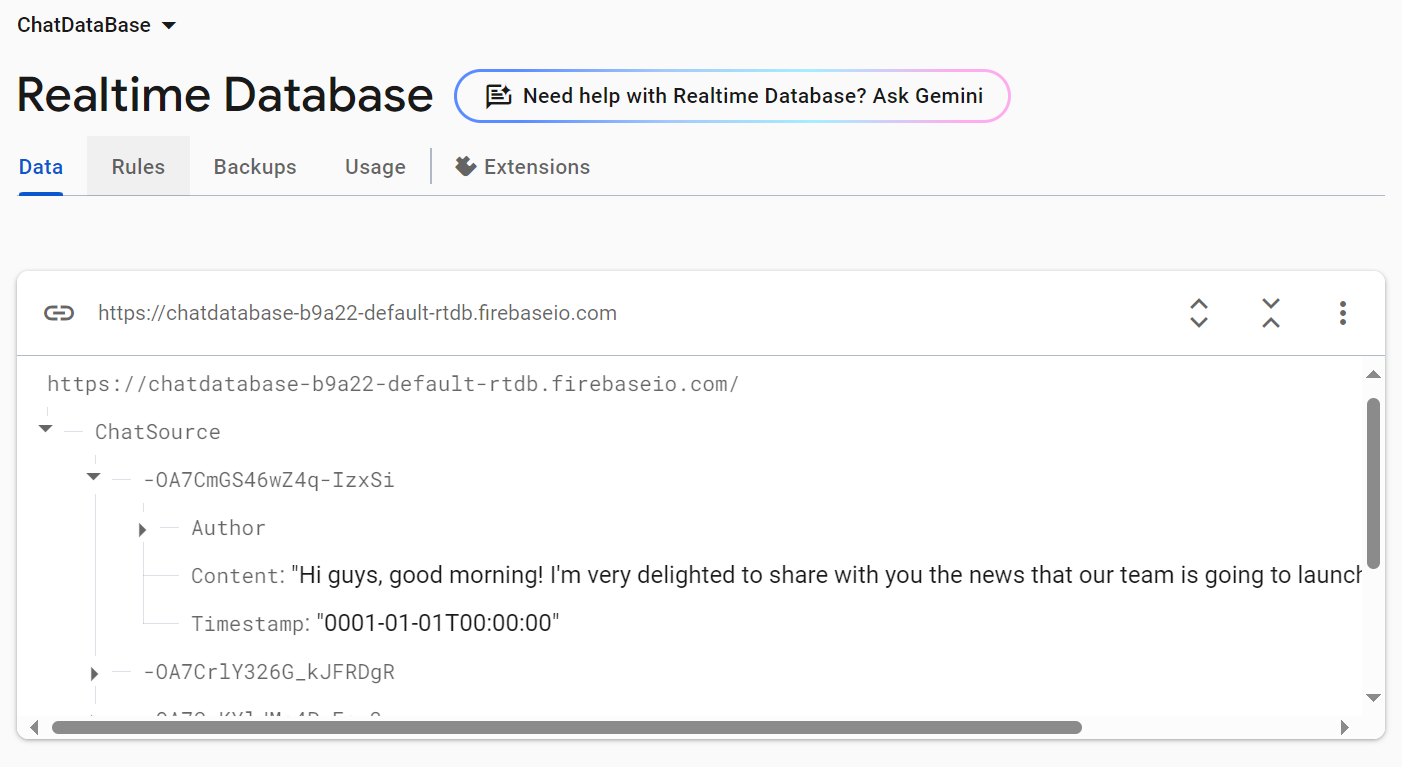
- Now, we’ve successfully created the Firebase Realtime database. Get the database URL from the Firebase console. Refer to the following image.

Configure Firebase in your .NET MAUI app
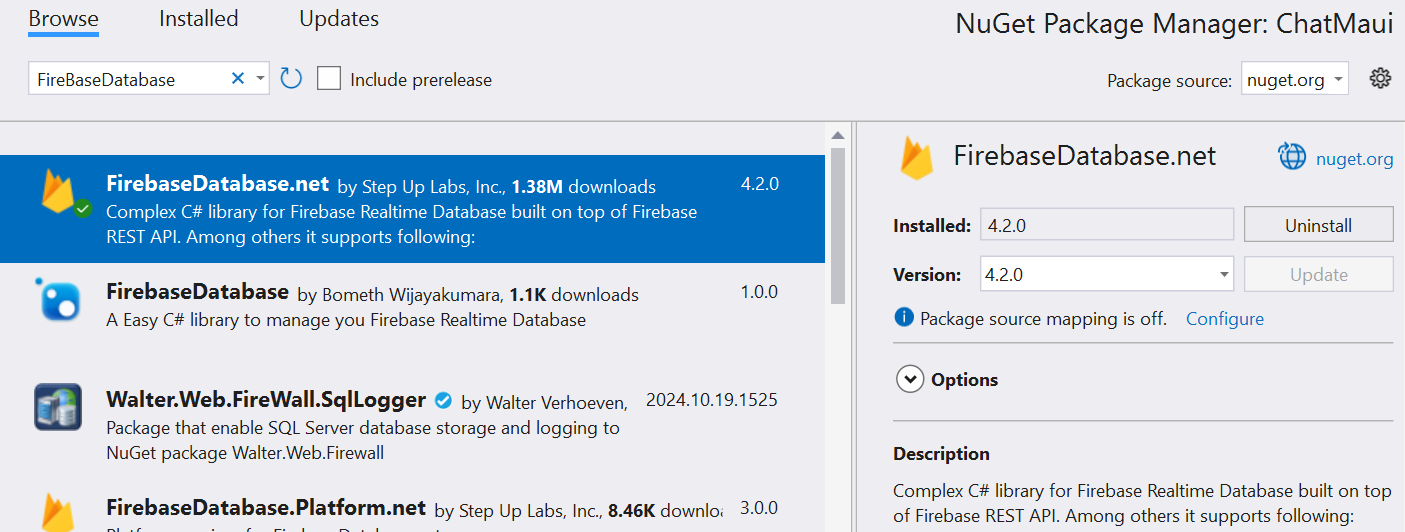
- Create a new .NET MAUI project and install the FirebaseDatabase.net NuGet package.

- Then, create the database model class with the required properties/data.
public class ChatMessage { public Author Author { get; set; } public string? Content { get; set; } public DateTime Timestamp { get; set; } public string Url { get; set; } public ImageSource Thumbnail { get; set; } } - In the RealtimeDatabaseService class, create the FirebaseClient instance with the Realtime database URL from the Firebase console.
using Firebase.Database; using Firebase.Database.Query; namespace ChatMaui { internal class RealtimeDatabaseService { internal FirebaseClient DatabaseClient { get; set; } public RealtimeDatabaseService() { var firebaseDatabaseUrl = "https://chatdatabase-b9a22-default-rtdb.firebaseio.com/"; // Initialize FirebaseClient. DatabaseClient = new FirebaseClient(firebaseDatabaseUrl); } } } - Now, include the code logic to post a new request and store the instance of ChatMessage, which holds the details of the chat message, using the PostAsync method. Here, the ChatSource indicates the collection or data structure of the saved data.
internal async Task SendMessageAsync(ChatMessage content)
{
    await DatabaseClient
        .Child("ChatSource")
        .PostAsync(content);
}
Add and configure the .NET MAUI Chat control
First, refer to the .NET MAUI Chat control’s getting started documentation.
Create the ViewModel
Create the CurrentUser property of type Author in the ViewModel class. Then, create the TextMessage instance. Set values for the Message.Author and Message.Text properties and add it to the ViewModel.Messages collection.
Refer to the available message types in .NET MAUI Chat.
public class ViewModel : INotifyPropertyChanged
{
        . . .
        . . .
        public Author CurrentUser
        {
            get
            {
                return this.currentUser;
            }
            set
            {
                this.currentUser = value;
                RaisePropertyChanged("CurrentUser");
            }
        }

        public ObservableCollection<object> Messages
        {
            get
            {
                return this.messages;
            }

            set
            {
                this.messages = value;
                RaisePropertyChanged(nameof(this.messages));
            }
        }
}
Now, bind the CurrentUser and Messages properties from the ViewModel to the SfChat control.
<ContentPage.BindingContext>
    <local:ViewModel />
</ContentPage.BindingContext>

<ContentPage.Content>
    <sfchat:SfChat x:Name="sfChat"
                   Messages="{Binding Messages}"
                   CurrentUser="{Binding CurrentUser}" />
</ContentPage.Content>
Implementing the chat saving and retrieval logic
Let’s create the LoadMessages method in the ViewModel class and implement the Subscribe query to retrieve the data and notify the changes in your database.
In this method, we’ll retrieve the existing data from the database, create a TextMessage, and add it to the Messages collection. This Subscribe event will be invoked when a new message is added on-demand in the SfChat control.
public IDisposable LoadMessages()
{
    return databaseClient.Child("ChatSource")
        .AsObservable<ChatMessage>().Subscribe((data) =>
        {
            if (data.Object != null && data.EventType == Firebase.Database.Streaming.FirebaseEventType.InsertOrUpd
            {
                Author author;
                if (data.Object.Author.Name == CurrentUser.Name)
                {
                    author = CurrentUser;
                }
                else
                {
                    author = new Author()
                    {
                        Name = data.Object.Author.Name,
                        Avatar = data.Object.Author.Avatar != null ? data.Object.Author.Avatar : "steven.png"
                    };
                }

                MainThread.BeginInvokeOnMainThread(() =>
                {
                    var message = new TextMessage()
                    {
                        Author = author,
                        Text = data.Object!.Content!,
                        DateTime = data.Object.Timestamp
                    };

                    this.Messages.Add(message);
                });
            }
        });
}
Then, add the following code in the Appearing event of the ContentPage to wire the Subscribe event handler to an observable sequence.
private void OnAppearing(object? sender, EventArgs e)
{
    this.SuscribeInGrupalChat = viewModel.LoadMessages();
}
Save the new message to the Firebase Realtime Database
Configure the SendMessage event of the .NET MAUI Chat control and create an instance of ChatMessage by using SendMessageEventArgs details. Then, invoke the SendMessageAsync method to invoke the PostAsync query of Firebase. Once the message is stored in the database, the Subscribe event handler will be notified, and that new message will be added to the .NET MAUI Chat control manually.
chat.SendMessage += OnSendMessage;
private async void OnSendMessage(object? sender, SendMessageEventArgs e)
{
// Set Handled=True to prevent adding the new message automatically and enable the user to add it manually.
e.Handled = true;
var newMessage = e.Message?.Text;
var dt = DateTime.Now;
chat.Editor.Text = string.Empty;
if (!string.IsNullOrEmpty(newMessage) && !string.IsNullOrEmpty(viewModel.CurrentUser.Name))
{
await viewModel.FireBaseDatabase.SendMessageAsync(new ChatMessage
{
Author = viewModel.CurrentUser,
Content = newMessage,
Timestamp = dt,
});
}
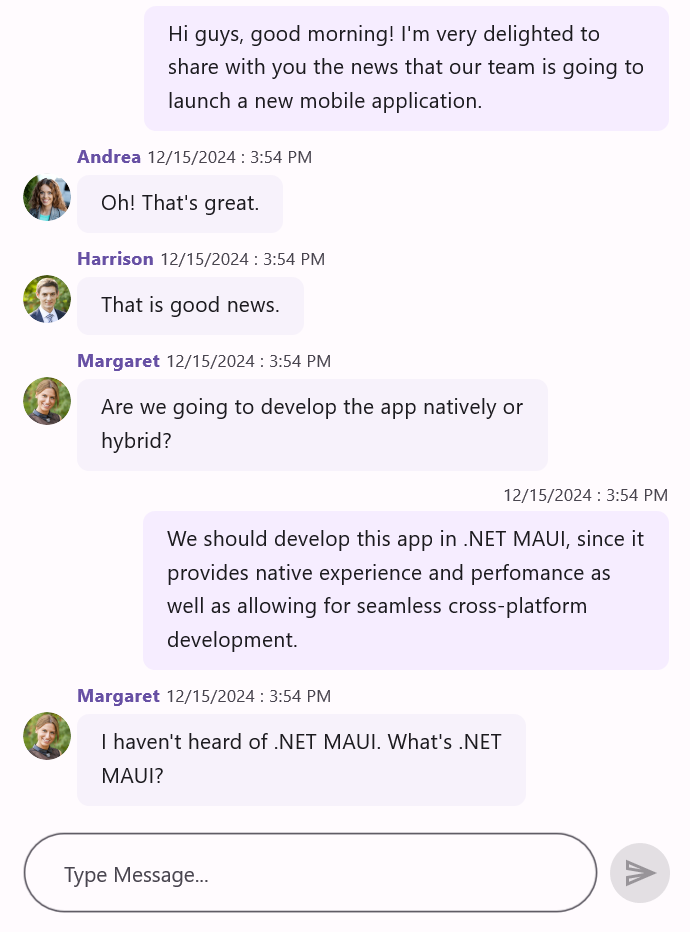
}With the Firebase Realtime Database and .NET MAUI Chat control, we can easily build a robust chat app with minimal configuration. This setup provides an efficient way to save, retrieve, and display chat messages in real time.
Refer to the following images.
GitHub demo
For more details, refer to the saving chat conversations to Firebase Realtime Database using the .NET MAUI Chat control GitHub demo.

Conclusion
Thanks for reading! In this blog, we’ve seen how to create a chat app using the Syncfusion .NET MAUI Chat control and Firebase Realtime Database. We’ve also seen how to save and retrieve chat data to the database. Try the steps discussed in this blog and leave your feedback in the comments below!
Existing customers can access the new version of Essential Studio® on the License and Downloads page. If you aren’t a Syncfusion customer, try our 30-day free trial to experience our fantastic features.
If you have any questions or require assistance, you can contact us through our support forums, support portal, or feedback portal. We are always happy to assist you!