Progressive web applications (PWAs) are the future of web development, offering an app-like experience that is fast, reliable, and engaging. With Blazor WebAssembly (WASM), we have a powerful tool to build interactive, client-side web apps with .NET.
If a user wants the same Blazor WASM app to work across multiple platforms and devices, be responsive and offline, without migrating the exact requirement into multiple native apps, they need a PWA.
In this blog, we’ll see how to transform a Blazor WebAssembly app into a progressive web app (PWA), a process that promises to redefine your web development experience.
Hosting a PDF Viewer in a Blazor WASM app
First, we’ll create a Blazor WASM app, beginning with a use case of adding and hosting a PDF Viewer, like an online PDF Viewer tool, to open and view PDF files. When the app is completed and hosted on the online server, online PDF viewing will be available to internet users worldwide.
Step 1: Setup your environment
Before starting, ensure you have the latest version of Visual Studio installed on your computer. You’ll also need to have .NET Core 3.1 or later installed.
Step 2: Create a new project
Launch Visual Studio and create a new Blazor WebAssembly app project. You can do this by navigating to File -> New -> Project, selecting Blazor App, and clicking Next. Give your project a name and click Create. Select Blazor WebAssembly App on the next screen and click Create.
Step 3: Install the required NuGet packages
After creating the project, install the PDF Viewer package. Open the NuGet package manager by navigating to Tools -> NuGet Package Manager -> Manage NuGet Packages for Solution. In the package manager, search for Syncfusion.Blazor.SfPdfViewer and Syncfusion.Blazor.Themes and install these packages.
Step 4: Include the namespaces
Add the Syncfusion.Blazor and Syncfusion.Blazor.SfPdfViewer namespaces in the _Imports.razor page. The PDF Viewer component is part of the Syncfusion.Blazor.SfPdfViewer namespace, so it needs to be accessible in your Blazor app.
Step 5: Register the Syncfusion Blazor service
In the Program.cs page, register the Syncfusion Blazor Service. Syncfusion’s components are services that must be registered and configured in your app’s startup code before they are used.
Step 6: Include the Bootstrap 5 theme file
Then, add the Bootstrap 5 theme file from the Syncfusion.Blazor.Themes package to the index.html page. This is to ensure that the Syncfusion components in your app have a consistent look and feel that matches Bootstrap 5’s styling.
Step 7: Include the component-oriented script files
The component-oriented script file from the Syncfusion.Blazor.SfPdfViewer package should also be included in the index.html page. This script file contains the client-side code for the PDF Viewer component.
Step 8: Declare and define the SfPdfViewer component
Finally, declare and describe your app’s SfPdfViewer component. This is where you specify how the PDF Viewer should behave and what PDF document it should display.
Refer to the following code example.
Index.razor
@page "/"

<SfPdfViewer2 Height="100%" Width="100%" />
By following these steps, you’re setting up your Blazor WASM app to use Syncfusion’s Blazor PDF Viewer component, allowing your app to display PDF documents in a user-friendly manner.
Note: For more details, refer to the Blazor PDF Viewer getting started documentation.
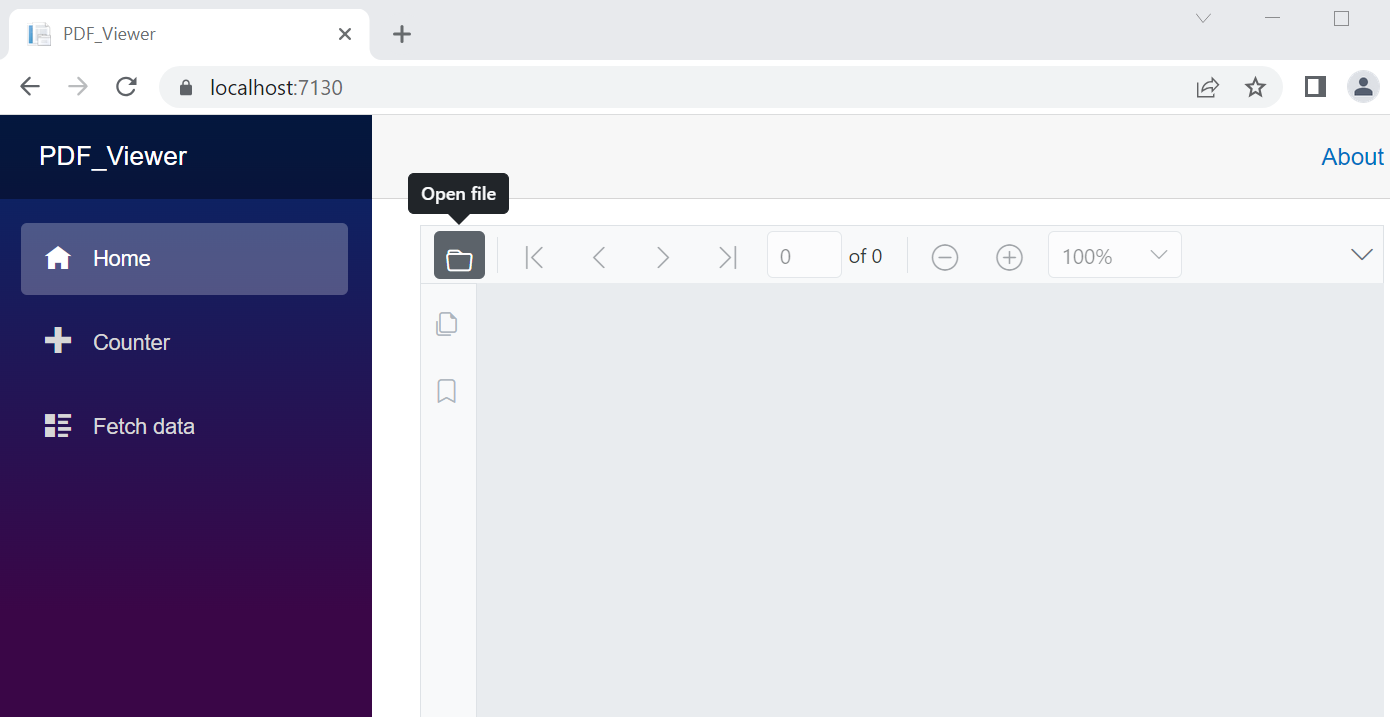
When you run the app, you will get the following output.
Transform your Blazor WASM app into a progressive web app
We’ve created a Blazor WASM app in the previous section, and now we’ll go over the steps required to convert the same app to a progressive web app. So, for the conversion, we primarily need the following files to be included in our Blazor WASM app:
- manifest.json: This file contains the metadata used to define and configure the PWA, such as the name, short name, start URL, background color, and icons.
- service-worker.js: This is a JavaScript file that helps in the work of PWAs by caching the app and its data to be used offline.
Note: This is used during the development phase.
- service-worker.published.js: This is similar to service-worker.js but is used once the app is published.
- icon-192.png
- icon-512.png
Note: The design of the icon-192.png and icon-512.png files are up to you. They are not mandatory. These icons will appear as the PWA app’s shortcut icon once installed.
You can download all the files listed above from this GitHub repository. After downloading them, please copy and paste them into the wwwroot folder of your Blazor WASM app. Then, in the index.html file of the wwwroot folder, reference the manifest.json, service-worker.js, and icon files.
Refer to the following code example.
index.html
<head>
    ……
    ……
    <link href="manifest.json" rel="manifest" />
    <link rel="icon" sizes="192x192" href="icon-192.png" />
    <link rel="icon" sizes="512x512" href="icon-512.png" />
</head>

<body>
    ……
    ……
    <script src="_framework/blazor.webassembly.js"></script>
    <script>navigator.serviceWorker.register('service-worker.js');</script>
</body>
Now, add the ServiceWorkerAssetsManifest option to the PropertyGroup and the ServiceWorker option to the ItemGroup.
Refer to the following code example.
*.csproj
<Project Sdk="Microsoft.NET.Sdk.BlazorWebAssembly">

  <PropertyGroup>
    ……
    ……
    <ServiceWorkerAssetsManifest>service-worker-assets.js</ServiceWorkerAssetsManifest>
  </PropertyGroup>

  <ItemGroup>
    ……
    ……
    <ServiceWorker Include="wwwroot\service-worker.js" PublishedContent="wwwroot\service-worker.published.js" />
  </ItemGroup>

</Project>
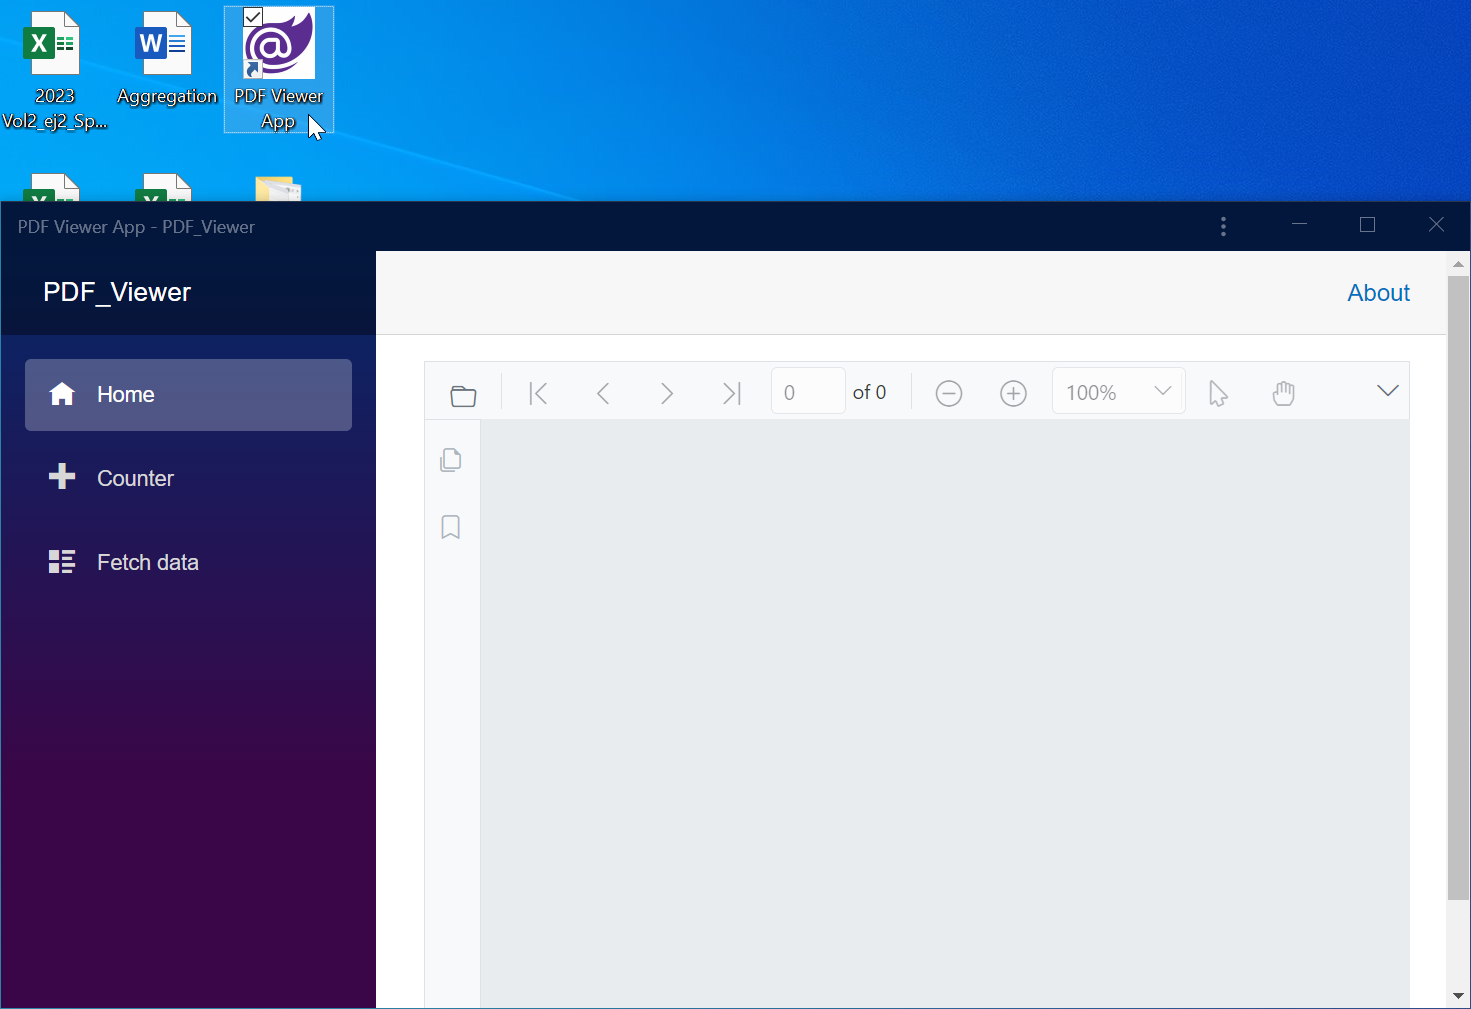
Finally, completely clean the project solution, rebuild it, and run it. You will see the same output but with an app installation option in the address bar. Click that to install your app. You can now see a desktop shortcut icon and your app running.
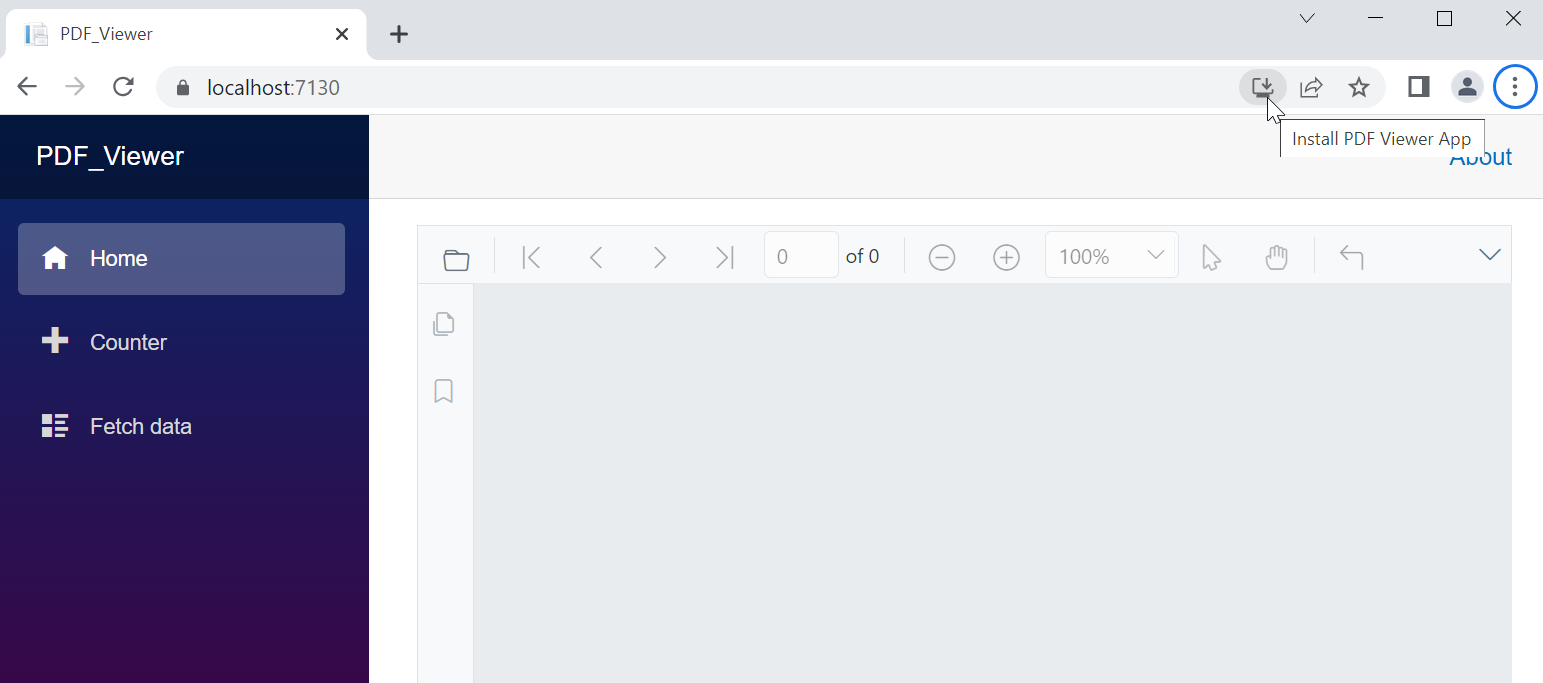
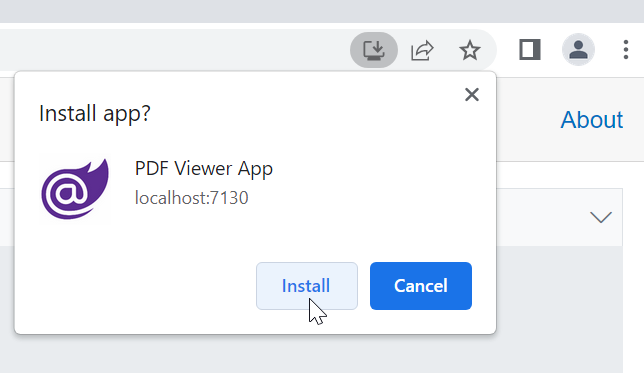
Following the installation, the app will run and display the PDF Viewer to upload and view PDF files.
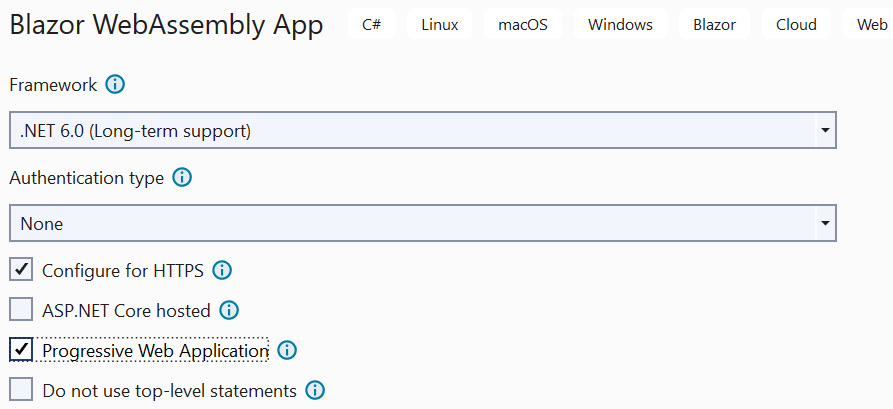
Important Note: If you are creating a Blazor WASM app for the first time, you don’t need to follow the steps previously outlined. When you are creating a new Blazor WASM app project, you can select the Progressive Web Application option directly.
References
For more details, refer to our documentation and GitHub demo.
Conclusion
Thanks for reading! In this blog, we’ve explored how to convert your existing Blazor WASM app into a progressive web app. Try out the steps in this blog post and share your feedback in the comments below.
The Syncfusion Blazor component library offers 85+ responsive, lightweight components, including DataGrid, 50+ Charts, and Scheduler, for building modern web apps.
The new version of Essential Studio® is available for existing customers on the License and Downloads page. If you are not a Syncfusion customer, try our 30-day free trial to check out our controls’ features.
For questions, you can reach us through our support forum, support portal, or feedback portal. We are always happy to assist you!
Related blogs
- Explore the Possibilities of the Blazor Playground App
- Enhance the User Experience in E-Commerce Checkouts Using the Stepper Control [Webinar Show Notes]
- Introducing the New Blazor Dropdown Tree Component
- Effortlessly Generate Radial Tree Diagrams in Blazor
- Blazor Synchronized Charts: The Perfect Tool for Trade Analysis
