.NET MAUI is a cross-platform framework that allows developers to create desktop and mobile applications from a single codebase with C#. In this article, we develop a simple .NET MAUI OCR scanner to scan images and convert them to PDF with searchable text using the Syncfusion OCR library.
The Syncfusion .NET Optical Character Recognition (OCR) library extracts text from scanned PDFs and images. It uses the Tesseract OCR engine. The Syncfusion OCR library does not work on mobile platforms with the Tesseract engine, so starting from version 20.3.0.47, we added support to use any external OCR service, such as Azure Cognitive Services OCR, with our existing OCR library to process OCR in mobile platforms.
Steps to build an OCR scanner application in .NET MAUI
In the following steps, we will create a .NET MAUI app, install different dependencies, and use the Syncfusion OCR library to convert an image into a readable PDF.
Step 1: Create a .NET MAUI project
Create a simple .NET MAUI project by referring to the documentation build your first .NET MAUI app.
Step 2: Install the dependencies
Install the following NuGet packages:
- Syncfusion.PDF.OCR.NET: The Syncfusion .NET OCR library.
- Microsoft.Azure.CognitiveServices.Vision.ComputerVision: This client library provides access to the Microsoft Cognitive Services ComputerVision APIs.
Step 3: Add UI elements
In this application, we get images from the user in the following ways:
- Open the camera and capture images such as receipts, notes, documents, photos, and business cards.
- Select images from the device’s photo gallery.
Open camera and capture image
Add a button in the UI to open the camera.
<Button x:Name=”CameraBtn”
	  Text=”Open Camera”
          Clicked=”OnCameraClicked”
          HorizontalOptions=”Center” />
Use the MAUI MediaPicker API to open and capture images using the camera. The MediaPicker API needs permission to access the camera and internal storage. Refer to the get started section of the API documentation to set the permissions.
Call the CapturePhotoAsync method to open the camera and capture the image. Refer to the complete code below.
private void OnCameraClicked(object sender, EventArgs e)
{
   TakePhoto();
}
//Open camera and take photo
public async void TakePhoto()
{
   if (MediaPicker.Default.IsCaptureSupported)
   {
      FileResult photo = await MediaPicker.Default.CapturePhotoAsync();
      if (photo != null)
      {
          // Save the file into local storage.
          string localFilePath = Path.Combine(FileSystem.CacheDirectory, photo.FileName);

          //Reduce the size of the image.
          using Stream sourceStream = await photo.OpenReadAsync();
          using SKBitmap sourceBitmap=SKBitmap.Decode(sourceStream);
          int height = Math.Min(794, sourceBitmap.Height);
                int width = Math.Min(794, sourceBitmap.Width);

          using SKBitmap scaledBitmap = sourceBitmap.Resize(new SKImageInfo(width, height),SKFilterQuality.Medium);
          using SKImage scaledImage = SKImage.FromBitmap(scaledBitmap);

          using (SKData data = scaledImage.Encode())
          {
              File.WriteAllBytes(localFilePath, data.ToArray());
          }

           //Create model and add to the collection
           ImageModel model = new ImageModel() { ImagePath = localFilePath, Title = "sample", Description = "Cool" };
           viewModel.Items.Add(model);
      }
   }
}
Select an image from the gallery
Add a button in the UI to select an image.
<Button
	x:Name="CounterBtn"
	Text="Select Image"
	Clicked="OnCounterClicked"
	HorizontalOptions="Center" />
Use the MAUI MediaPicker API to select images from the device’s photo gallery. Use the PickPhotoAsync method to select images from the gallery. Refer to the following code snippet.
private void OnCounterClicked(object sender, EventArgs e)
{
    PickPhoto();
}

//Select images from gallery.
public async void PickPhoto()
{
   if (MediaPicker.Default.IsCaptureSupported)
   {
       FileResult photo = await MediaPicker.Default.PickPhotoAsync();

       if (photo != null)
       {
          // Save the file into local storage.
          string localFilePath = Path.Combine(FileSystem.CacheDirectory, photo.FileName);

          using Stream sourceStream = await photo.OpenReadAsync();
          using FileStream localFileStream = File.OpenWrite(localFilePath);

          await sourceStream.CopyToAsync(localFileStream);

          ImageModel model = new ImageModel() { ImagePath = localFilePath, Title = "sample", Description = "Cool" };
          viewModel.Items.Add(model);
      }
    }
}
Once we receive the images, present those images in the UI using the CollectionView. Refer to the MAUI data templates documentation to bind the image data into the CollectionView.
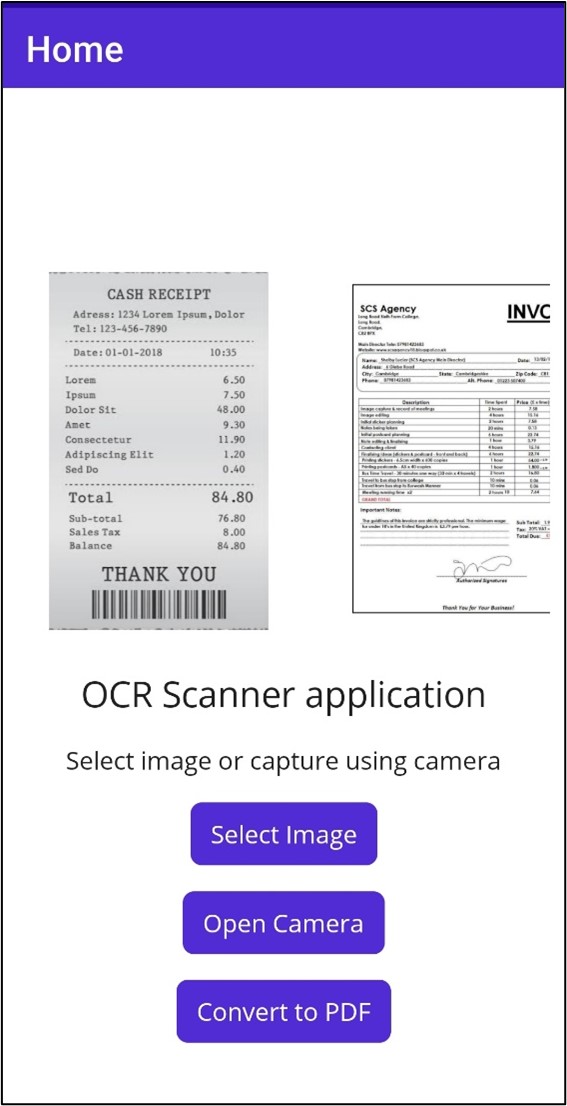
Finally, convert the image to PDF with OCR, so our simple UI looks like the following picture.
 Refer to the MainPage.xaml file on GitHub for the complete UI.
Step 4: Convert images to PDF with OCR text
Here, we use the Syncfusion OCR library with the external Azure OCR engine to convert images to PDF.
Please refer to this article to configure and use the Azure Computer Vision OCR services. We have already created a class named AzureOcrEngine.cs to process images. You can use this class as it is in your project without any changes. You just need to add your subscription key and endpoint in the code.
The AzureOCREngine implements the interface IOcrEngine. The IOcrEngine has a method named PerformOCR that takes an image stream as an argument. Now, call the external OCR service with the input image and it returns OCRLayoutResult as the result.
Assign AzureOCREngine as an external OCR engine using the API ExternalEngine available in the OCRProcessor class from the Syncfusion PDF OCR library.
Refer to the following code example.
public void ConvertToPDF()
{
    Task.Run(async () =>
    {

       PdfDocument finalDcoument = new PdfDocument();
       if (viewModel.Items.Count == 0)
          return;
       using (OCRProcessor processor = new OCRProcessor())
       {

          processor.ExternalEngine = new AzureOcrEngine();
          foreach (var item in viewModel.Items)
          {
             FileStream imageStream = new FileStream(item.ImagePath,FileMode.Open);
             PdfDocument document = processor.PerformOCR(imageStream);
             MemoryStream saveStream = new MemoryStream();
             document.Save(saveStream);
             document.Close(true);
             PdfDocument.Merge(finalDcoument,saveStream);
         }

      }

    MemoryStream fileSave = new MemoryStream();
    finalDcoument.Save(fileSave);
    fileSave.Position = 0;
    finalDcoument.Close(true);

    Dispatcher.Dispatch(() =>
    {
        popup.Close();
        SaveService service = new SaveService();
        service.SaveAndView("Output.pdf", "application/pdf", fileSave);
    });

  });
}
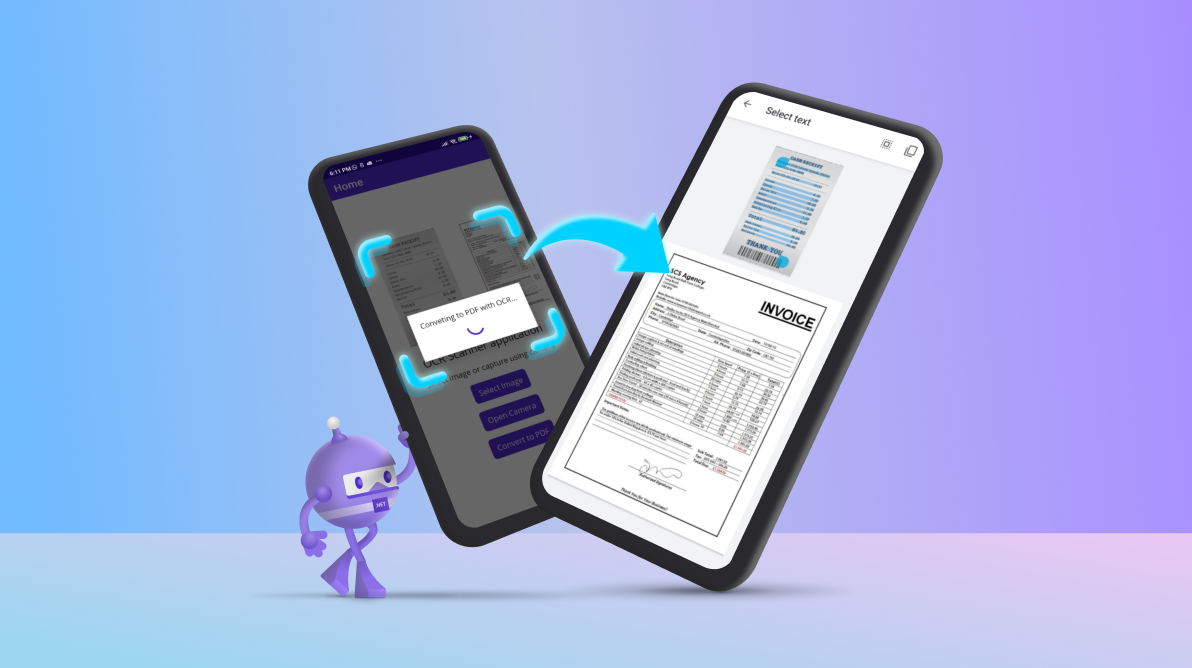
After executing the above code, you will get the following output.
 |
 |
Note: To save the PDF document to external storage, add the platform-specific service classes. Refer to the respective classes in the following links:
GitHub sample
For more details about this project, refer to the complete .NET MAUI OCR scanner application on GitHub.
Conclusion
In this blog post, we created a simple .NET MAUI OCR scanner application to process existing images and new images captured using the camera into PDFs with machine-readable text.
Take a moment to explore the documentation, where you will find other options and features of the Syncfusion OCR library, all with accompanying code samples.
If you have any questions or comments, you can contact us through our support forums, support portal, or feedback portal. We are always happy to assist you!
Related blogs
If you liked this article, we think you would also like the following articles about our PDF Library:
- Generate Dynamic PDF Reports from an HTML Template Using C#
- Digitally Sign and Verify Signatures in PDF Files Using C#
- How to Find Corrupted PDF Files in C# Easily
- How to Convert an Image to PDF in ASP.NET Core
- Easy Ways to Redact PDFs Using C#
- 7 Ways to Compress PDF Files in C#, VB.NET


Comments (1)
Hi Paraveen,
Do you have anything for image cropping and document scanning like one used by banks to take picture of the checks ?
Thanks