Syncfusion is glad to introduce the ASP.NET Core Template Studio, a utility for creating ASP.NET Core applications with Syncfusion controls, styles, and themes in Visual Studio Code. This utility saves developers significant time in adding Syncfusion ASP.NET Core components to their projects.
The Template Studio offers a UI for configuring ASP.NET Core applications. Users can more easily select a project name, location, project type, .NET Core version, and theme in the UI to improve their users’ experience.
In this blog, I am going to explain how to install the Syncfusion ASP.NET Core Template Studio extension and how to create a Syncfusion ASP.NET Core application using this extension in Visual Studio Code.
Prerequisites
The prerequisites for using ASP.NET Core Template Studio are:
Installing the Syncfusion ASP.NET Core Template Studio extension
The Syncfusion ASP.NET Core Template Studio extension for Visual Studio Code is included in the Syncfusion ASP.NET Core setup in the Essential Studio® 2022 Volume 1 release. You can also install it either from Visual Studio Code or by downloading the setup from the Visual Studio Code Marketplace.
We will look at the different procedures in the following section.
Installing from Visual Studio Code
The following steps illustrate how to install the Template Studio extension from Visual Studio Code:
- Open Visual Studio Code.
- Then, open the Command Palette by navigating to View > Command Palette.
- Now, search for Install Extensions in the Command Palette and expand Install Extensions when it appears.
- Search for Syncfusion ASP.NET Core in the search box to locate ASP.NET Core VS Code Extensions – Syncfusion.
- Install the “ASP.NET Core VS Code Extensions – Syncfusion” extension by clicking Install.
Installing from Visual Studio Code Marketplace
The following steps illustrate how to install the Template Studio extension from Visual Studio Code Marketplace:
- Open the Syncfusion ASP.NET Core Template Studio Extension in Visual Studio Code Marketplace and click Install.
- A pop-up will appear requesting to open Visual Studio Code. Click Open Visual Studio Code.
- In the next pop-up that appears, click Install to install the extension.
Creating a Syncfusion ASP.NET Core application
Use the following steps to create a Syncfusion ASP.NET Core application:
- Open Visual Studio Code.
- Then, open the command palette by pressing Ctrl+Shift+P. To access the Syncfusion templates, search for the word Syncfusion in the Visual Studio Code palette, select Syncfusion ASP.NET Core Template Studio: Launch, and then press the Enter key.

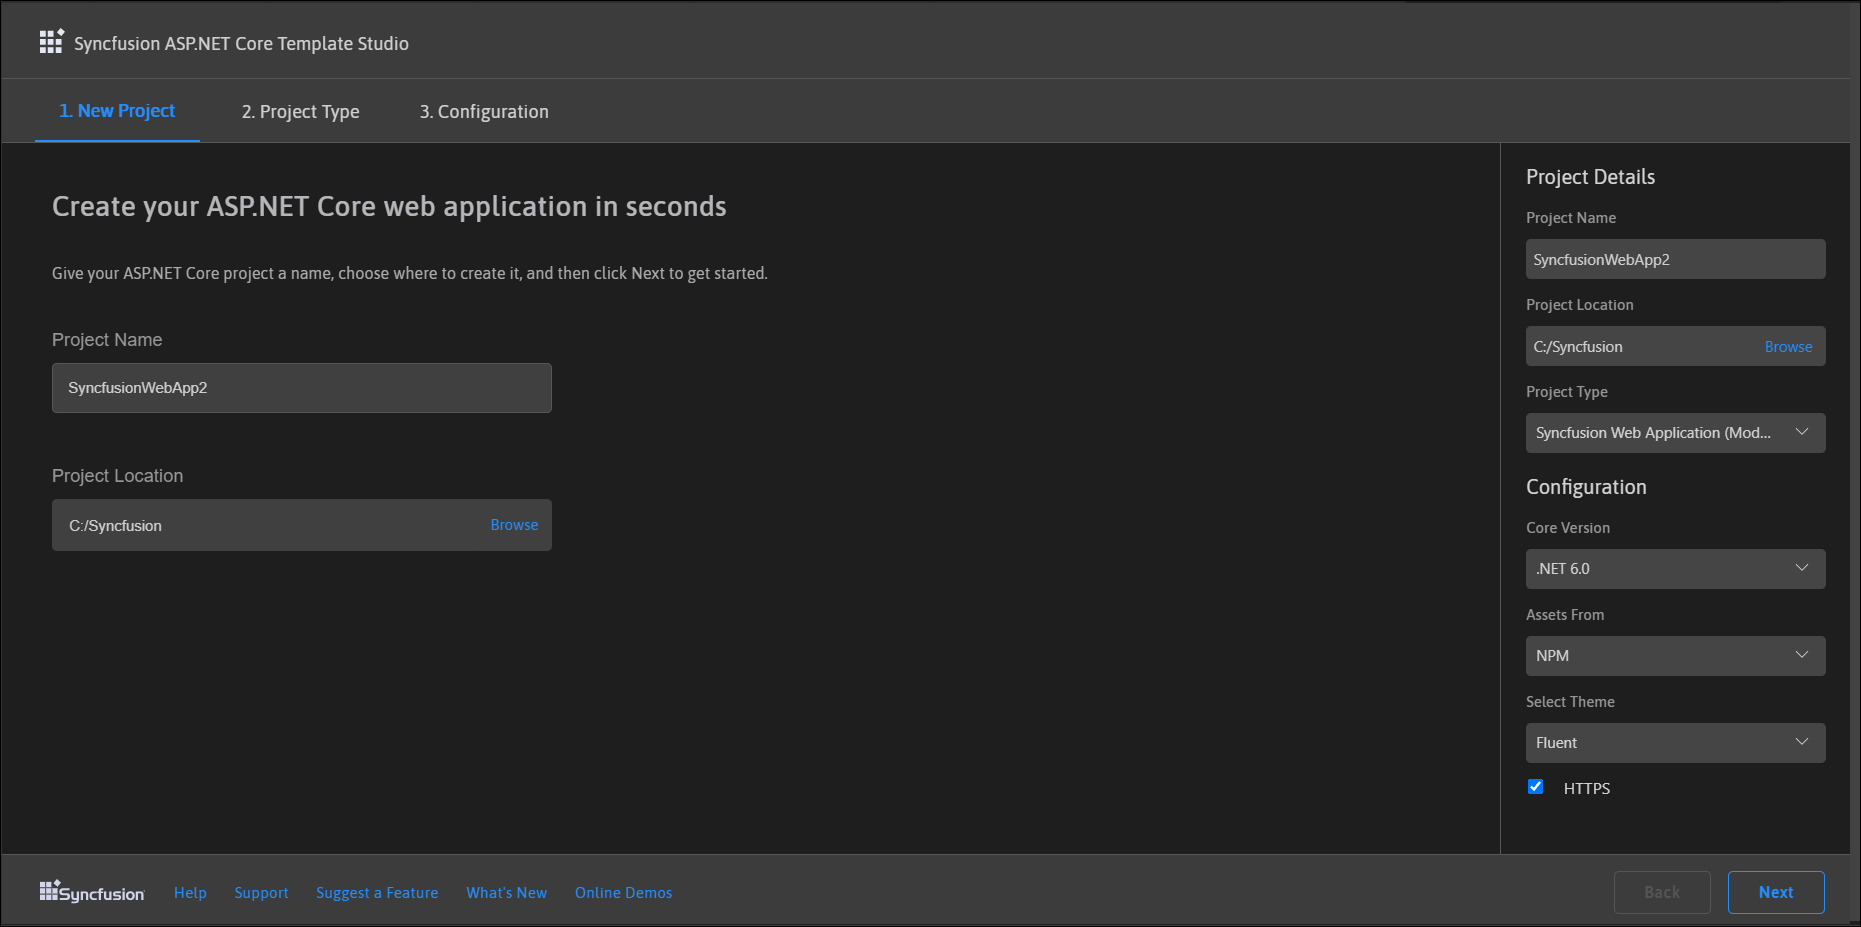
- The Template Studio wizard will be launched. Using this UI, provide the project-related details. Enter the name of the project and the location where you want to save the application.

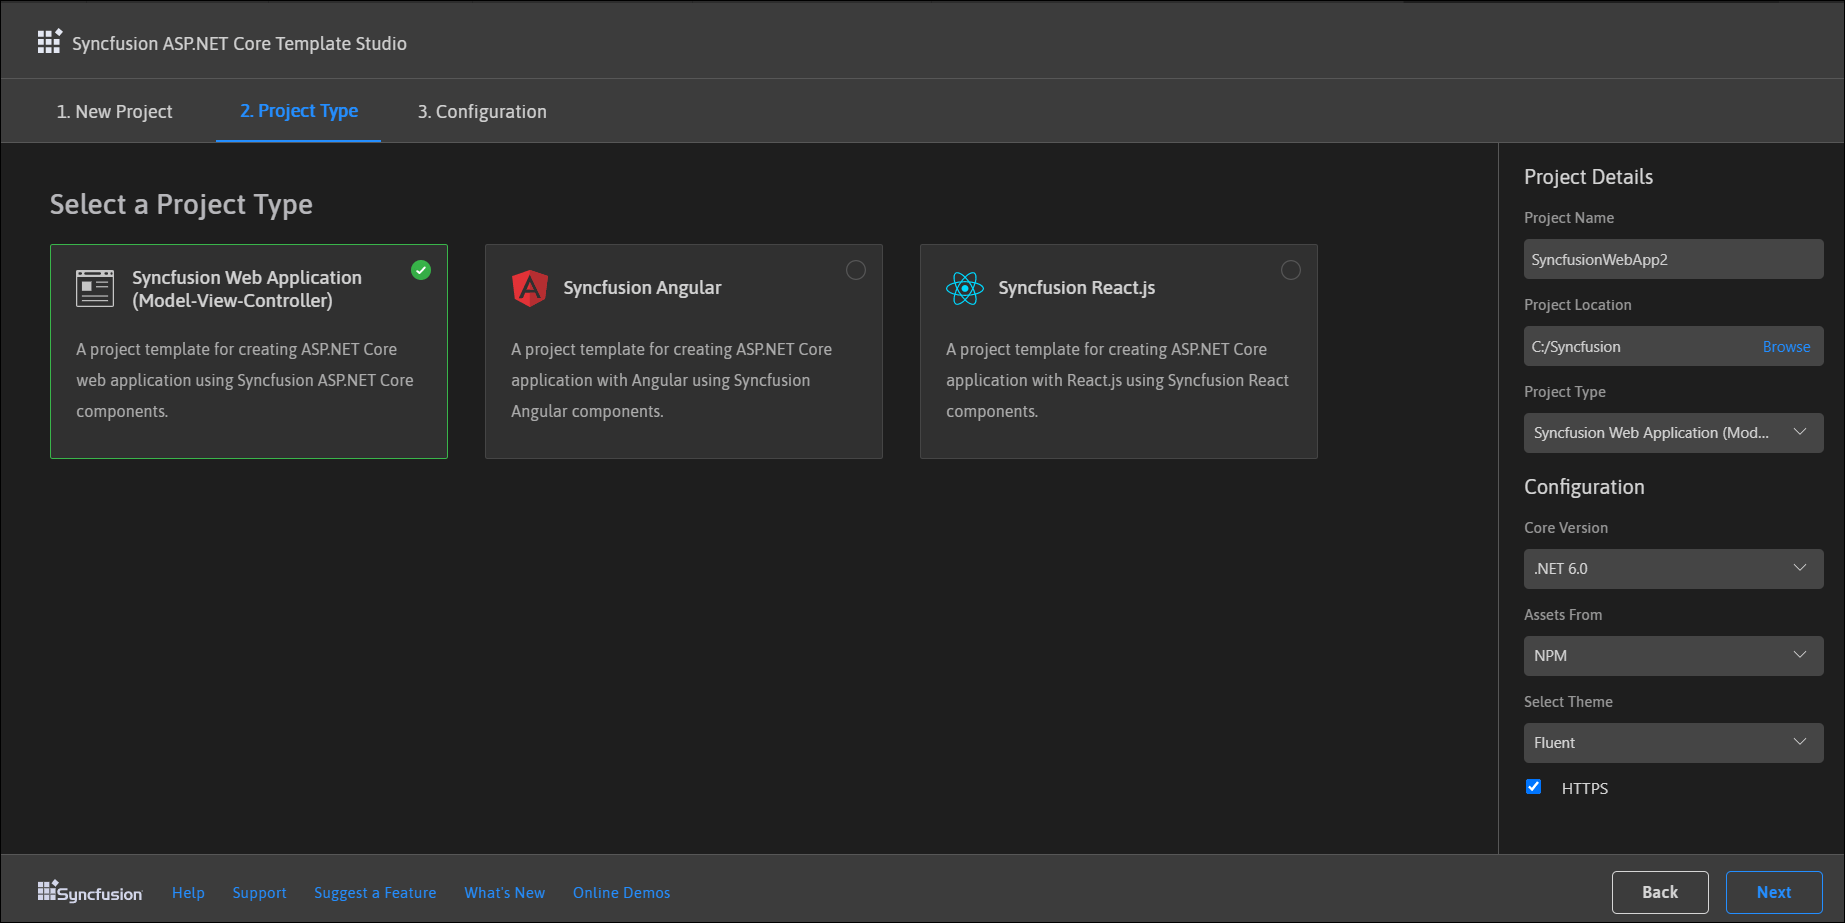
- Now, select the required ASP.NET Core application type in the Project Type tab:
-
- Syncfusion Web Application (Model-View-Controller)
- Syncfusion Angular
- Syncfusion React.js

-
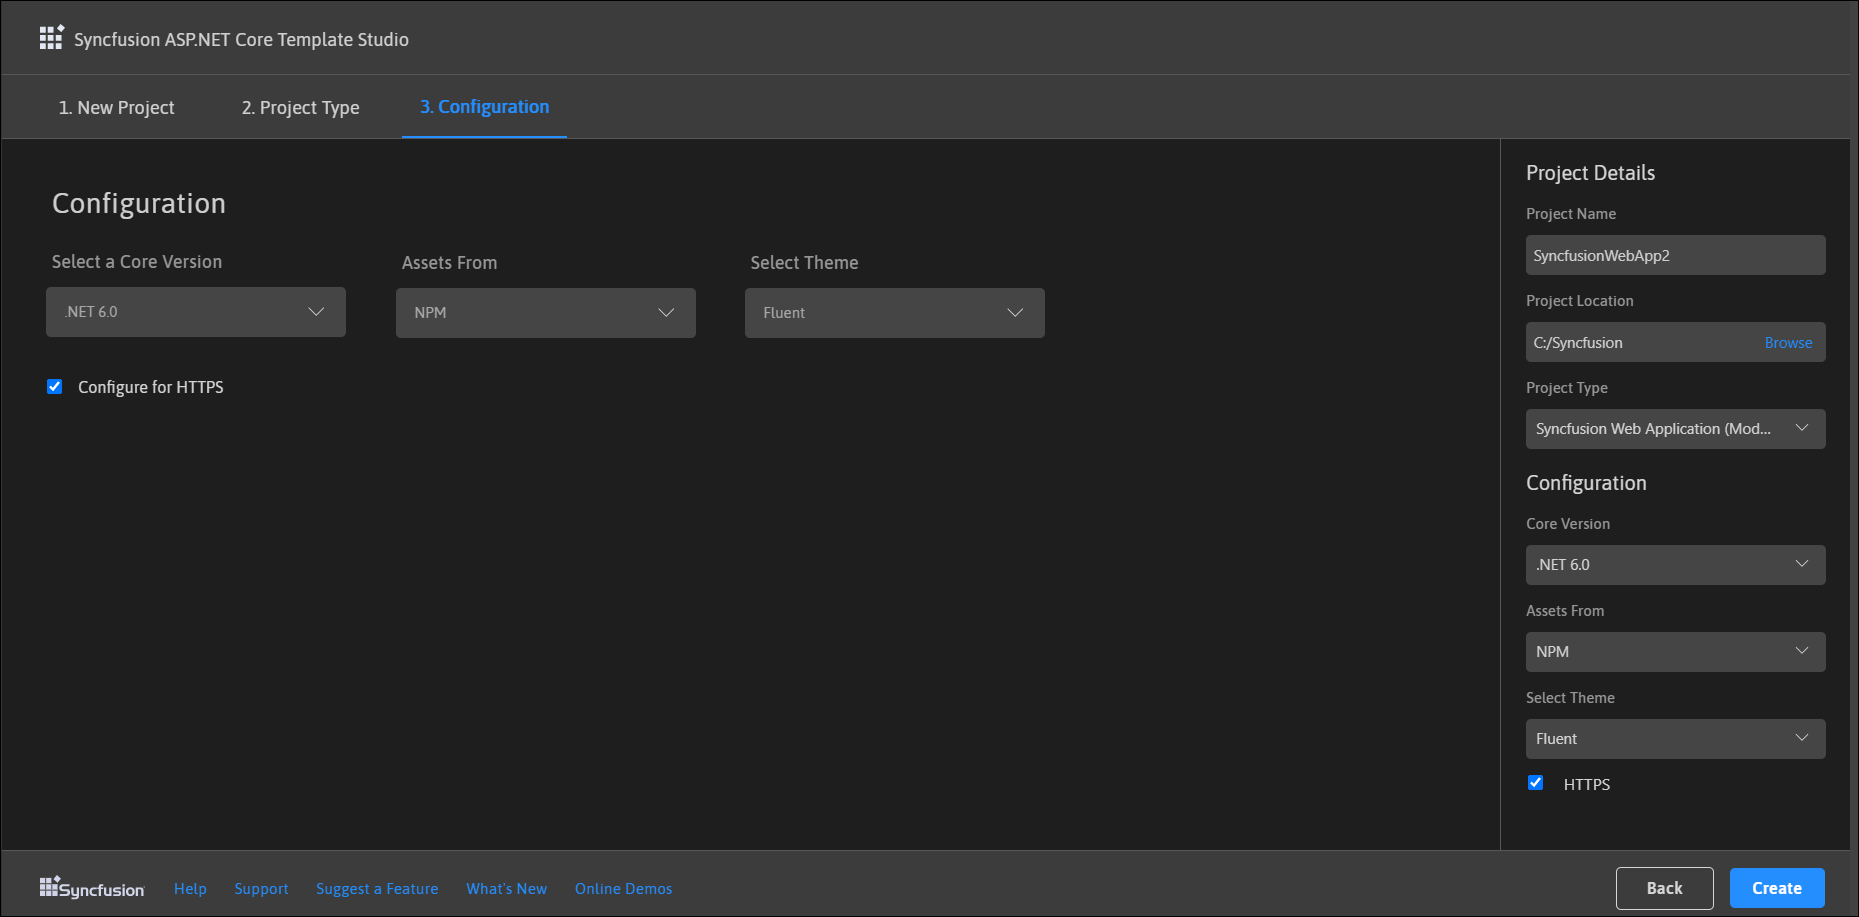
- In the Configuration tab, choose the .NET Core version, a theme, HTTPS configuration, and Assets From. Then, click Create.

Notes: In Assets From, the Installed location option will be available when the Syncfusion Essential JavaScript 2 build has been installed.
The Syncfusion ASP.NET Core application will be created. The Syncfusion NuGet packages, NPM packages, styles, and the code to render the Syncfusion components will already be in the index page of the newly created Syncfusion ASP.NET Core application.
Debugging the Syncfusion ASP.NET Core application
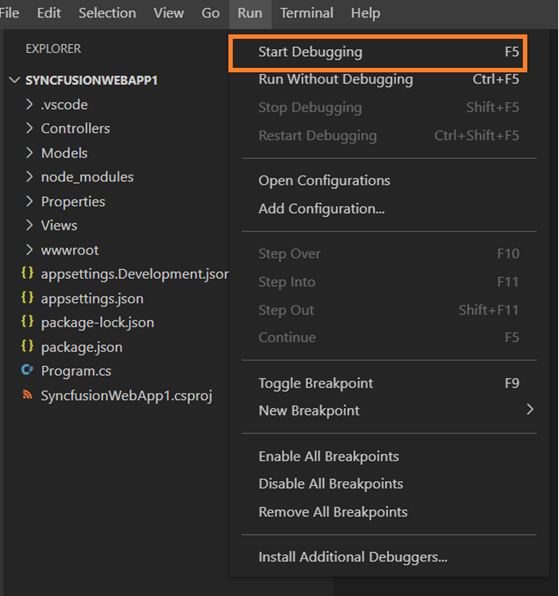
The debug and release modes are set when the project is created. As a result, you do not need to configure them manually. The NuGet packages are automatically restored when debugging a Syncfusion ASP.NET Core application. The application will then be compiled and launched in the default browser.
The ASP.NET Core application runs in debug mode by default. You can switch to release mode by selecting Debug from the Debug tab or pressing the Ctrl+Shift+D shortcut key.
Special mention: Syncfusion® Document Viewer Extension
If you often find yourself switching between apps just to check a Word or Excel file, this handy tool is for you. The Syncfusion® Document Viewer Extension for Visual Studio Code lets you open and view documents like Word, Excel, and more; right inside your coding environment.
You can preview high-fidelity files and even make light edits such as text changes and formatting tweaks, all without leaving VS Code. It’s a simple way to stay focused and keep your project documentation within reach.
Available for free download on the Visual Studio Code Marketplace.
Conclusion
Thanks for reading! In this blog post, we have seen how to use our Syncfusion ASP.NET Core extension in Visual Studio Code. It will help you create attractive web applications with Syncfusion ASP.NET Core UI components in less time. Try out the procedures in this blog post and leave your feedback in the comments section below!
You can also contact us via our support forum, Syncfusion support, or feedback portal. We are always happy to assist you!

