Syncfusion’s native Blazor UI components library can be used with all features supported by the Blazor framework. In this blog post, we are going to explore Syncfusion Blazor components on a cross-platform desktop app using the Electron framework.
Electron supports building cross-platform desktop applications with web technologies. It utilizes Node.js and the Chromium rendering engine to run a web application on a desktop shell.
Prerequisites
Create a Blazor server-side application using dotnet-cli
Follow these steps to create a Blazor server-side app using dotnet-cli:
Step 1: First, open the command prompt in any folder. Then, run the following command line to create a new Blazor server-side application without HTTPS support. I am naming the application BlazorElectronApp.
dotnet new blazorserver --no-https -o BlazorElectronApp
Step 2: Navigate to the application folder (BlazorElectronApp) and install the required Syncfusion Blazor NuGet package.
For this blog, we are going to use the Syncfusion.Blazor.Grid NuGet package.
cd BlazorElectronApp
dotnet add package Syncfusion.Blazor.Grid
Step3: Then, open the ~/Startup.cs file from the application and add the Syncfusion Blazor Service in the ConfigureServices method, like in the following code example.
using Syncfusion.Blazor;

public class Startup
{
    ……
    ……
    public void ConfigureServices(IServiceCollection services)
    {
        ……
        ……
        services.AddSyncfusionBlazor();
    }
}
Step 4: Now, open the ~/Pages/_Host.cshtml file and add the Syncfusion theme reference in the <head> tag. Refer to the following code example.
@page "/"
……
……
<!DOCTYPE html>
    <html lang="en">
        <head>
            ……
            ……
            <link href="_content/Syncfusion.Blazor.Themes/bootstrap4.css" rel="stylesheet" />
        </head>
        ……
        ……
    </html>
Step 5: Finally, add the Syncfusion Blazor DataGrid component in the ~/Pages/Index.razor page. Refer to the following code example.
@page "/"
@using Syncfusion.Blazor.Grids

<SfGrid DataSource="@Orders" AllowPaging="true">
    <GridPageSettings PageSize="5"></GridPageSettings>
        <GridColumns>
            <GridColumn Field=@nameof(Order.OrderID) HeaderText="Order ID" TextAlign="TextAlign.Right" Width="120"></GridColumn>
            <GridColumn Field=@nameof(Order.CustomerID) HeaderText="Customer Name" Width="150"></GridColumn>
            <GridColumn Field=@nameof(Order.OrderDate) HeaderText=" Order Date" Format="d" Type="ColumnType.Date" TextAlign="TextAlign.Right" Width="130"></GridColumn>
            <GridColumn Field=@nameof(Order.Freight) HeaderText="Freight" Format="C2" TextAlign="TextAlign.Right" Width="120"></GridColumn>
        </GridColumns>
</SfGrid>

@code{
public List<Order> Orders { get; set; }

protected override void OnInitialized()
{
    Orders = Enumerable.Range(1, 25).Select(x => new Order()
    {
        OrderID = 1000 + x,
        CustomerID = (new string[] { "ALFKI", "ANANTR", "ANTON", "BLONP", "BOLID" })[new Random().Next(5)],
        Freight = 2.1 * x,
        OrderDate = DateTime.Now.AddDays(-x),
        }).ToList();
    }

    public class Order {
        public int? OrderID { get; set; }
        public string CustomerID { get; set; }
        public DateTime? OrderDate { get; set; }
        public double? Freight { get; set; }
    }
}
Now, the created Blazor server-side application with the Syncfusion DataGrid component is ready to launch without the Electron setup.
Configure the Electron setup in application
Please follow these steps to configure the Electron setup into the Blazor server-side application:
Step 1: First, install the ElectronNET.API NuGet package in the application. Electron.NET is a wrapper for the Electron application with embedded .NET API.
dotnet add package ElectronNET.API
Step 2: Next, create a local .NET tool manifest file by running the following command line. This will create a manifest file in the ~/.config/dotnet-tools.json location.
dotnet new tool-manifest

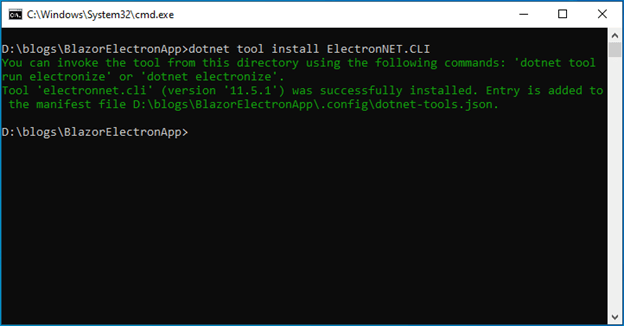
Step 3: Then, install the electronize tool locally in the project by running the following command line.
dotnet tool install ElectronNET.CLI
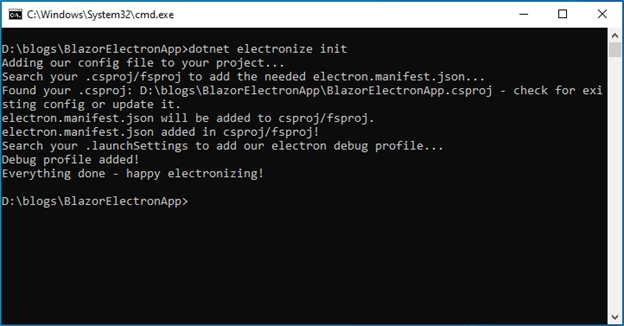
 Step 4: Run the following command to configure the Electron.NET manifest and update the application launch profiles.
dotnet electronize init
 Step 5: Now, integrate the Electron.NET in the ~/Program.cs file. Refer to the following code example.
using ElectronNET.API;

public class Program
{
    .....
    .....

    public static IHostBuilder CreateHostBuilder(string[] args) =>
    Host.CreateDefaultBuilder(args)
    .ConfigureWebHostDefaults(webBuilder =>
    {
        webBuilder.UseElectron(args);
        webBuilder.UseStartup<Startup>();
    });
}
Step 6: Then, add this code in the ~/Startup.cs file to open the Electron window.
using ElectronNET.API;

public class Startup
{
    ……
    ……

    public void Configure(IApplicationBuilder app, IWebHostEnvironment env)
    {
        ……
        ……
        // Open the Electron-Window
        Task.Run(async () => await Electron.WindowManager.CreateWindowAsync());
    }
}
Step 7: Now, run the application using the following command line.
dotnet electronize start
Note: The electronize start will take some time for its initial launch. But it will be fast in subsequent launches.
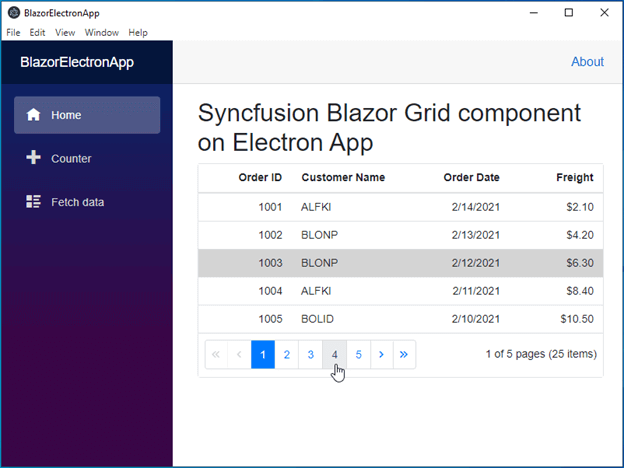
Then, our Blazor server-side application will open in the cross-platform desktop Electron shell with the DataGrid component.
Step 8: Finally, run these command lines to do production builds based on platform.
dotnet electronize build /target win
dotnet electronize build /target osx
dotnet electronize build /target linux
GitHub reference
For more information, refer to the complete working example, Exploring Syncfusion Blazor components on a cross-platform desktop app using Electron.
Conclusion
Thanks for reading! In this blog post, we have seen the steps to integrate Syncfusion Blazor components in a cross-platform desktop app using the Electron framework. Try out the steps given in this blog post and leave your feedback in the comments section.
The Syncfusion Blazor suite offers over 65 high-performance, lightweight, and responsive UI components for the web, including file-format libraries, in a single package. Use them to build stunning web applications!
For existing customers, the new version is available for download from the License and Downloads page. If you are not yet a Syncfusion customer, you can try our 30-day free trial to check out our available features. Also, try our samples from this GitHub location.
You can contact us through our support forum, Direct-Trac, or feedback portal. We are always happy to assist you!
