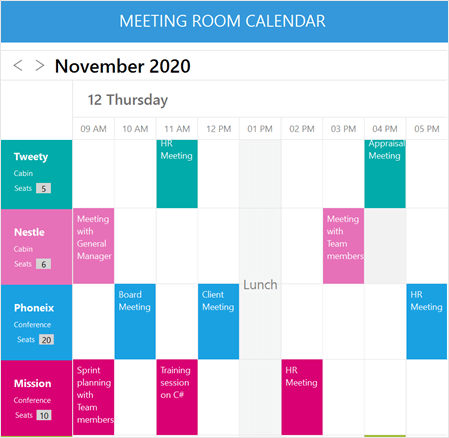
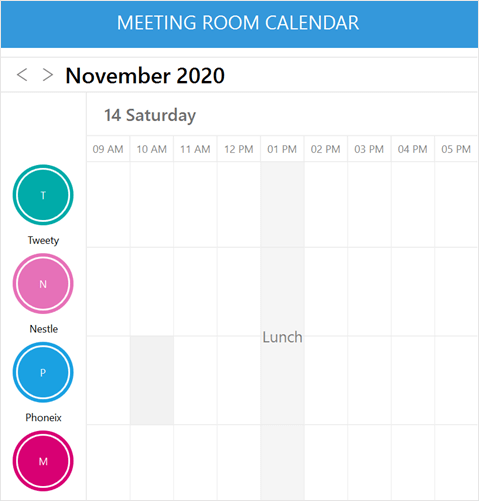
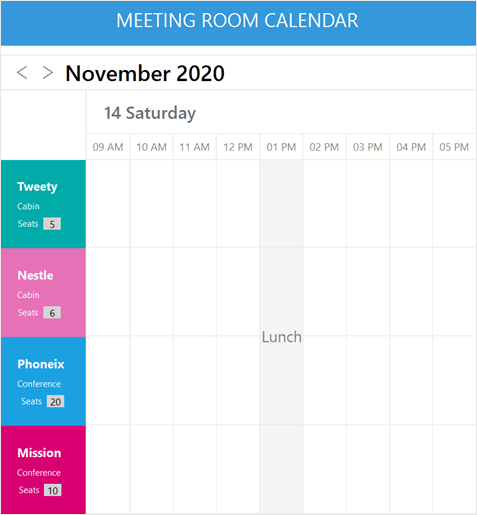
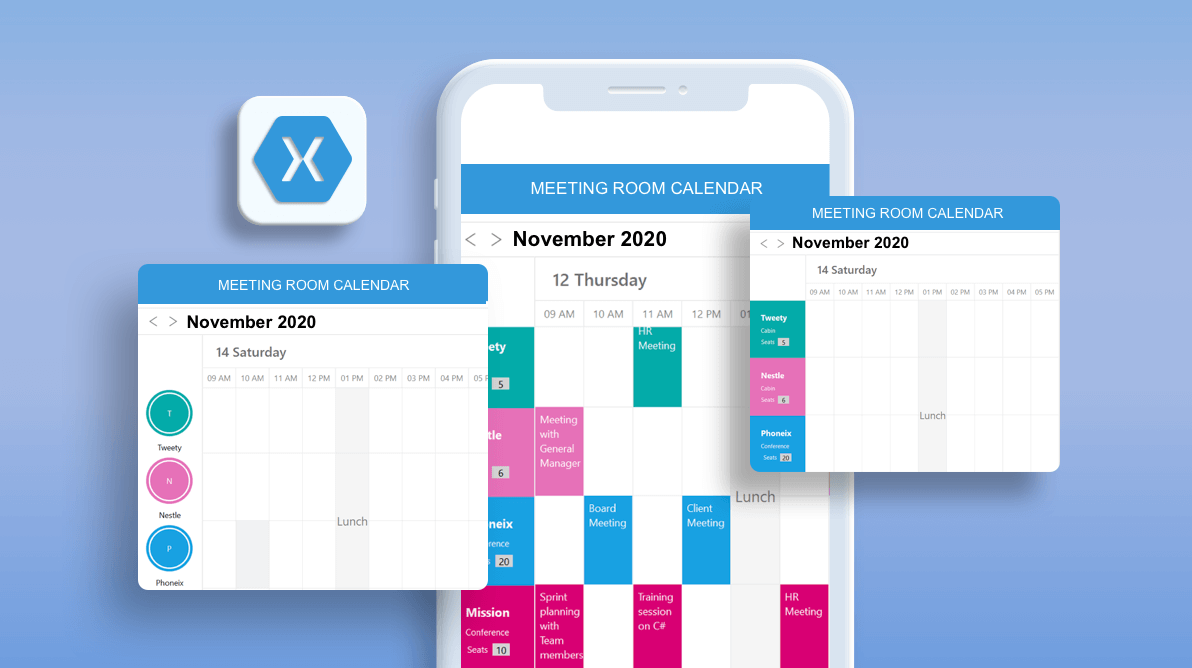
In today’s business world, having a meeting room in the workplace is important. Apart from having it, you’ll have to share it efficiently and without causing conflict among teams, which can be more challenging. The meeting room calendar application allows everyone in your workplace to search for room availability in seconds, allowing for easy room booking among different teams with no time conflicts. Let’s walk through the steps to customize the look and feel of our Syncfusion Xamarin.Forms Scheduler component to design a meeting room calendar.

Multiple resources – overview
In our previous blog, Create a Scheduling App using Scheduler for Xamarin, we got a basic overview of Xamarin.Forms Scheduler and its usage in a real-time scenario. In this blog, I’ll continue with an overview of the multiple resources concept and how to utilize this feature in designing a meeting room calendar.
Designing a meeting room calendar
We are going to display only the Scheduler timeline view in this example. As you get started, there will be some restrictions already set for booking meeting rooms, like being unable to reserve a room if it is already booked during a non-accessible time range, such as lunch or during maintenance.
Also, you can’t edit the past meeting events. For example, you can’t book rooms on dates before the current date.
We have also added the Scheduler custom editor, which is used for appointment editing.
Getting started
Follows these steps to create a resource view Scheduler in your Xamarin.Forms application:
Step 1: Follow the getting started documentation to add a Xamarin.Forms SfSchedule control to your application.
Step 2: Then, make the following property changes in the instance of SfSchedule:
- Set the Scheduler ScheduleView property as TimelineView.
- Enable the scheduler resource view by setting the value to True in the ShowResourceView property.
- Set the ResourceViewMode property to Absolute to display the appointments of all scheduler resources.
Refer to the following code example.
<syncfusion:SfSchedule x:Name="schedule"
        ScheduleView = "TimelineView"
        ShowResourceView="True"
        ResourceViewMode="Absolute">
</syncfusion:SfSchedule >
Populating resources data
Let’s see how to customize the Scheduler layout to display the meeting rooms. The meeting rooms are defined as resources and each room will be displayed vertically against the common timescale.
Imagine that an office has five meeting rooms within its premises, and everyone should share those rooms. As soon as a person books a room, they own it for the entire booked time range and no other person can reserve the same room during that specific time.
To start with, let’s assume that the resource data holds some common room information such as room name, room ID, and a specific color to denote resource appointments. Apart from the default resource fields, you can also define other custom resource fields such as room capacity and its type by binding resources to any type of IEnumerable source. Specify the ResourceMapping attribute to map the properties in the underlying data source to the schedule resource.
Add the resources collections and bind it to the Xamarin Scheduler using the ScheduleResources property.
Refer to the following code example.
ObservableCollection<MeetingRoomInfo> MeetingRooms = new ObservableCollection<MeetingRoomInfo>();

MeetingRooms.Add(new MeetingRoomInfo() { Name = "Jammy", Id = "5001", Color = Color.FromHex("#FF339933"), Capacity = 15, RoomType = "Conference" });
MeetingRooms.Add(new MeetingRoomInfo() { Name = "Tweety", Id = "5002", Color = Color.FromHex("#FF00ABA9"), Capacity = 5, RoomType = "Cabin" });
MeetingRooms.Add(new MeetingRoomInfo() { Name = "Nestle", Id = "5003", Color = Color.FromHex("#FFE671B8"), Capacity = 6, RoomType = "Cabin" });
MeetingRooms.Add(new MeetingRoomInfo() { Name = "Phoneix", Id = "5004", Color = Color.FromHex("#FF1BA1E2"), Capacity = 20, RoomType = "Conference" });
MeetingRooms.Add(new MeetingRoomInfo() { Name = "Mission", Id = "5005", Color = Color.FromHex("#FFD80073"), Capacity = 10, RoomType = "Conference" });
MeetingRooms.Add(new MeetingRoomInfo() { Name = "Emilia", Id = "5006", Color = Color.FromHex("#FFA2C139"), Capacity = 12, RoomType = "Conference" });
<syncfusion:SfSchedule x:Name="schedule"
        ScheduleView = "TimelineView"
        ShowResourceView="True"
        ScheduleResources="{Binding MeetingRooms}"
        ResourceViewMode="Absolute">
        <syncfusion:SfSchedule.ResourceMapping>
                <syncfusion:ResourceMapping
                     Name="Name"
                     Id="Id"
                     Color="Color"/>
      </syncfusion:SfSchedule.ResourceMapping>
</syncfusion:SfSchedule >

Customizing the resource layout
You can customize the resource header through its template property and change its look using the ResourceItemTemplate property.
Refer to the following code example.
<ContentPage.Resources>
    <DataTemplate x:Key="CustomResourceTemplate">
        <StackLayout BackgroundColor="{Binding Color}">
        <Grid Margin="20,20,20,20">
            <Grid.RowDefinitions>
                <RowDefinition Height="0.3*"></RowDefinition>
                <RowDefinition Height="0.2*"></RowDefinition>
                <RowDefinition Height="0.2*"></RowDefinition>
            </Grid.RowDefinitions>
                <Grid.ColumnDefinitions>
                    <ColumnDefinition Width="Auto"></ColumnDefinition>
                    <ColumnDefinition Width="20"></ColumnDefinition>
                </Grid.ColumnDefinitions>
                <Label
                    Grid.Row="2" Grid.Column="0"
                    x:Name="lbl_seats" Text="Seats" TextColor="White"
                    HorizontalOptions="EndAndExpand"
                    HorizontalTextAlignment="End" FontSize="Small">
                    <Label.FontSize>
                        <OnPlatform x:TypeArguments="x:Double">
                            <On Platform="iOS">7</On>
                            <On Platform="Android">7</On>
                            <On Platform="WPF">10</On>
                            <On Platform="UWP">10</On>
                        </OnPlatform>
                    </Label.FontSize>
                </Label>
            <Label Grid.Row="2" Grid.Column="1" x:Name="lbl_capacity"
                   Text="{Binding Capacity}"
                   BackgroundColor="LightGray"
                   TextColor="Black"
                   VerticalTextAlignment="Center" WidthRequest="5" HeightRequest="5"
                   HorizontalTextAlignment="Center">
                <Label.FontSize>
                    <OnPlatform x:TypeArguments="x:Double">
                        <On Platform="iOS">11</On>
                        <On Platform="Android">11</On>
                        <On Platform="WPF">11</On>
                        <On Platform="UWP">11</On>
                    </OnPlatform>
                </Label.FontSize>
            </Label>
                <Label x:Name="lbl_roomname" Text="{Binding Name}" TextColor="White"
                   Grid.Row="0" Grid.ColumnSpan="2" HorizontalTextAlignment="Start"
                       FontSize="Small" FontAttributes="Bold">
                <Label.FontSize>
                    <OnPlatform x:TypeArguments="x:Double">
                        <On Platform="iOS">14</On>
                        <On Platform="Android">14</On>
                        <On Platform="WPF">14</On>
                        <On Platform="UWP">14</On>
                    </OnPlatform>
                </Label.FontSize>
            </Label>
                <Label x:Name="lbl_roomtype" Text="{Binding RoomType}" TextColor="White"
                   Grid.Row="1" Grid.ColumnSpan="2" HorizontalTextAlignment="Start" FontSize="Small">
                <Label.FontSize>
                    <OnPlatform x:TypeArguments="x:Double">
                        <On Platform="iOS">7</On>
                        <On Platform="Android">7</On>
                        <On Platform="WPF">10</On>
                        <On Platform="UWP">10</On>
                    </OnPlatform>
                </Label.FontSize>
            </Label>
        </Grid>
        </StackLayout>
    </DataTemplate>
</ContentPage.Resources>
<syncfusion:SfSchedule x:Name="schedule"
        ScheduleView = "TimelineView"
        ShowResourceView="True"
        ScheduleResources="{Binding MeetingRooms}"
        ResourceItemTemplate="{StaticResource CustomResourceTemplate}"
        ResourceViewMode="Absolute"/>

Populating the meeting data
The header layout customization is over now, and it’s time to fill the Scheduler with room reservation data. Let’s form the data with meeting-related fields such as meeting summary, start time, end time, and location. Then, assign them to the Scheduler DataSource property. Each appointment in the Scheduler denotes a confirmed booking to convey the room reservation status at a specific time.
The Xamarin.Forms Scheduler supports full data binding to all types of IEnumerable sources. Specify the ScheduleAppointmentMapping attributes to map the properties in the underlying data source to the scheduler appointments.
Refer to the following code example.
<syncfusion:SfSchedule x:Name="schedule"
        DataSource="{Binding Meetings}"
        ScheduleView = "TimelineView"
        ShowResourceView="True"
        ScheduleResources="{Binding MeetingRooms}"
        ResourceItemTemplate="{StaticResource CustomResourceTemplate}"
        ResourceViewMode="Absolute" >
<syncfusion:SfSchedule.AppointmentMapping>
    <syncfusion:ScheduleAppointmentMapping
            ColorMapping="Color"
            EndTimeMapping="To"
            StartTimeMapping="From"
            SubjectMapping="EventName"
            IsAllDayMapping="IsAllDay"
            RecurrenceRuleMapping="RecurrenceRule"
            ResourceIdsMapping="ResourceIdCollection"/>
</syncfusion:SfSchedule.AppointmentMapping>
</ syncfusion:SfSchedule>
Blocking reservations on inaccessible cells
Now, we need to concentrate on another important action: making certain cells inaccessible to users. This can be done by adding the SpecialTimeRegion in the SpecialTimeRegions property.
To prevent the appointment editor from opening inaccessible slots, set the CanEdit property of the TimeRegionSettings as false like in the following code.
<syncfusion:SfSchedule.SpecialTimeRegions>
    <syncfusion:TimeRegionSettings
            StartHour="13"
            EndHour="14"
            Text="Lunch"
            CanEdit="False"
            Color="#EAEAEA"
            TextColor="Black"/>
</syncfusion:SfSchedule.SpecialTimeRegions>
To prevent appointment editor from opening on past dates in the schedule, set the MinDisplayDate to restrict date navigation features, namely Backward and MoveToDate.
<syncfusion:SfSchedule
        x:Name="schedule"
        DataSource="{Binding Meetings}"
        ScheduleView = "TimelineView"
        MinDisplayDate="{Binding MinimumDate}” />
Resource
For more information, you can download the complete example for Designing a Meeting Room Calendar using Xamarin.Forms Scheduler.
Summary
To summarize, we have seen how to customize our Syncfusion Xamarin.Forms Scheduler to design a meeting room calendar by using additional styling options. Keep checking up with us, as more useful blogs are waiting in our queue that will show more of the customizing options available in the Scheduler.
If you are an existing Syncfusion user, please download the latest version from the License and Downloads page and try the new features for yourself. Also, our NuGet packages are available on NuGet.org.
If you aren’t a customer yet, you can try our 30-day free trial to check out these features. Also, try our other samples from this GitHub location.
Feel free to share your feedback or questions in the comments section below. You can also contact us through our support forum, Direct-Trac, or feedback portal. We are always happy to assist you!
