The Syncfusion WinUI AutoComplete loads and populates data in a suggestion list depending on the user’s input characters. Users can then select one or more items from the list. Items selected from the list can be displayed with images, text, and close buttons to remove them as needed.
Key features
The key features of the WinUI AutoComplete control are as follows:
- Smoothly and dynamically presents items based on the user input.
- Does not include a dropdown button. When a user types, the dropdown automatically opens with suggestions.
- Handles a huge volume of data and shows suggestions based on logical matching instead of just string comparison.
- Also supports filtering, grouping, appearance customization, and more.
The best example of AutoComplete control is a search engine. When you search for something, suggestions are listed based on popular queries by other users.
In this blog, we will see how to achieve Google-like autosuggestions in a WinUI application using our AutoComplete control.
Google-like autosuggestions using the WinUI AutoComplete control
Let’s fetch suggestions from the Google search engine and show them using the WinUI AutoComplete control.

Step #1: Adding the WinUI AutoComplete control to your application
Follow these steps to add the AutoComplete control to the XAML page of your WinUI app:
- First, create a WinUI 3 desktop app for C# and .NET 5.
- Then, download and install the Syncfusion.Editors.WinUI NuGet package in the project.
- Now, import the control namespace Syncfusion.UI.Xaml.Editors on the XAML page.
- Initialize the WinUI AutoComplete control. Refer to the following code example.
<Window
   x:Class="WinUI_Calendar.MainWindow"
   xmlns="http://schemas.microsoft.com/winfx/2006/xaml/presentation"
   xmlns:x="http://schemas.microsoft.com/winfx/2006/xaml"
   xmlns:local="using:WinUI_Calendar "
   xmlns:d="http://schemas.microsoft.com/expression/blend/2008"
   xmlns:mc="http://schemas.openxmlformats.org/markup-compatibility/2006"
   xmlns:editors="using:Syncfusion.UI.Xaml.Editors"
   mc:Ignorable="d">
 <Grid>
   <editors:SfAutoComplete Width="300"/>
 </Grid>
</Window>
Step #2: Get suggestions from the Google search engine based on user input
When we search for something in a search engine, we will get suggestions based on our input characters. Let’s see how to fetch suggestions from the Google search engine.
Refer to the following code to fetch suggestions as an XML document. Here, the query refers to the user’s input.
string xmlSuggestions;

using (HttpClient client = new HttpClient())
{
  var searchQuery = "https://www.google.com/complete/search?output=toolbar&q=" + query;
  xmlSuggestions = client.GetStringAsync(searchQuery);
}
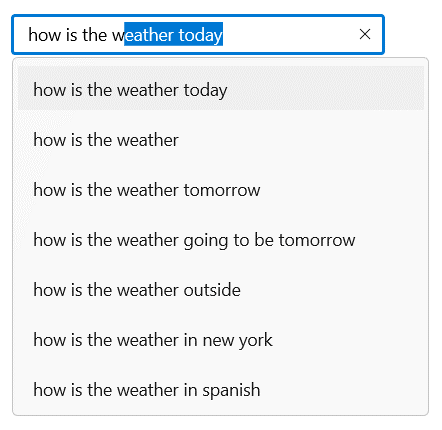
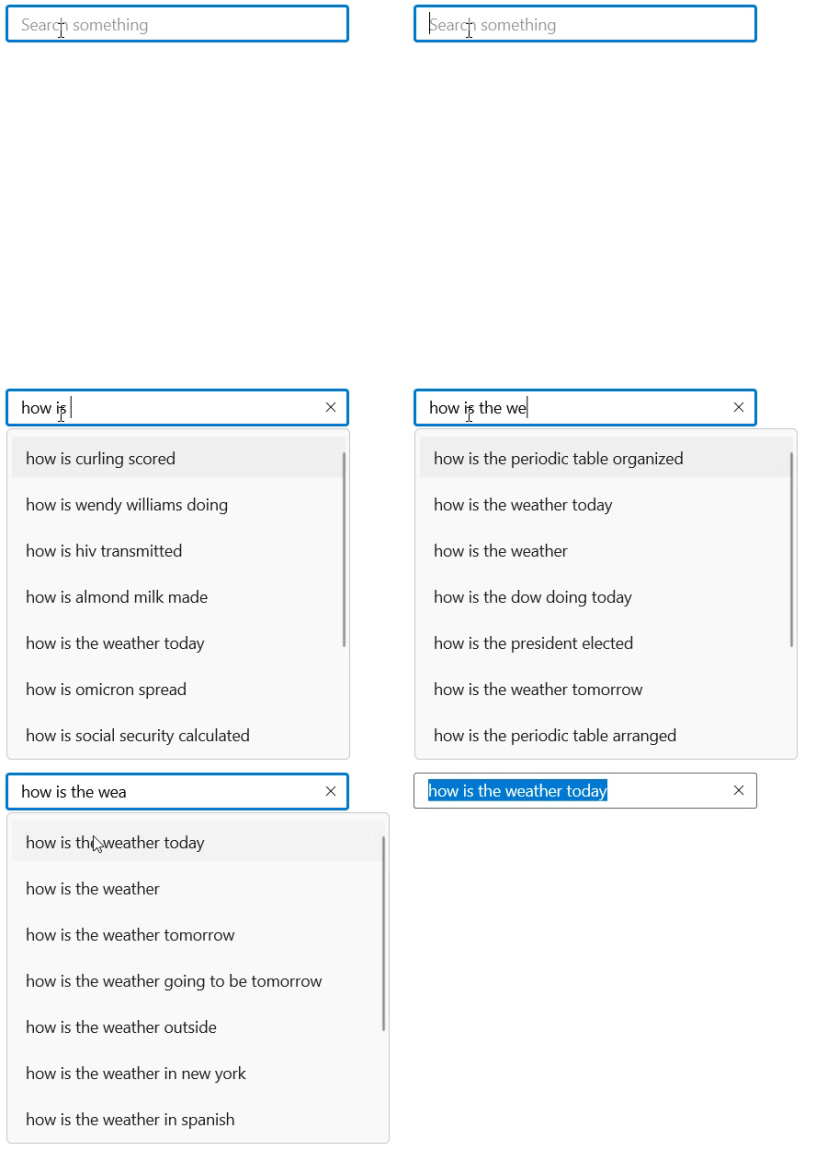
Let’s say we are trying to search for information about today’s weather, so we’ll use the partial input how is the wea. This will give us the following search query: https://www.google.com/complete/search?output=toolbar&q=how%20is%20the%20wea&gl=us&hl=en&pws=0&gws_rd=cr.
This query will give the following suggestions:
<toplevel>
 <CompleteSuggestion>
   <suggestion data="how is the weather today"/>
 </CompleteSuggestion>
 <CompleteSuggestion>
   <suggestion data="how is the weather"/>
 </CompleteSuggestion>
 <CompleteSuggestion>
   <suggestion data="how is the weather tomorrow"/>
 </CompleteSuggestion>
 <CompleteSuggestion>
   <suggestion data="how is the weather going to be tomorrow"/>
 </CompleteSuggestion>
 <CompleteSuggestion>
   <suggestion data="how is the weather outside"/>
 </CompleteSuggestion>
 <CompleteSuggestion>
   <suggestion data="how is the weather in new york"/>
 </CompleteSuggestion>
 <CompleteSuggestion>
   <suggestion data="how is the weather in spanish"/>
 </CompleteSuggestion>
 <CompleteSuggestion>
   <suggestion data="how is the weather tonight"/>
 </CompleteSuggestion>
 <CompleteSuggestion>
   <suggestion data="how is the weather in chicago"/>
 </CompleteSuggestion>
 <CompleteSuggestion>
   <suggestion data="how is the weather in florida"/>
 </CompleteSuggestion>
</toplevel>
Step #3: Parse the XML document and get the suggestions
With the suggestions in hand as an XML document, we need to parse it and get the required data. Once the data is collected, we return the accumulated data as a list.
Refer to the following code.
XDocument doc = XDocument.Parse(xmlSuggestions);
var suggestions = doc.Descendants("CompleteSuggestion")
  .Select(
    item => item.Element("suggestion").Attribute("data").Value);
return suggestions.ToList();
Step #4: Show suggestions using WinUI AutoComplete based on user input
Now that we know how to get suggestions from the Google search engine based on the user input characters. Let’s see how to implement this in the WinUI AutoComplete control.
When a user provides input in the AutoComplete control, the FilterBehavior property will populate the suggestions. It is of type IAutoCompleteFilterBehavior.
Create the CustomFiltering class to implement the IAutoCompleteFilterBehavior interface. The GetMatchingItemsAsync method will be called whenever a user starts typing. Then, the items that are returned by this method will be shown as suggestions in the dropdown.
Refer to the following code example.
public class CustomFiltering : IAutoCompleteFilterBehavior
{
  public Task<object> GetMatchingItemsAsync(SfAutoComplete source, AutoCompleteFilterInfo filterInfo)
  {
    var result = GetGoogleSuggestions(filterInfo.Text);
    return Task.FromResult((object)result);
  }

  private IList<string> GetGoogleSuggestions(string query)
  {
    // Get suggestions using the Google search query.
  }
}
<editors:SfAutoComplete HorizontalAlignment="Center"
VerticalAlignment="Center"
PlaceholderText="Search something"
TextSearchMode="Contains"
Width="300">
<editors:SfAutoComplete.FilterBehavior>
<local:CustomFiltering/>
</editors:SfAutoComplete.FilterBehavior>
</editors:SfAutoComplete>

That’s all there is to it!
GitHub demo
You can download a working example of Google-like autosuggestions using WinUI AutoComplete control from GitHub.
Conclusion
Thanks for reading! In this blog post, we have seen how to implement Google-like autosuggestions using the Syncfusion WinUI AutoComplete control. For more details, refer to the WinUI AutoComplete documentation and demo app in the Windows Store. Try out the procedure in this blog post and leave your feedback in the comments section below.
For existing customers, the newest version of Essential Studio® is available for download from the license and downloads page. If you are not yet a customer, you can try our 30-day free trial to check out the newest features.
You can also contact us through our support forums, feedback portal, or support portal. We are always happy to assist you!
