The Syncfusion ASP.NET Core Listbox is a feature-rich control that provides great functionalities rather than just displaying a list of items. It allows users to select one or more items using check boxes, with a mouse or through keyboard interactions. It can be populated using an array of strings or an array of objects. In this blog, I am going to walk you through five major features of the Listbox control:
- Drag and drop
- Grouping
- Sorting
- Filtering
- Templating
Drag and drop
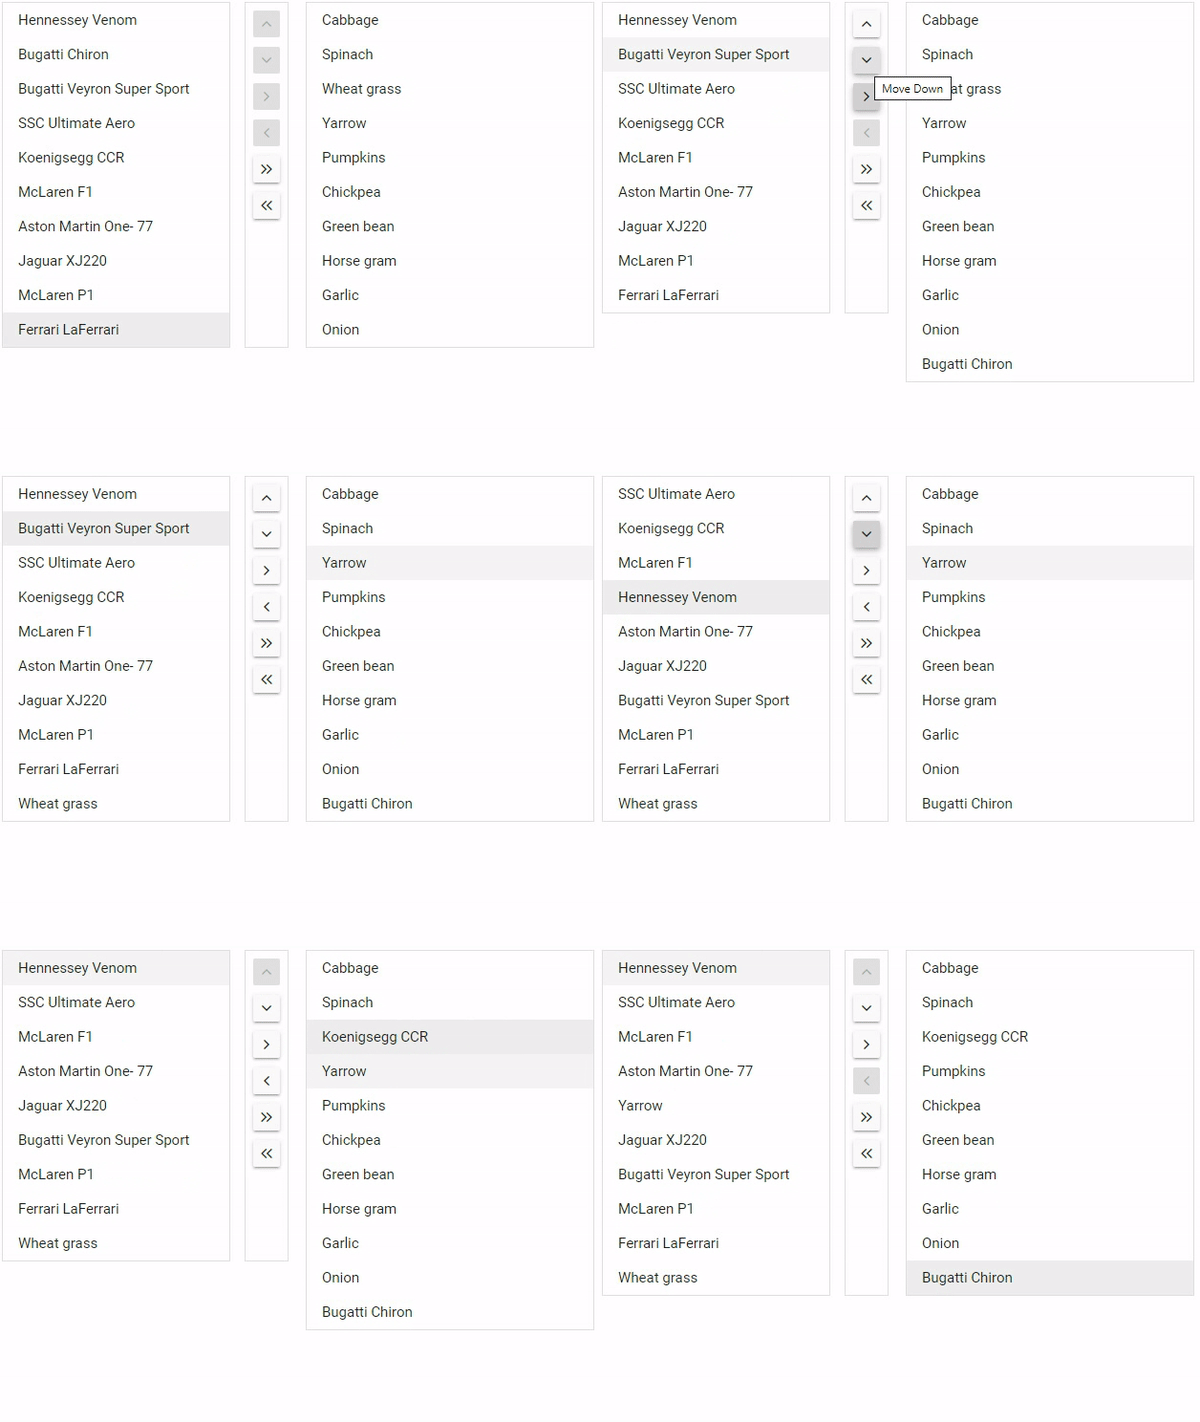
The ASP.NET Core Listbox provides an option to drag an item or a group of items and drop them within a single list box or among multiple list boxes. With this feature, multiple list boxes are mapped using the scope property, in which the values are the same.
You can also reorder items within a single list box or among multiple list boxes through keyboard interactions or using the toolbar. You can enable the toolbar by specifying the toolbarSettings property with the following options.
| Options | Descriptions |
| moveUp | Moves the selected item upwards within the Listbox. |
| moveDown | Moves the selected item downwards within the Listbox. |
| moveTo | Moves the selected item from a source Listbox to a destination Listbox. |
| moveFrom | Moves the selected item from a destination Listbox to a source Listbox. |
| moveAllTo | Moves all the items from a source Listbox to a destination Listbox. |
| moveAllFrom | Moves all the items from a destination Listbox to a source Listbox. |
Grouping
The ASP.NET Core Listbox control lets you wrap a nested element into a group based on its category. The category of each list item can be mapped with the groupBy field in the data table. The control creates headers for every group; they are for representational purposes only. They cannot be selected using a mouse or keyboard and are not bound to any data item.
The following code example demonstrates how to group a nested element.
<ejs-listbox id="listbox" dataSource="ViewBag.vegetableData">
        <e-listbox-fields groupBy="Category" text="Vegetable" value="Id"></e-listbox-fields>
</ejs-listbox>
public IActionResult grouping() {
  List<object> Data = new List<object> {
    new { Vegetable = "Cabbage", Category = "Leafy Greens", Id = "item1" },
    new { Vegetable = "Spinach", Category = "Leafy Greens", Id = "item2" },
    new { Vegetable = "Wheat grass", Category = "Leafy Greens", Id = "item3" },
    new { Vegetable = "Chickpea", Category = "Beans", Id = "item6" },
    new { Vegetable = "Green bean", Category = "Beans", Id = "item7" },
    new { Vegetable = "Horse gram", Category = "Beans", Id = "item8" },
    new { Vegetable = "Garlic", Category = "Bulb and Stem", Id = "item9" },
    new { Vegetable = "Nopal", Category = "Bulb and Stem", Id = "item10" },
    new { Vegetable = "Onion", Category = "Bulb and Stem", Id = "item11" }
  };
  ViewBag.vegetableData = Data;
  return View();
}
The following screenshot showcases grouping in Listbox.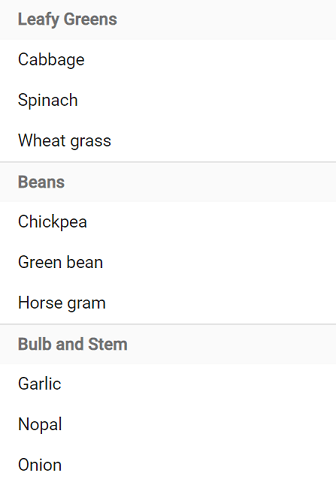
Sorting
In the ASP.NET Core Listbox control, you can sort items using the sortOrder property. You can use this property to sort both alphabetically and numerically. This property can be set to None, Ascending, or Descending, and the default value is None.
The following code snippet demonstrates how to sort items in descending order.
<ejs-listbox id="listbox" dataSource="ViewBag.vegetableData" sortOrder=”Descending”>
</ejs-listbox>
The following screenshot shows sorting in Listbox in descending order.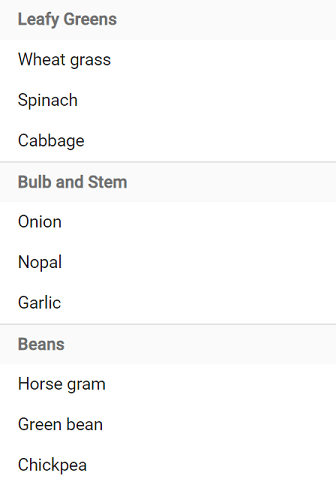
Filtering
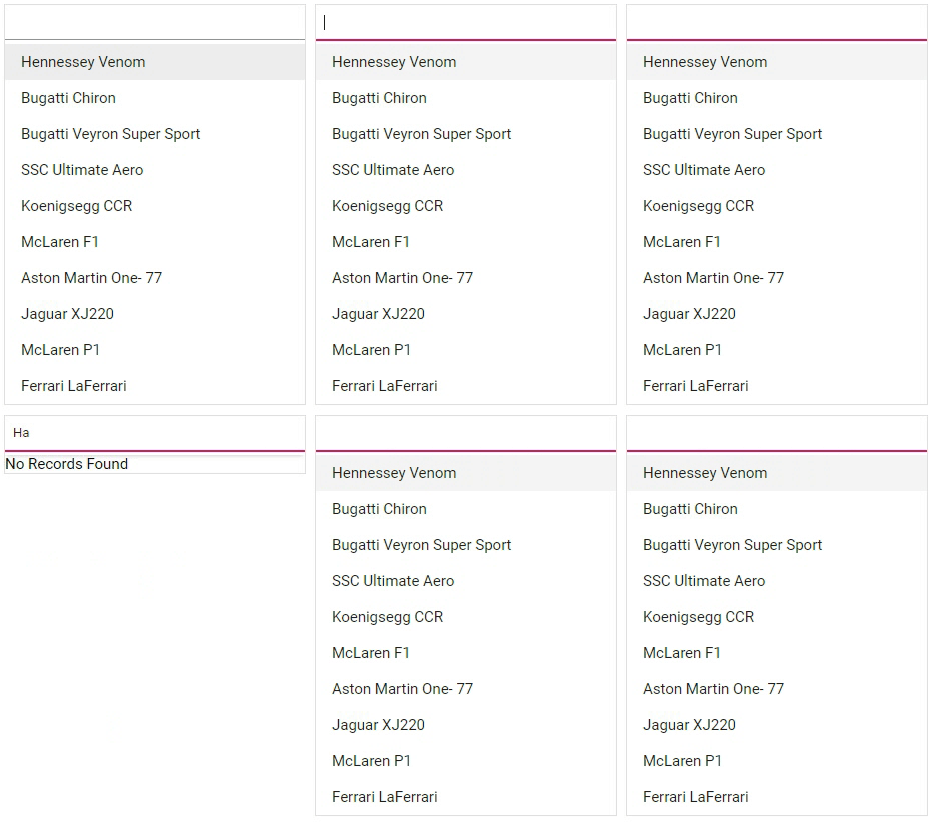
In the ASP.NET Core Listbox control, you can enable filtering by specifying the allowFiltering property. The filtering can be performed using the filterType property or filtering event. The filterType property is used to specify the type of filtering, such as startswith, endswith, and contains, which perform filtering and display the result in the list box. The filtering event is used to perform custom filtering through the updateData method.
The following code example showcases filtering.
<ejs-listbox id="listbox" dataSource="ViewBag.vegetableData" allowFiltering="true" filtering="onfiltering">
</ejs-listbox>
<script>
    function onfiltering(e) {
        var query = new ej.data.Query();
        query = (e.text !== '') ? query.where('Name', 'startswith', e.text, true) : query;
        e.updateData(@Html.Raw(JsonConvert.SerializeObject(ViewBag.data)), query);
    }
</script>
Templating
To provide flexibility, the ASP.NET Core Listbox offers template support. Users can render a custom user interface to display data items using the itemTemplate property. A template can include a mixture of static HTML and web controls.
The following code example shows templating.Note: The images were referenced from the wwwroot folder of the corresponding project.
<ejs-listbox id="listbox" dataSource="ViewBag.employeeData" itemTemplate= '<div><img class="e-img" src="../Employees/${Image}.png" alt="employee"/> <div class="e-name"> Name: ${Text} </div></div>'
<e-listbox-fields groupBy="Country" text="Text"></e-listbox-fields>
</ejs-listbox>
<style>
      .e-name {
            font-weight: bold;
            padding: 0 10px 10px;
        }
        .e-img {
            padding: 10px 10px;
        }
</style>
public IActionResult Index()  {
        List<object> Data = new List<object>{
                new { Text="Mona Sak", Image="1", Country="USA"},
                new { Text="Evie Nowak", Image="2", Country="USA" },
                new { Text="Britney Linden", Image="3", Country="ENGLAND" },
                new { Text="Jessica Bisset", Image="4", Country="ENGLAND" },
                new { Text="Gwen Brown", Image="5", Country="USA" }
         };
         ViewBag.employeeData = Data;
         return View();
}
Note: The images were referenced from the wwwroot folder of the corresponding project.
The following screenshot showcases the custom user interface in Listbox.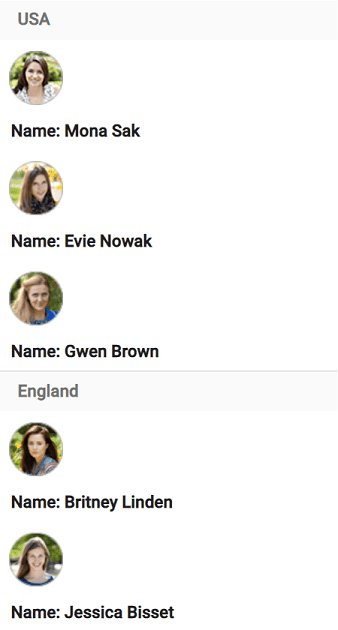
Conclusion
I hope you now have a better understanding of the major features supported by the ASP.NET Core Listbox control. What else do you expect from a list box? Please share your thoughts in the comments section.
If you’re already a Syncfusion user, you can download Essential Studio® for ASP.NET Core’s product setup to try out this control. Otherwise, you can download a free 30-day trial.
If you have any questions about these features, please contact us through our Support Forum, Direct-Trac, or Feedback Portal. We are happy to assist you!

Comments (1)
useful blog