TL;DR: Let’s design a hotel booking app using the Syncfusion React Data Grid and other components. This blog covers displaying hotel details, filtering based on dates and budget, selecting rooms with preferred amenities, and managing user data for reservations. Follow along to create a versatile and efficient booking system with a user-friendly interface.
Looking to create a user-friendly hotel booking app in React? This tutorial shows you how to use the powerful Syncfusion React Data Grid to display hotel details, filter rooms by date and budget, and manage bookings with ease.
With built-in features like sorting, filtering, and custom row templates, the Syncfusion React Data Grid simplifies data management for web apps, making it ideal for building a seamless hotel booking experience based on budget, amenities, location, and user reviews.
This demo will show you how to:
- Use the React Data Grid to display lists of hotels, their facilities, costs, locations, and user reviews.
- Provide options to select a hotel based on available rooms for selected check-in and check-out dates, budget, facilities, and user reviews.
Let’s get started!
Building your app environment
Prerequisites
Before building with the Syncfusion React Data Grid, ensure your environment is ready:
- node.js 16.0
- If you have not previously installed the React packages or have an older version of node.js, you can run the following command to install them.
npm install -g create-react-app
Step 1: Create a React app
Create a React app, you can execute the following command.
npx create-react-app my-app
cd my-app
npm start
Or, using Yarn:
yarn create react-app my-app
cd my-app
yarn start
Besides using the npx package runner tool, you can also create an app using the npm init. To begin with the npm init command, upgrade the npm version to npm 6+.
npm init react-app my-app
cd my-app
npm start
Note: In the following demo, we’ll create a React app in a JavaScript environment.
Step 2: Adding Syncfusion React packages
Once you have created the React app, install the Syncfusion React Data Grid component packages. All Syncfusion React (Essential JS 2) packages are published on the NPM public registry. Choose the component you want to install.
In this demo, we’ll use the following Syncfusion React components to create a hotel room booking app.
- Data Grid
- Calendar
- Date Range Picker
- Numeric Textbox
- TextBox
- Rating
- Slider
- Uploader
- Masked TextBox
- Toast
- Maps
- Button
- Dialog
- DropDown List
- Form Validator and input components
To install these Syncfusion React packages, run the following commands:
npm install @syncfusion/ej2-react-grids –save
npm install @syncfusion/ej2-react-inputs –save
npm install @syncfusion/ej2-react-buttons –save
npm install @syncfusion/ej2-react-calendars –save
npm install @syncfusion/ej2-react-dropdowns –save
npm install @syncfusion/ej2-react-popups –save
npm install @syncfusion/ej2-react-navigations --save
npm install @syncfusion/ej2-react-notifications –save
npm install @syncfusion/ej2-react-maps --save
If you find it tedious to install the packages one by one, you can copy the following dependencies and paste them into your package.json file.
[package.json]
{
  "name": "quickstart",
  "version": "0.1.0",
  "private": true,
  "dependencies": {
    "@syncfusion/ej2-react-grids": "*",
    "@syncfusion/ej2-react-calendars": "*",
    "@syncfusion/ej2-react-buttons": "*",
    "@syncfusion/ej2-react-popups": "*",
    "@syncfusion/ej2-react-inputs": "*",
    "@syncfusion/ej2-react-dropdowns": "*",
    "@syncfusion/ej2-react-navigations": "*",
    "@syncfusion/ej2-react-maps": "*",
    . . .
  }
}
Step 3: Adding CSS reference
After installing the Syncfusion component packages, import the required themes based on the components used.
Syncfusion React components come with built-in themes that are available in the installed packages. You can adapt the React components based on the app style by referring to any built-in themes.
To refer to the common CSS file containing all the component CSS through CDN, add the following code to your index.html file.
[./public/index.html]
<link href="https://cdn.syncfusion.com/ej2/25.2.3/fabric.css" rel="stylesheet" />
Alternatively, you can reference the CSS for individual components from the node module. In this example, we’ve referenced the React components CSS from the node module in the HotelBookApp.css file.
[./src/HotelBookApp.css]
@import '../node_modules/@syncfusion/ej2-base/styles/fabric.css';
@import '../node_modules/@syncfusion/ej2-buttons/styles/fabric.css';
@import '../node_modules/@syncfusion/ej2-calendars/styles/fabric.css';
@import '../node_modules/@syncfusion/ej2-dropdowns/styles/fabric.css';
@import '../node_modules/@syncfusion/ej2-inputs/styles/fabric.css';
@import '../node_modules/@syncfusion/ej2-navigations/styles/fabric.css';
@import '../node_modules/@syncfusion/ej2-popups/styles/fabric.css';
@import '../node_modules/@syncfusion/ej2-splitbuttons/styles/fabric.css';
@import "../node_modules/@syncfusion/ej2-react-grids/styles/fabric.css";
@import "../node_modules/@syncfusion/ej2-icons/styles/fabric.css";
@import "../node_modules/@syncfusion/ej2-lists/styles/fabric.css";
@import '../node_modules/@syncfusion/ej2-notifications/styles/fabric.css';
Ensuring seamless app implementation
Once you have completed all the initial setup, you can begin implementing the app step by step.
Step 1: Showcasing hotel and room facilities using React Data Grid
In this section, we’ll use the Syncfusion React Data Grid to showcase various room profiles along with their respective hotel names, room images, highlighted user reviews, locations, and facilities, leveraging it’s React Grid capabilities.
We’ll also use the React DataGrid’s row template feature to customize the appearance and layout of grid rows. This feature will allow us to display custom content such as images, buttons, or other controls.
Refer to the following image.
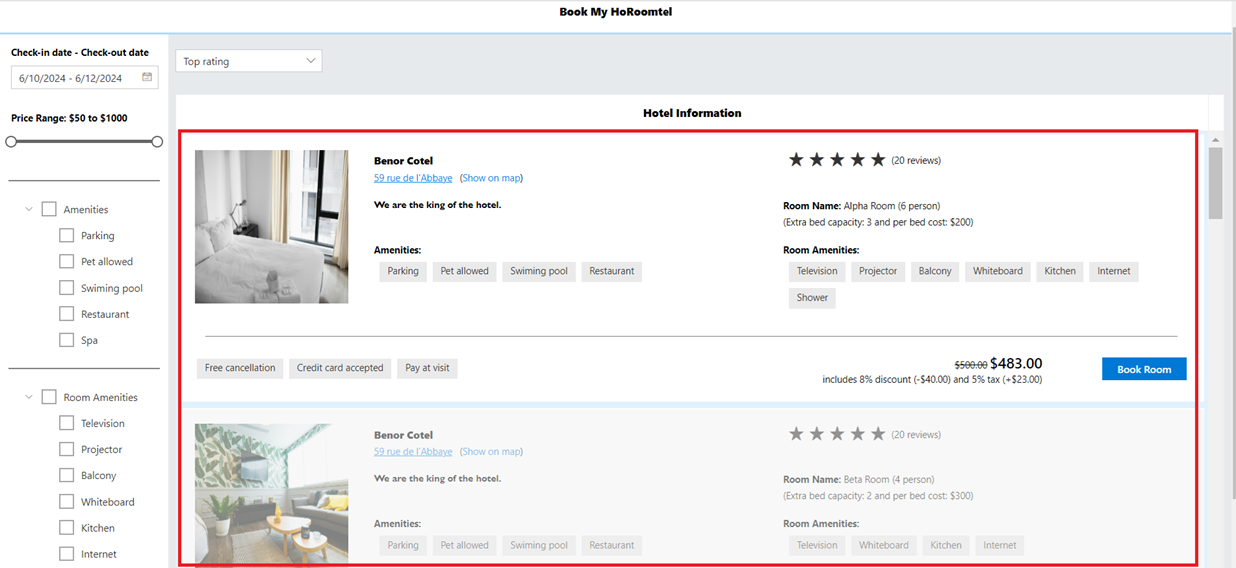
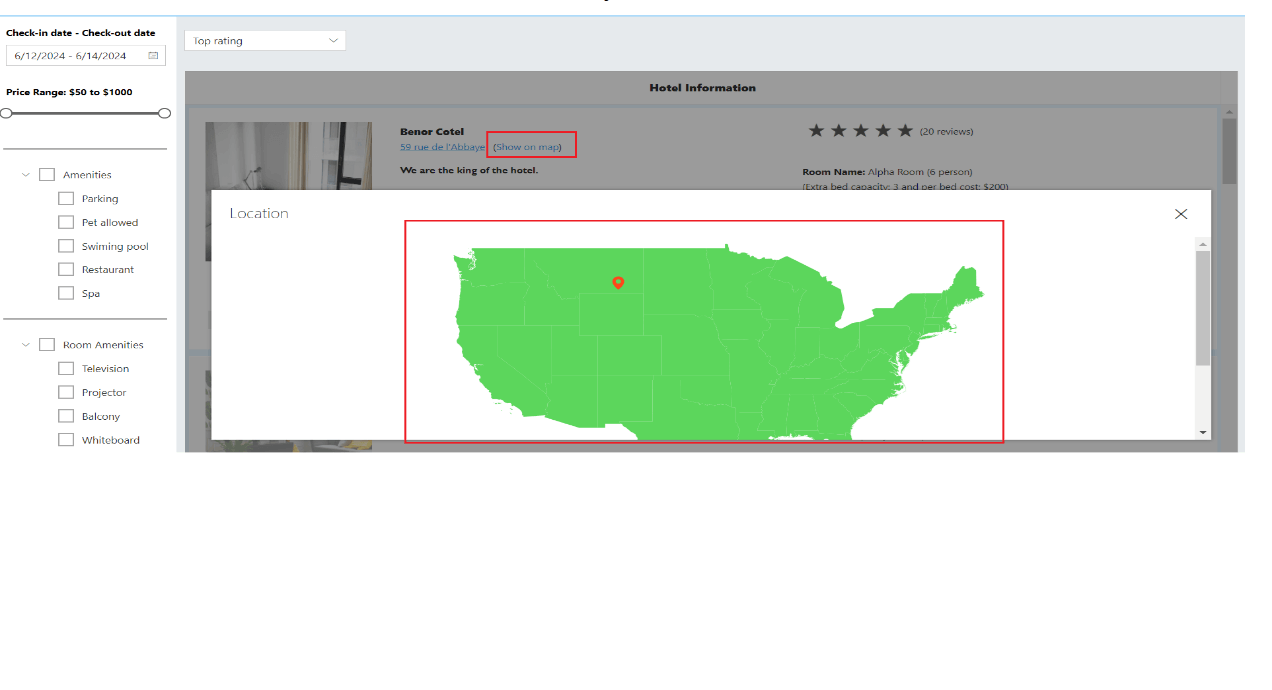
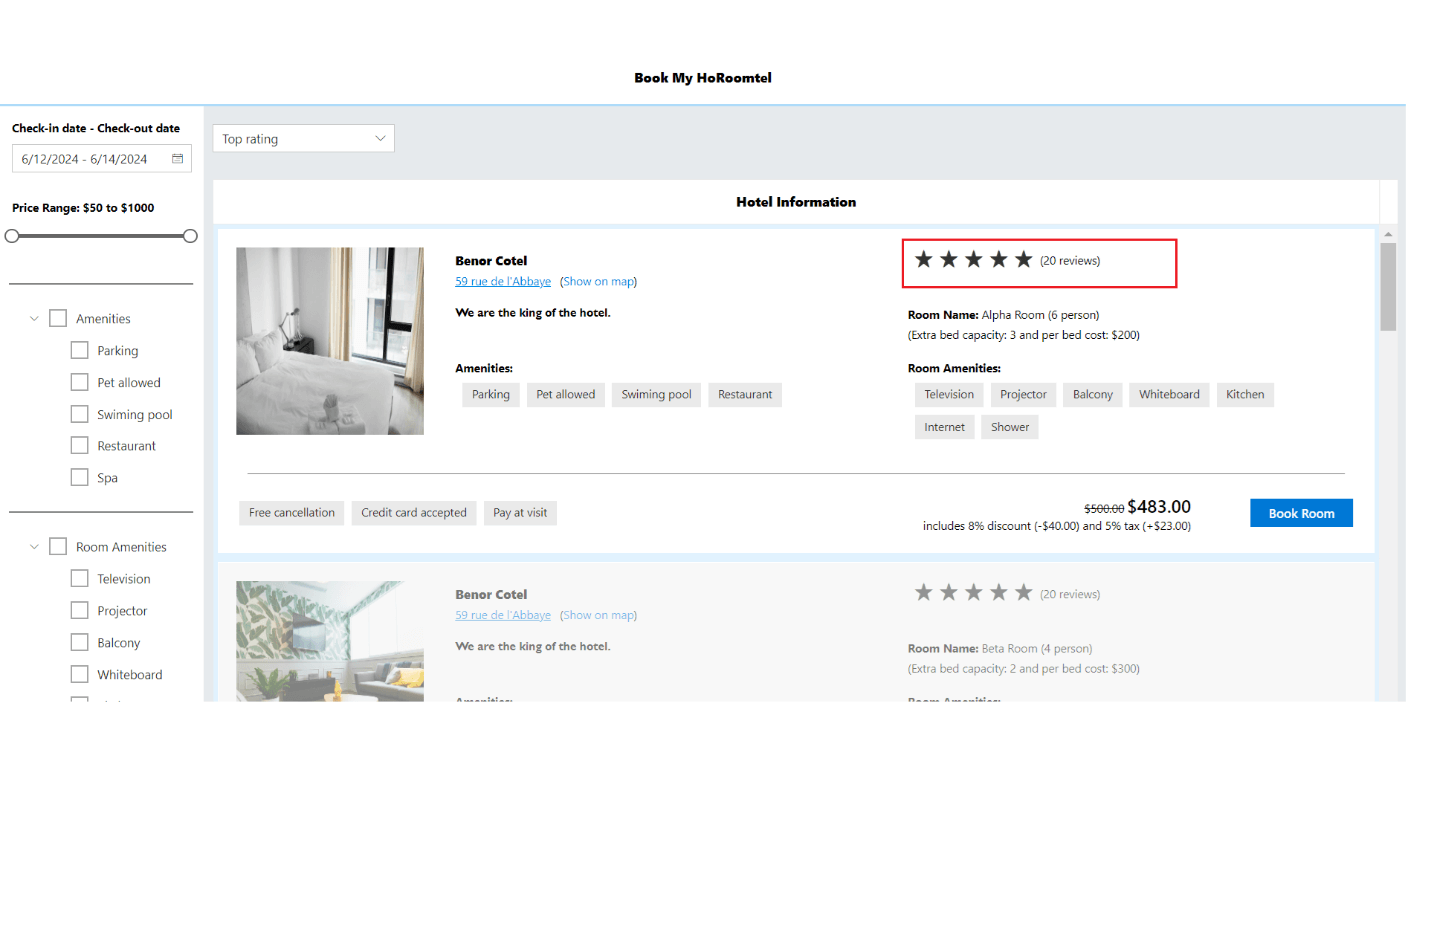
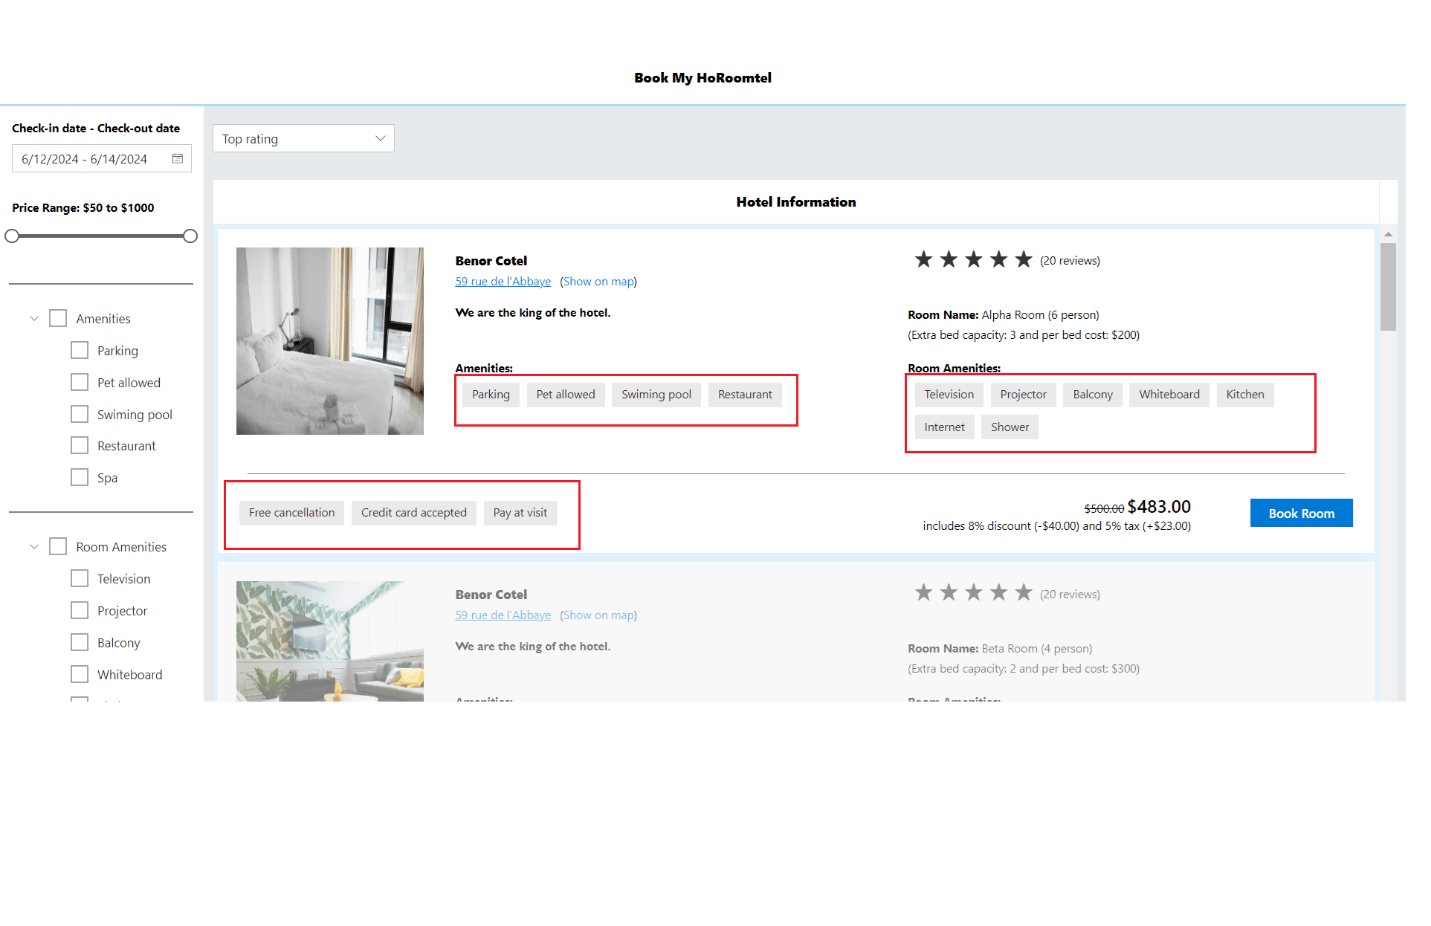
In this demo, we’ve used the following Syncfusion React components and HTML elements within the Grid row template to highlight hotel rooms with comprehensive details.
- Maps: To specify the hotel’s location. In this demo, we’ve assigned the random latitude and longitude values for the hotel location.
React Data Grid integrated with Maps to display hotel locations - Rating: To display user review ratings.
React Data Grid integrated with the Rating component to display user reviews - Chips: To highlight room and hotel amenities.
React Data Grid integrated with the Chips component to highlight room and hotel amenities - Button: To book a room and initiate the booking process.
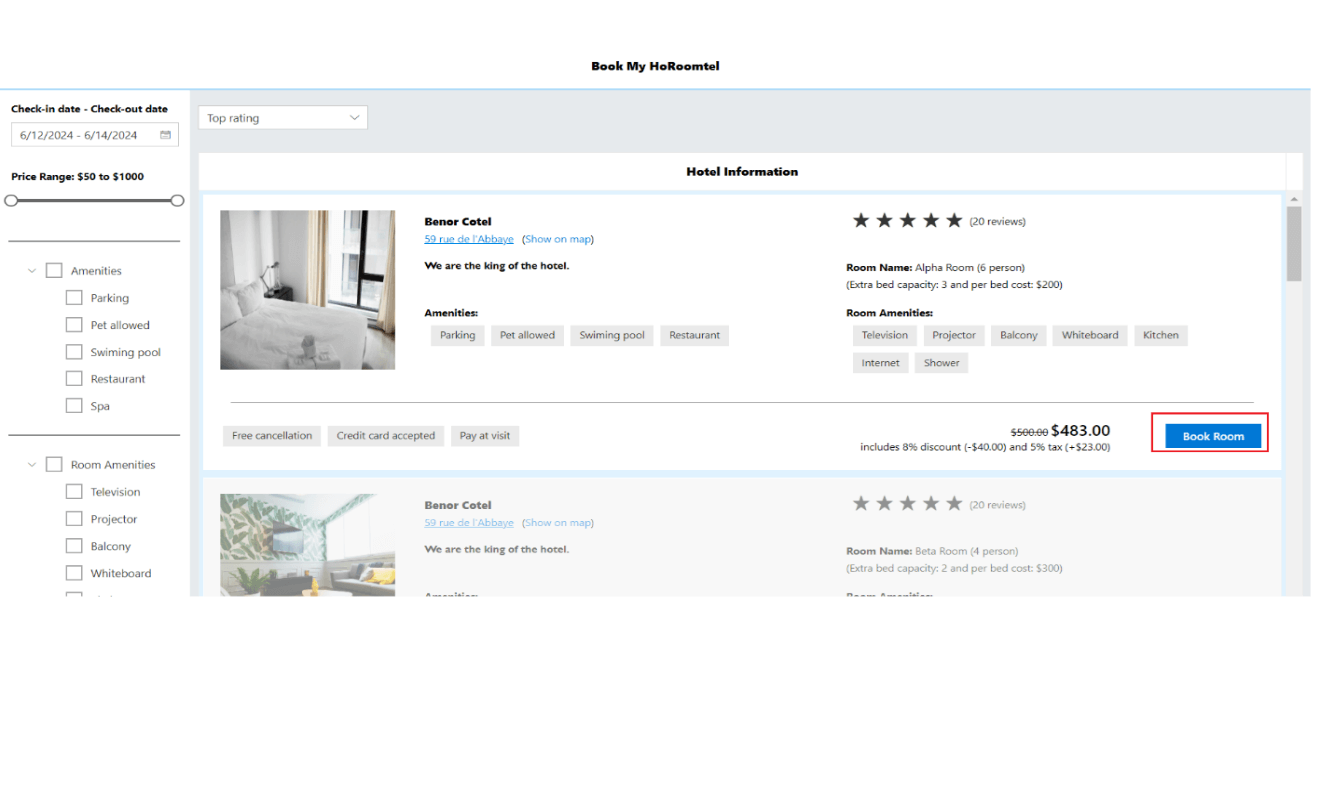
Using React Data Grid’s Button to book a room - Additionally, the HTML img tag is used to display images, and the span, div, and hyperlink tags are used to display text.
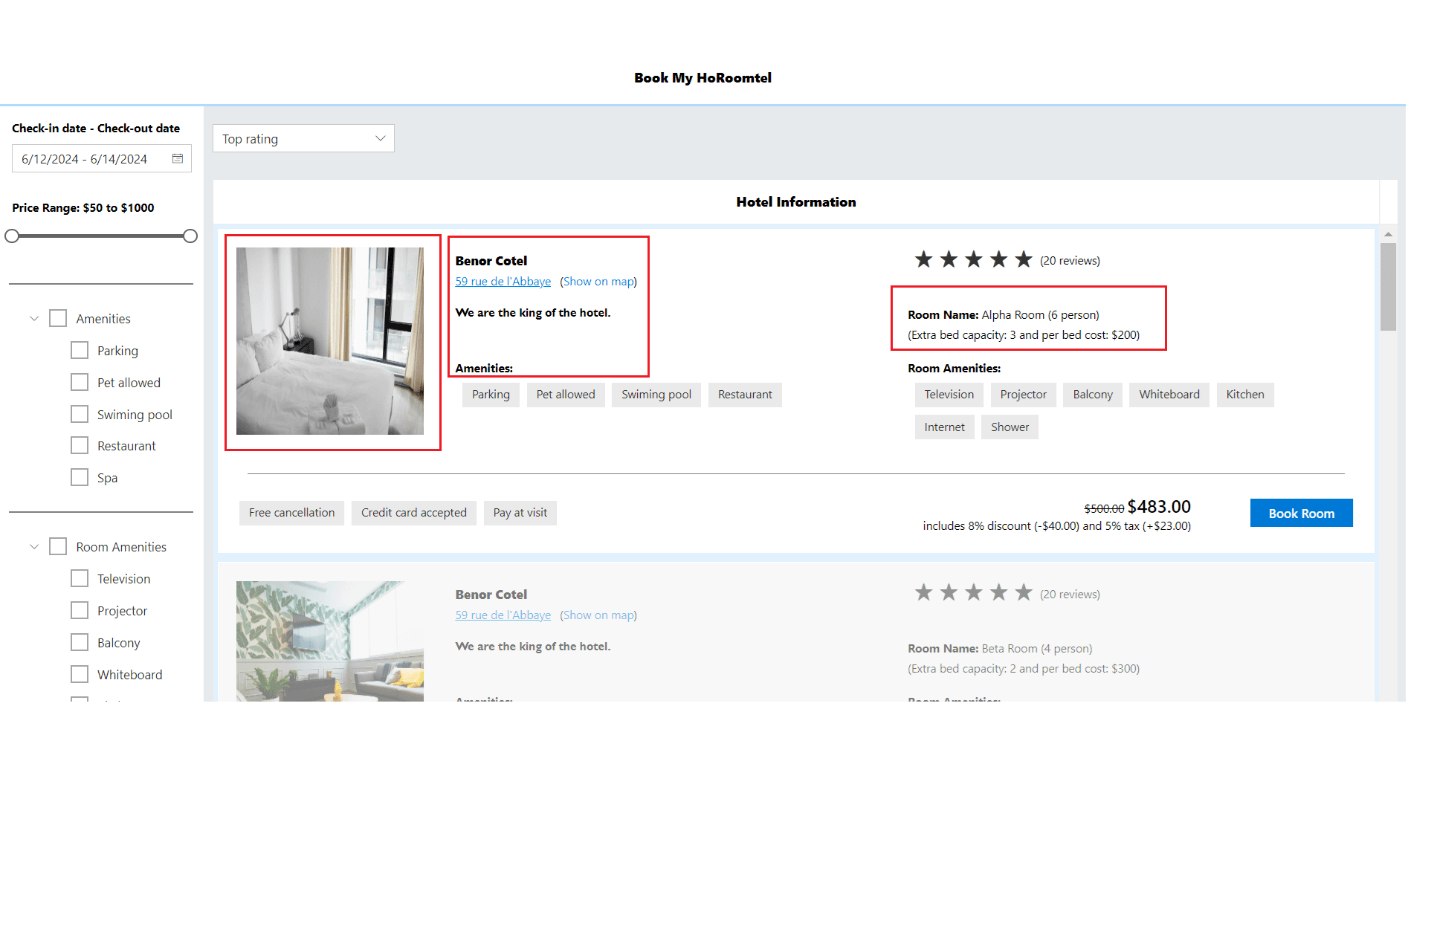
Using HTML tags to display images and text in React Data Grid
Step 2: Simplify your stay with check-in/out dates, prices, and amenities
This section illustrates how to showcase React components in the sidebar and conduct sorting and filtering operations according to your database using the Syncfusion React DataManager.
The DataManager serves as a versatile gateway for both local and remote data sources, seamlessly interacting with them using queries. You can perform a wide range of data operations, including sorting, filtering, searching, and aggregating. Additionally, it supports CRUD (Create, Read, Update, Delete) functionalities, enabling comprehensive data management capabilities.
This makes the DataManager an essential tool for handling complex data interactions and ensuring efficient data processing and manipulation in your apps. For more information about DataManager, refer to the documentation.
Sorting hotel rooms by rating and budget
In this demo, we’ll use the React DropDown List to present the options:
- Top rating,
- Price low to high, and
- Price high to low.
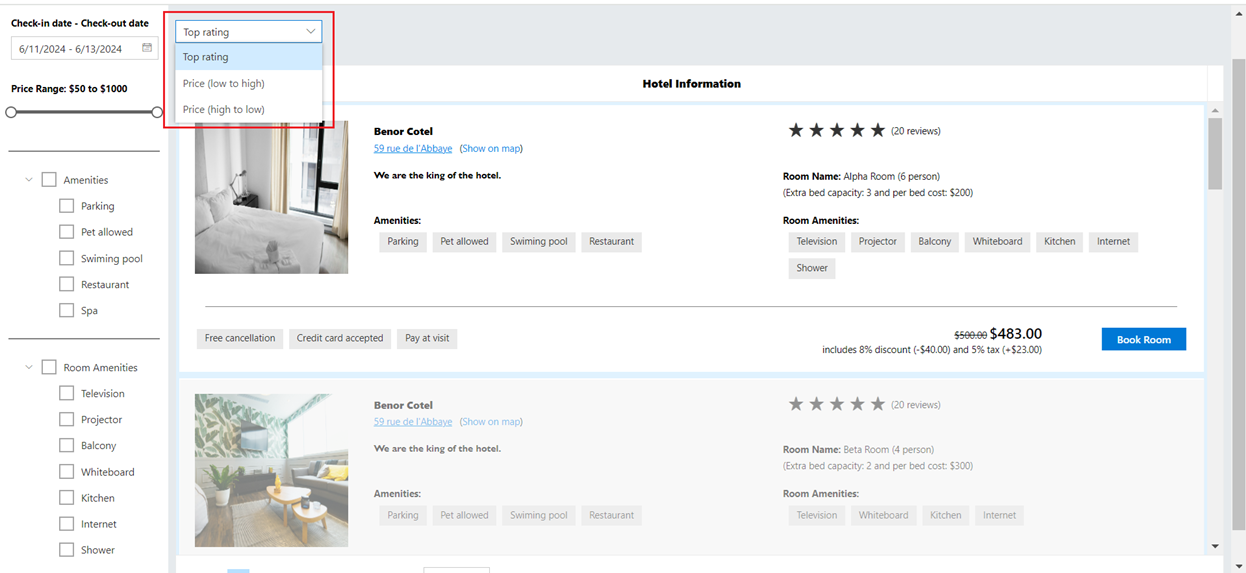
Depending on the user’s selection, we can sort the hotel room data using the DataManager’s sorting feature, with the results displayed in the Data Grid.
Ensuring availability for your stay dates
Let’s use the React Date Range Picker component to choose your check-in and check-out dates for your stay. Once you’ve selected your stay dates, the DataManager begins the filtering process to refine available rooms and display them in the Data Grid according to your chosen dates. For more details, refer to the DataManager’s filtering feature.
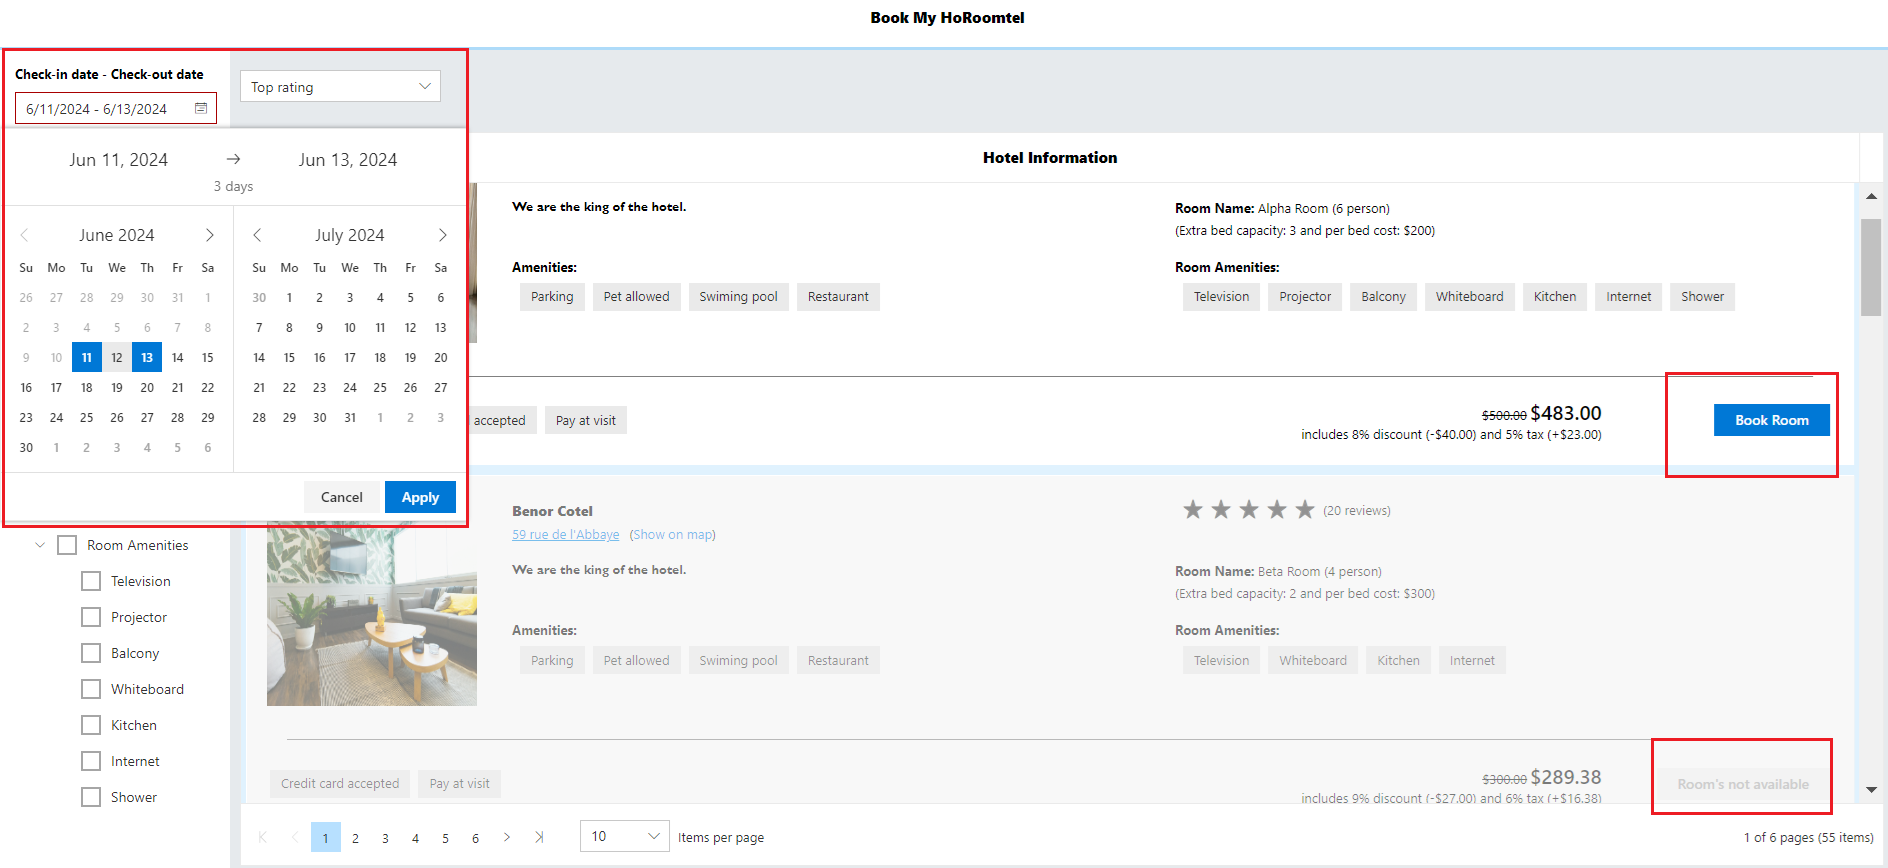
The DataGrid showcases rooms with an enabled Book Room button if they are available on your chosen dates. Conversely, the Book Room button is disabled if they are unavailable.
Selecting the ideal room within your budget
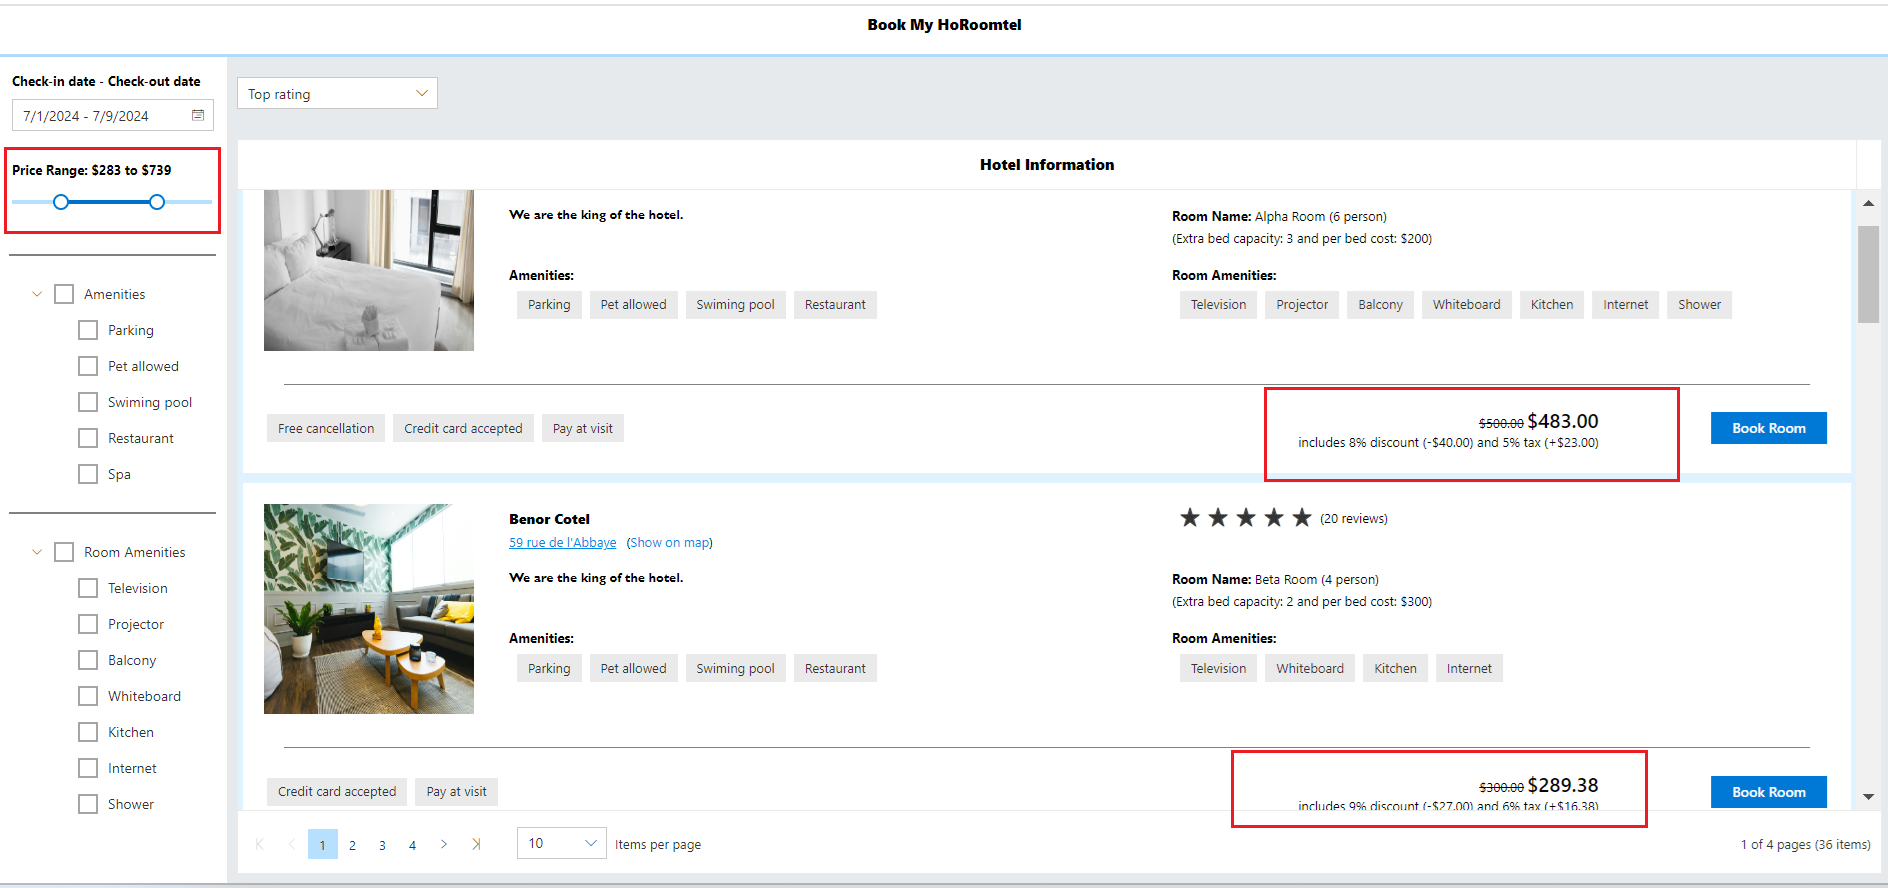
Now, use the React Slider component to choose rooms within your budget, allowing you to set minimum and maximum prices. Once you’ve set the price range, the DataManager initiates the filtering process to display available rooms in the Data Grid within the specified price range.
Selecting hotels and rooms to match your preferred amenities
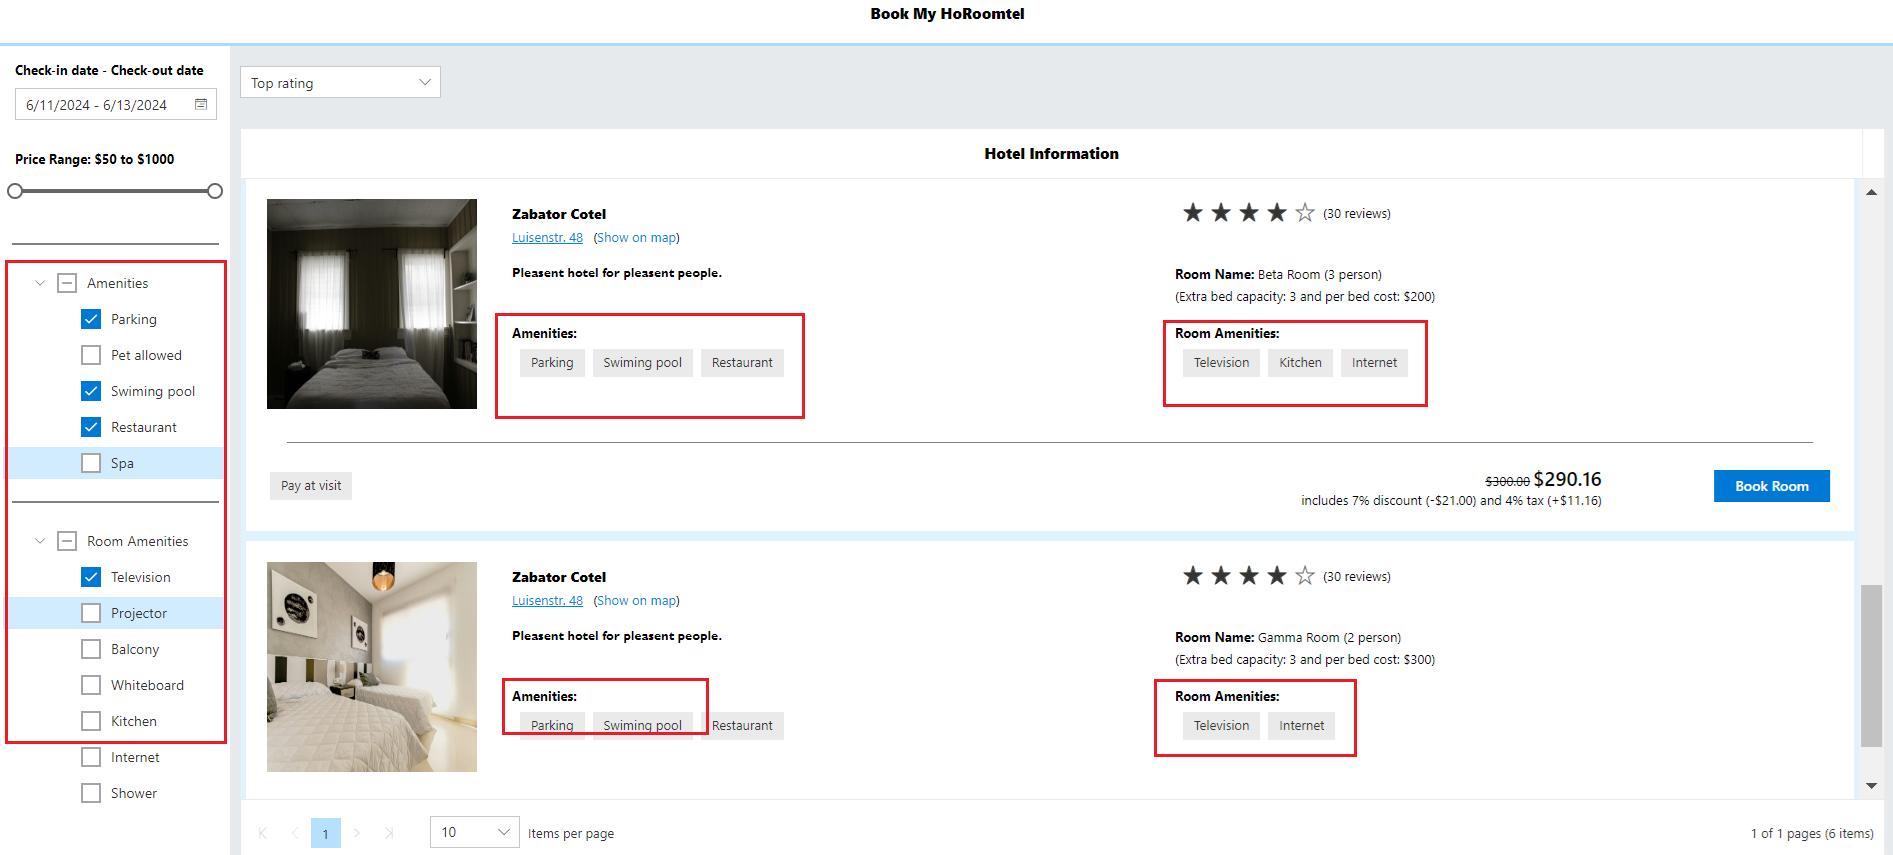
Then, employ the React TreeView to display hotels and room amenities. After selecting your preferred amenities, the DataManager starts the filtering process to display available rooms in the Data Grid within the specified price range.
Collecting user mandatory details for room reservations
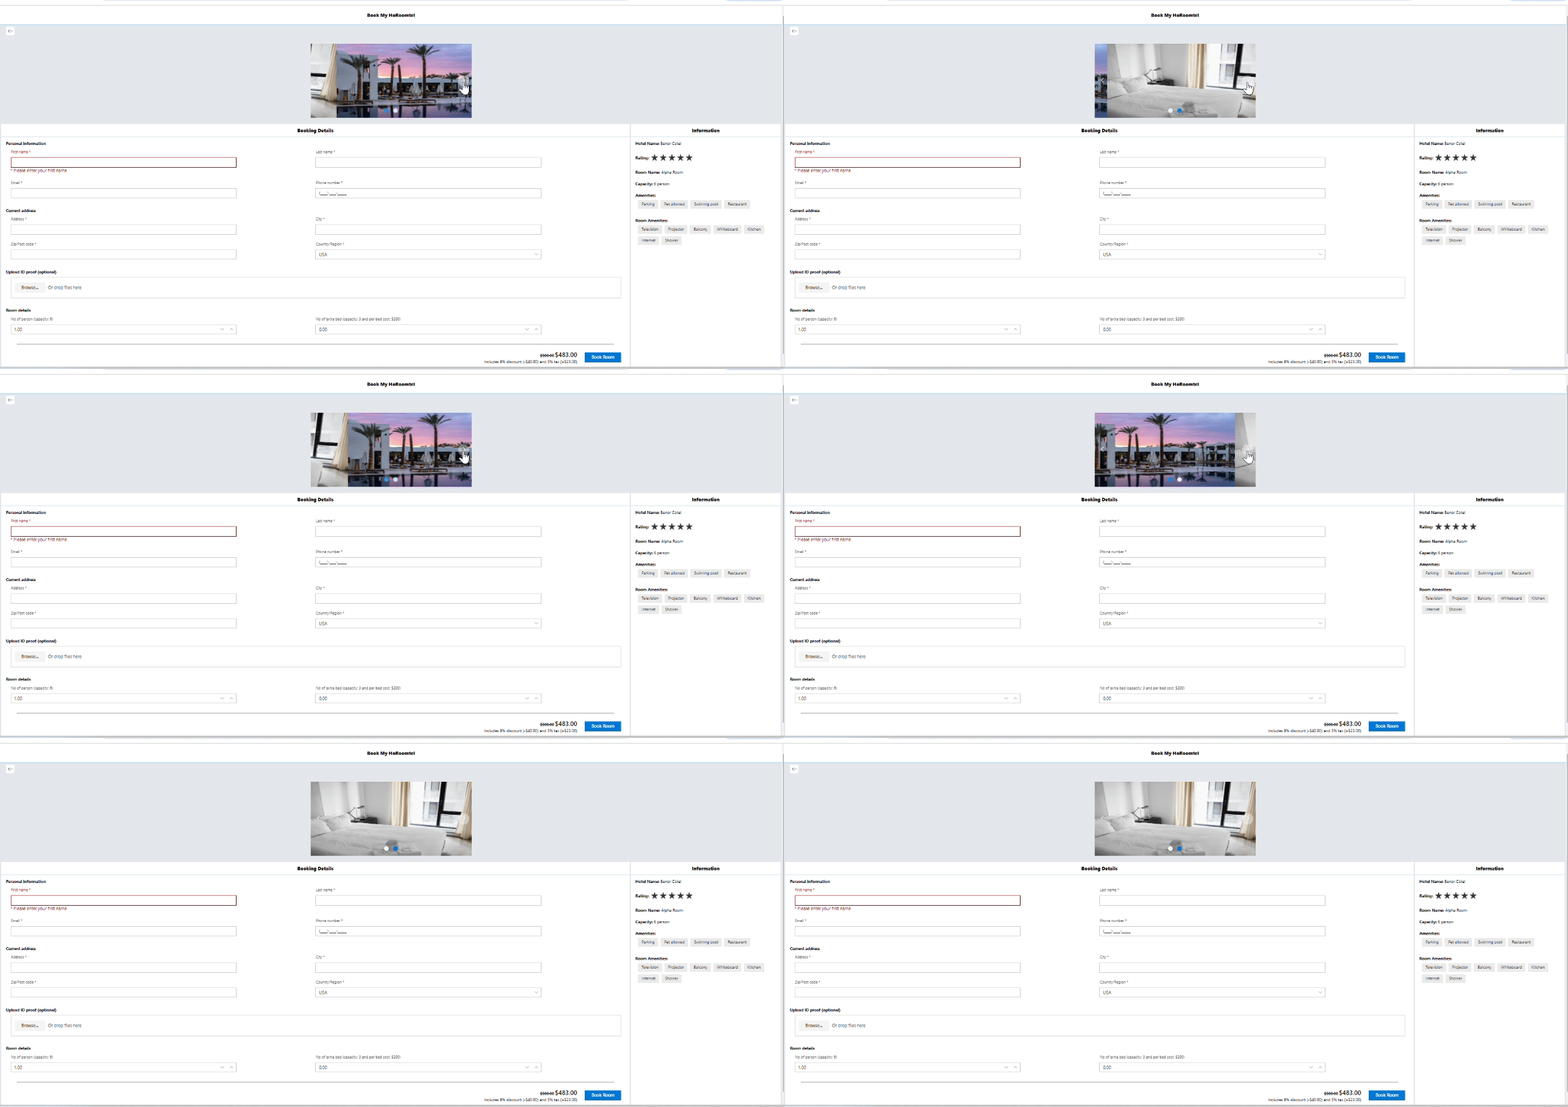
Let’s improve the user experience for room booking by incorporating a slideshow feature that displays various room and hotel images using the React Carousel component.
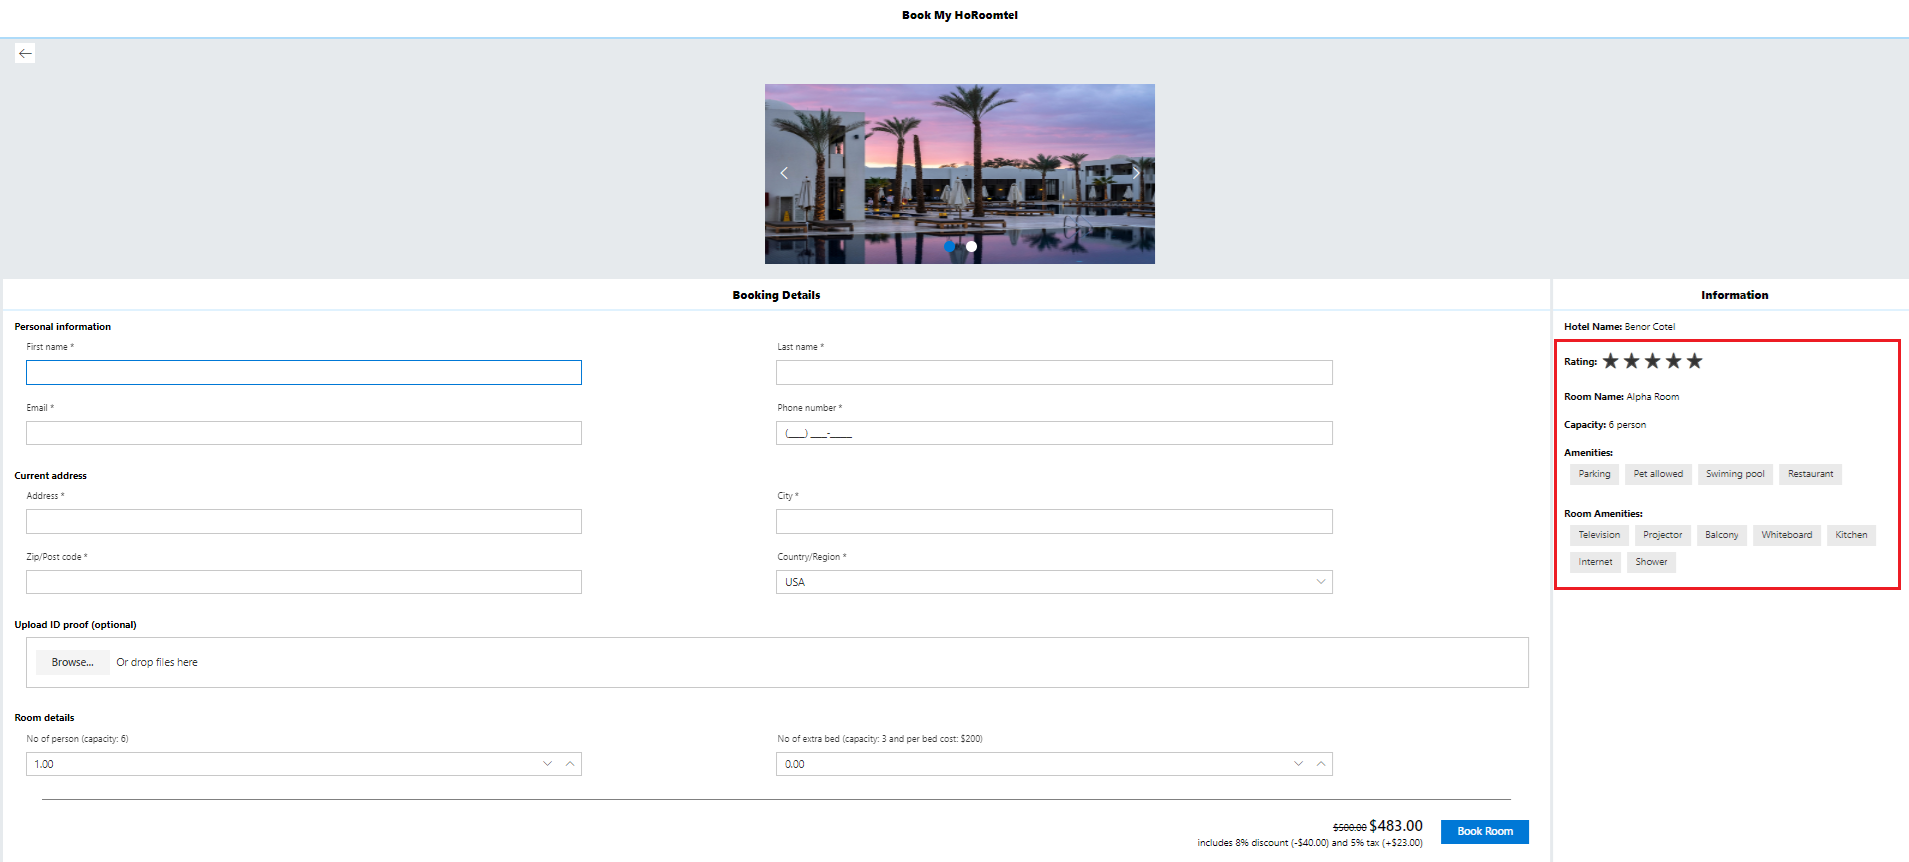
Additionally, we’ll incorporate the React Rating component to showcase user ratings and the Chips component to highlight hotel and room amenities, enhancing the rich UI experience.
Step 3: Implementing the React Form Validator to get the user details
In this section, we’ve employed the React Form Validator to ensure the collection of mandatory user details for room bookings. Within the form, we’ve integrated the following React components to gather user information:
- TextBox: To capture user details such as First Name, Last Name, Email, and City.
- Masked TextBox: To collect user phone numbers.
- DropDown List: To enable users to select their Country/Region name.
- Uploader: To upload mandatory authorized ID proof documents.
- Numeric Textbox: To input the number of guests and extra beds required.
- Button: To confirm the booking process.
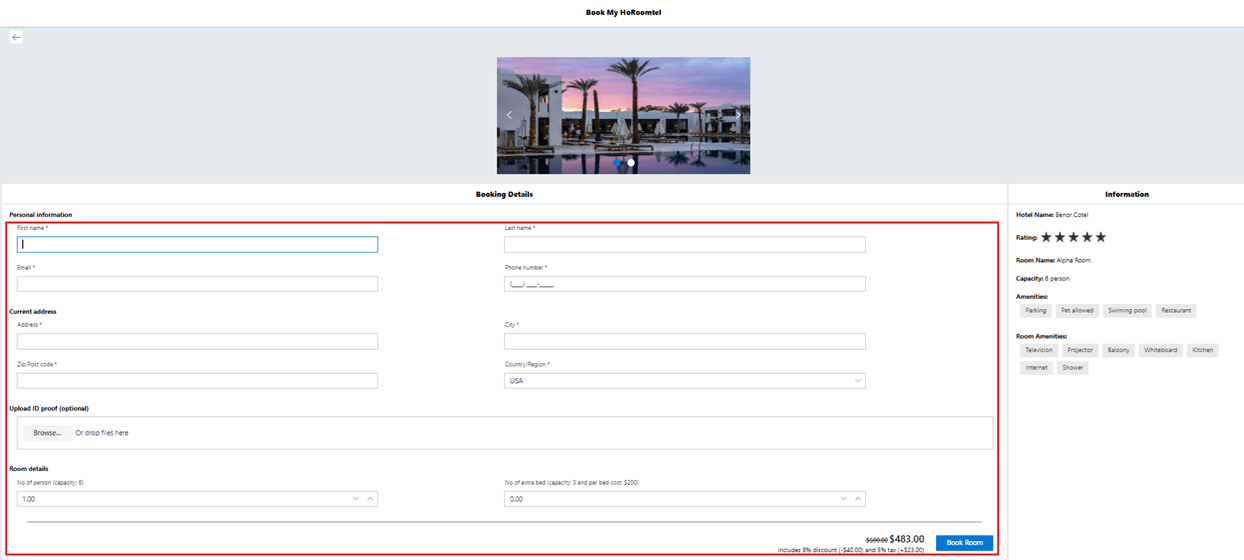
Implementing form validation
The React Form Validator offers the functionality to validate forms by incorporating validation rules. For more details, refer to the validation rules and error messages in the React Form Validator.
In this demo, we’ll implement the following validation rules:
- required: To ensure mandatory completion of fields such as First Name, Last Name, Email, Address, Phone number, and Zip code.
- minLength: To enforce the entry of a minimum number of characters for First Name and Last Name.
- email: To validate the format of the Email field, ensuring it conforms to email standards.
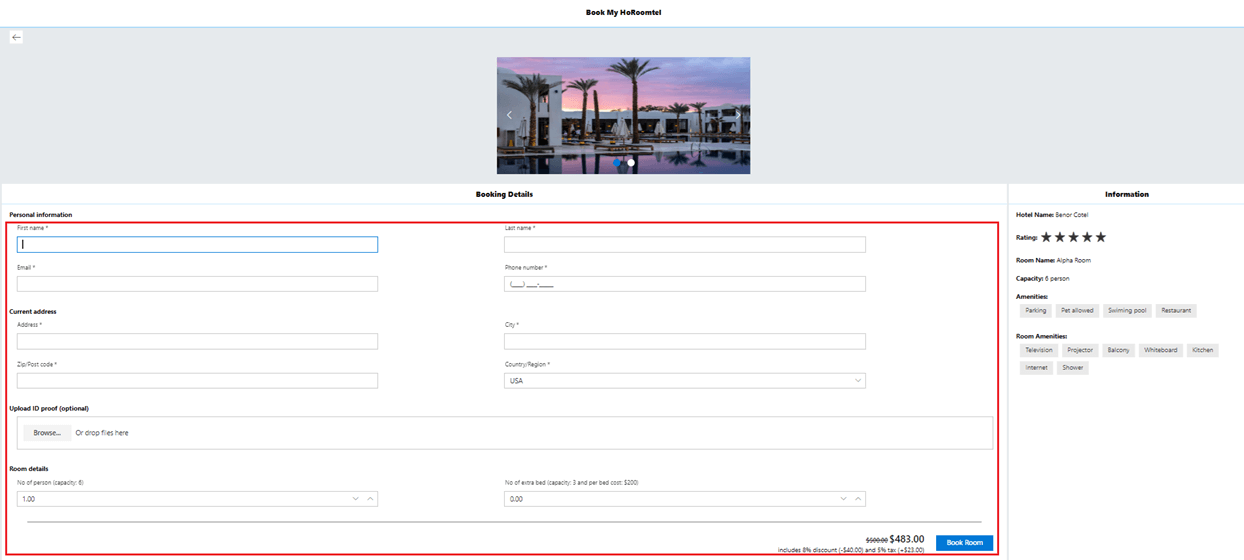
Step 4: Finalizing your booking with printing receipt
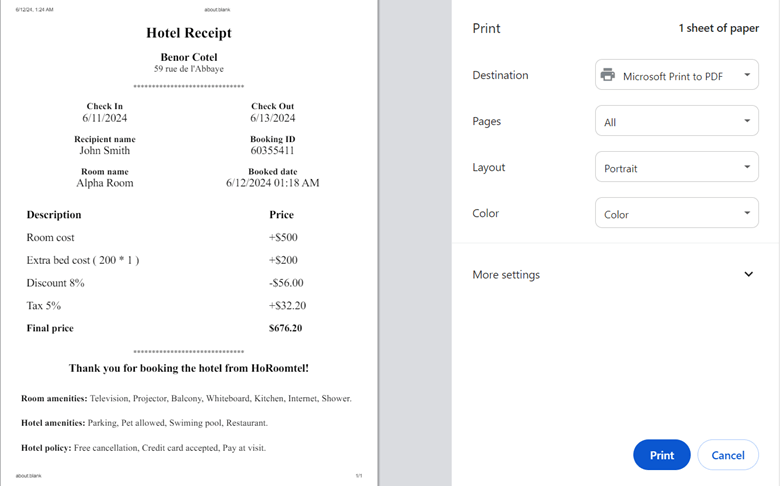
This section explains the booking confirmation process and how to print the booking receipt. After filling in all the mandatory details, select the Book Room button.
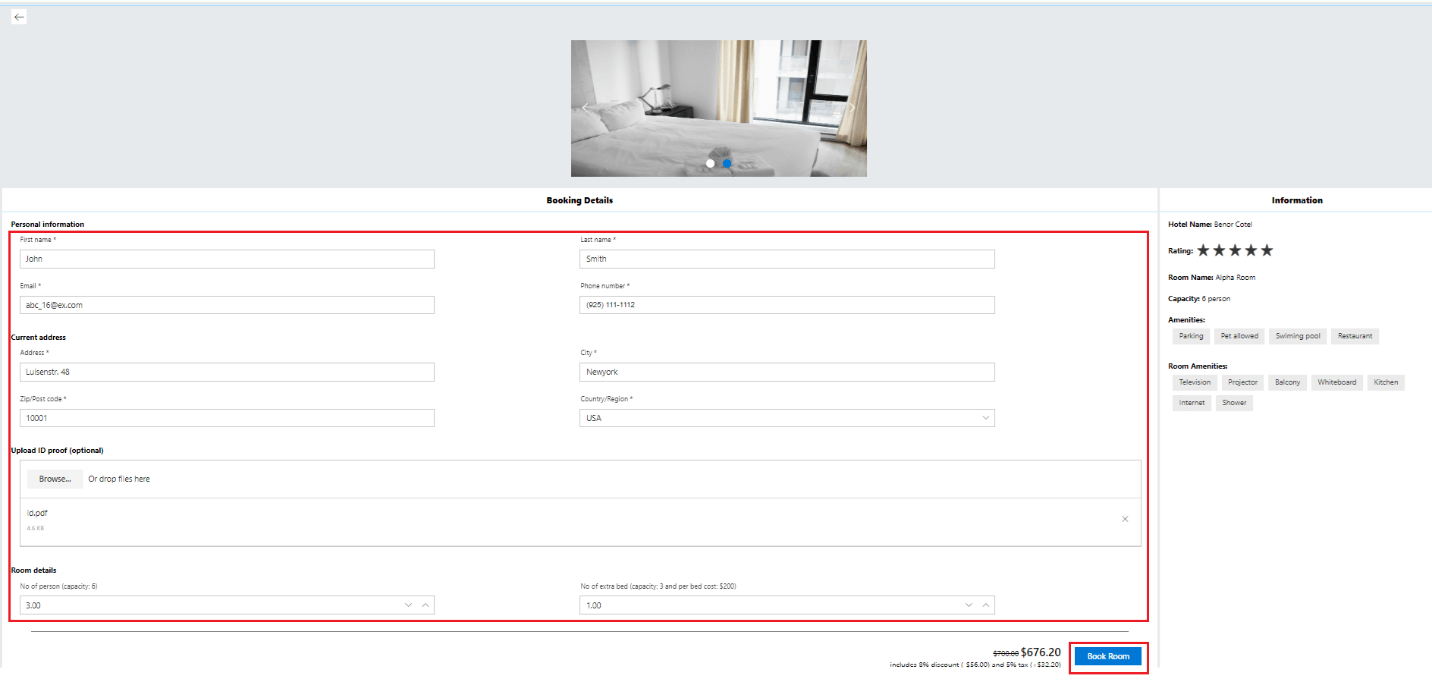
Now, the user details will be saved in the Data Grid.
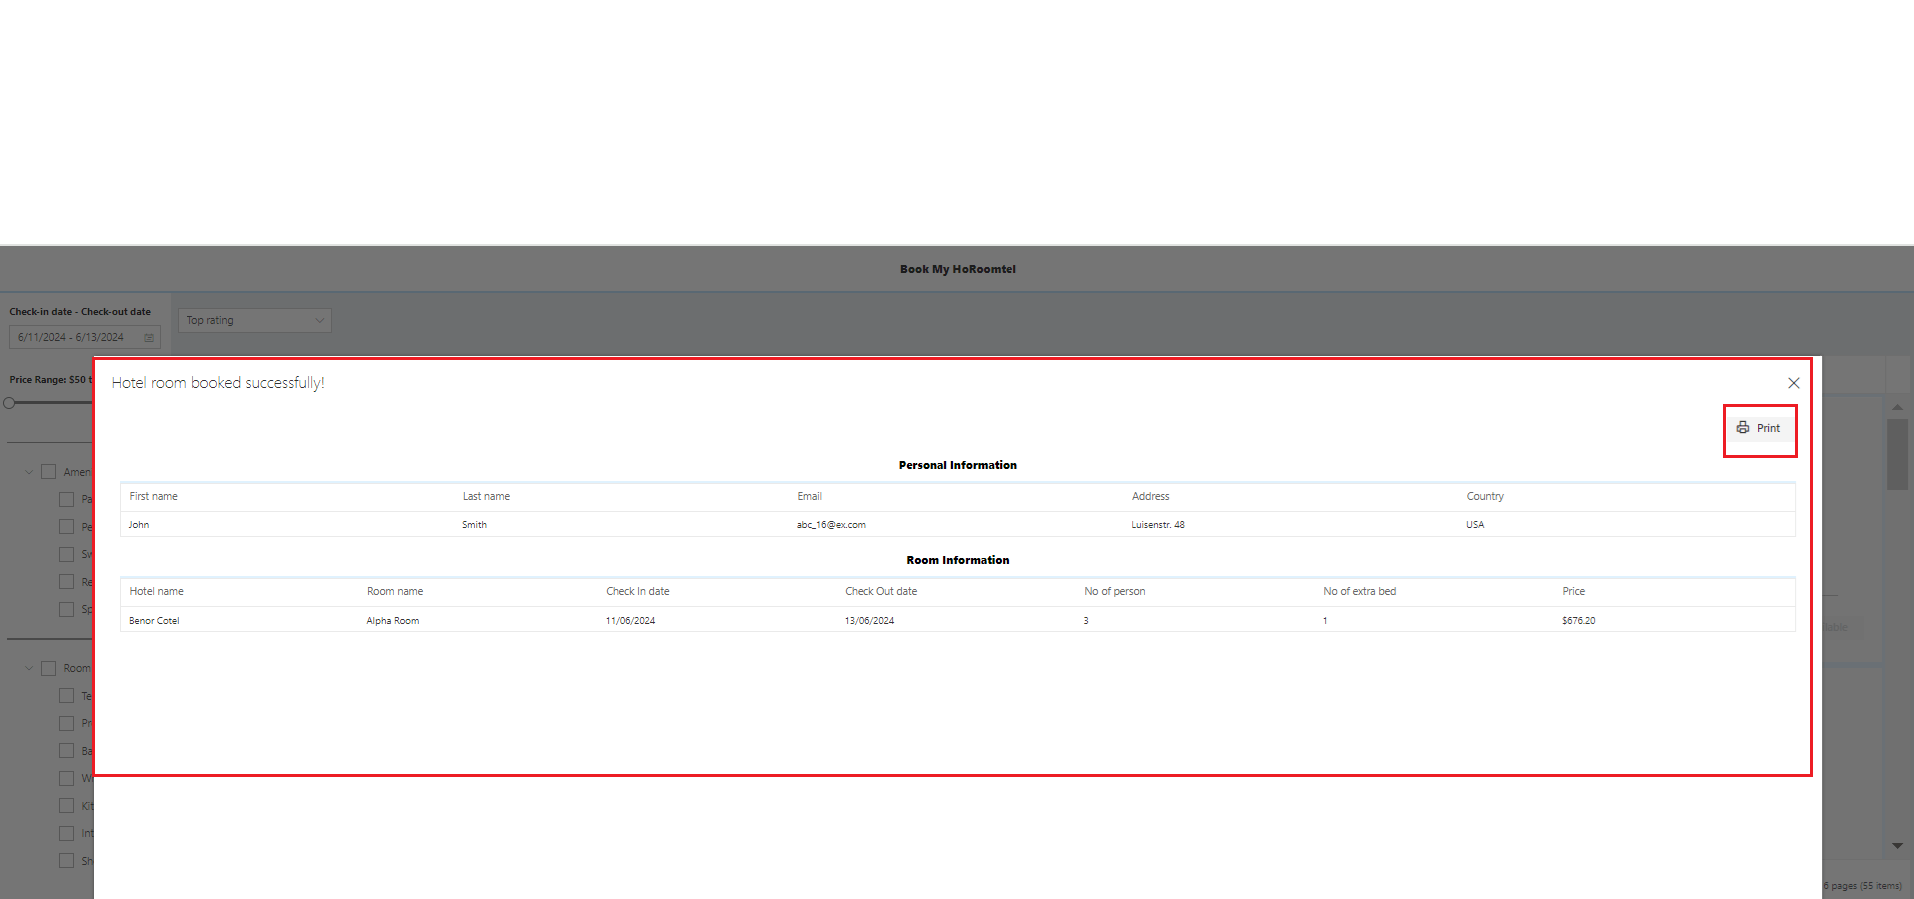
When you click the Print button, the Data Grid initiates the printing process using its printing feature.
GitHub reference
Check out the complete code examples for Creating a hotel booking app with the React Data Grid on GitHub.
Run the app
To run the sample, execute the following command in your command prompt.
npm start
Common errors while executing the React app
|
Error |
Solution |
|
Module not found: Can’t resolve ‘module’ |
This indicates that the required module is either not installed properly or is missing. Therefore, we recommend ensuring that all dependency modules are installed correctly by executing either the npm install or yarn install command after deleting the package.lock.json file. |
|
npm ERR! ENOENT: no such file or directory |
This error suggests that the specified directory or file is unavailable on your machine or permission for execution was denied. To resolve this, ensure that the file exists and that proper permissions are enabled to access the file or directory. |
|
npm ERR! Failed at the [email protected] start script |
This error occurred due to a problem with the start script defined in your package.json file. To run your app, it’s important to validate and execute the start script correctly. Additionally, ensure that all dependencies are installed properly. |
|
npm ERR! EADDRINUSE: Address already in use |
This error indicates that the port number has already been used. You can choose another port or stop the existing running app. |
|
npm ERR! Invalid package.json |
This error indicates a syntax issue in your package.json file. To solve this issue, ensure all the syntax is correct. |

Explore the endless possibilities with Syncfusion’s outstanding React UI components.
Conclusion
You’ve built a dynamic hotel booking app using the Syncfusion React Data Grid, a top-tier React DataGrid Component. This app streamlines hotel selection, filtering, and booking management for a seamless user experience. Ready to enhance your app? Follow the steps outlined in this blog and share your thoughts in the comments below.
The existing customers can download the latest version of Essential Studio® from the License and Downloads page. If you are new, try our 30-day free trial to explore our incredible features.
Feel free to contact us through our support forums, support portal, or feedback portal. We are always happy to assist you!
Comments (2)
Excellent.
Can you make one with blazor ?
Hi Mohammed,
As per your request, we are currently working on a Hotel Booking Application using Blazor. We will provide it once it’s done.
Regards,
Gayathri R