“If you talk to a man in a language he understands, that goes to his head.
If you talk to him in his language, that goes to his heart.”
– Nelson Mandela
I hope your application, too, deserves to reach the hearts of its users! This is possible with localization support.
In Blazor, we have to follow the same approach defined for the ASP.NET Core framework. ASP.NET Core has provided the following three approaches to enable culture settings in an application:
- QueryStringRequestCultureProvider
- CookieRequestCultureProvider
- AcceptLanguageHeaderRequestCultureProvider
Among these, the CookieRequestCultureProvider is the recommended approach for the Blazor framework at the moment. If localization is implemented through QueryStringRequestCultureProvider or the URL path, we will not be able to persist the cultural details while working with webSockets.
Let’s see how to implement localization in a Blazor web application through CookieRequestCultureProvider and switch among different cultures in this blog!
Set up the application culture through cookies
Follow these steps to set your desired culture in an application:
Step 1: Create a new _Host.cshtml.cs in the Pages folder.
Step 2: Add the following code example, which has to be read by the localization middleware.
Step 3: Set the current culture in that application.
#Pages/_Host.cshtml.cs

public class HostModel : PageModel
{
    public void OnGet()
    {
        HttpContext.Response.Cookies.Append(
            CookieRequestCultureProvider.DefaultCookieName,
            CookieRequestCultureProvider.MakeCookieValue(
                new RequestCulture(
                    CultureInfo.CurrentCulture,
                    CultureInfo.CurrentUICulture)));
    }
}
Now, let’s see what this code will do in the application.
The HostModel class acts as the starting point for page rendering along with the inherited PageModel class.
PageModel has some predefined handlers for the request sent to the page and the data used to render the page. The most common handlers defined in the PageModel are:
- OnGet: To initialize the state needed for the page.
- OnPost: To handle the submission.
So, by using the OnGet method, we can set the culture in an application to affect the culture state before rendering the page.
Step 4: Next, we should append the cookie for the culture with respect to the header using the CookieRequestCultureProvider.
The DefaultCookieName value is .AspNetCore.Culture, which represents the default name to track the user-defined culture details. We can change the default value if required while creating the cookie for the culture.
The MakeCookieValue method will create the cookie for the culture, which requires two inputs, the cookie name and culture details.
Now, I am changing the default cookie value and culture to “fr” (French) as explained in the following code example.
#Pages/_Host.cshtml.cs

        public void OnGet()
        {

            HttpContext.Response.Cookies.Append(
                "LocalAppCulture",
                CookieRequestCultureProvider.MakeCookieValue(
                    new RequestCulture("fr")));

        }
Step 5: Add the following code example in the index.razor page to check the culture change in the application.
#index.razor

Current culture is
<b>
    @CultureInfo.CurrentCulture.Name
</b>
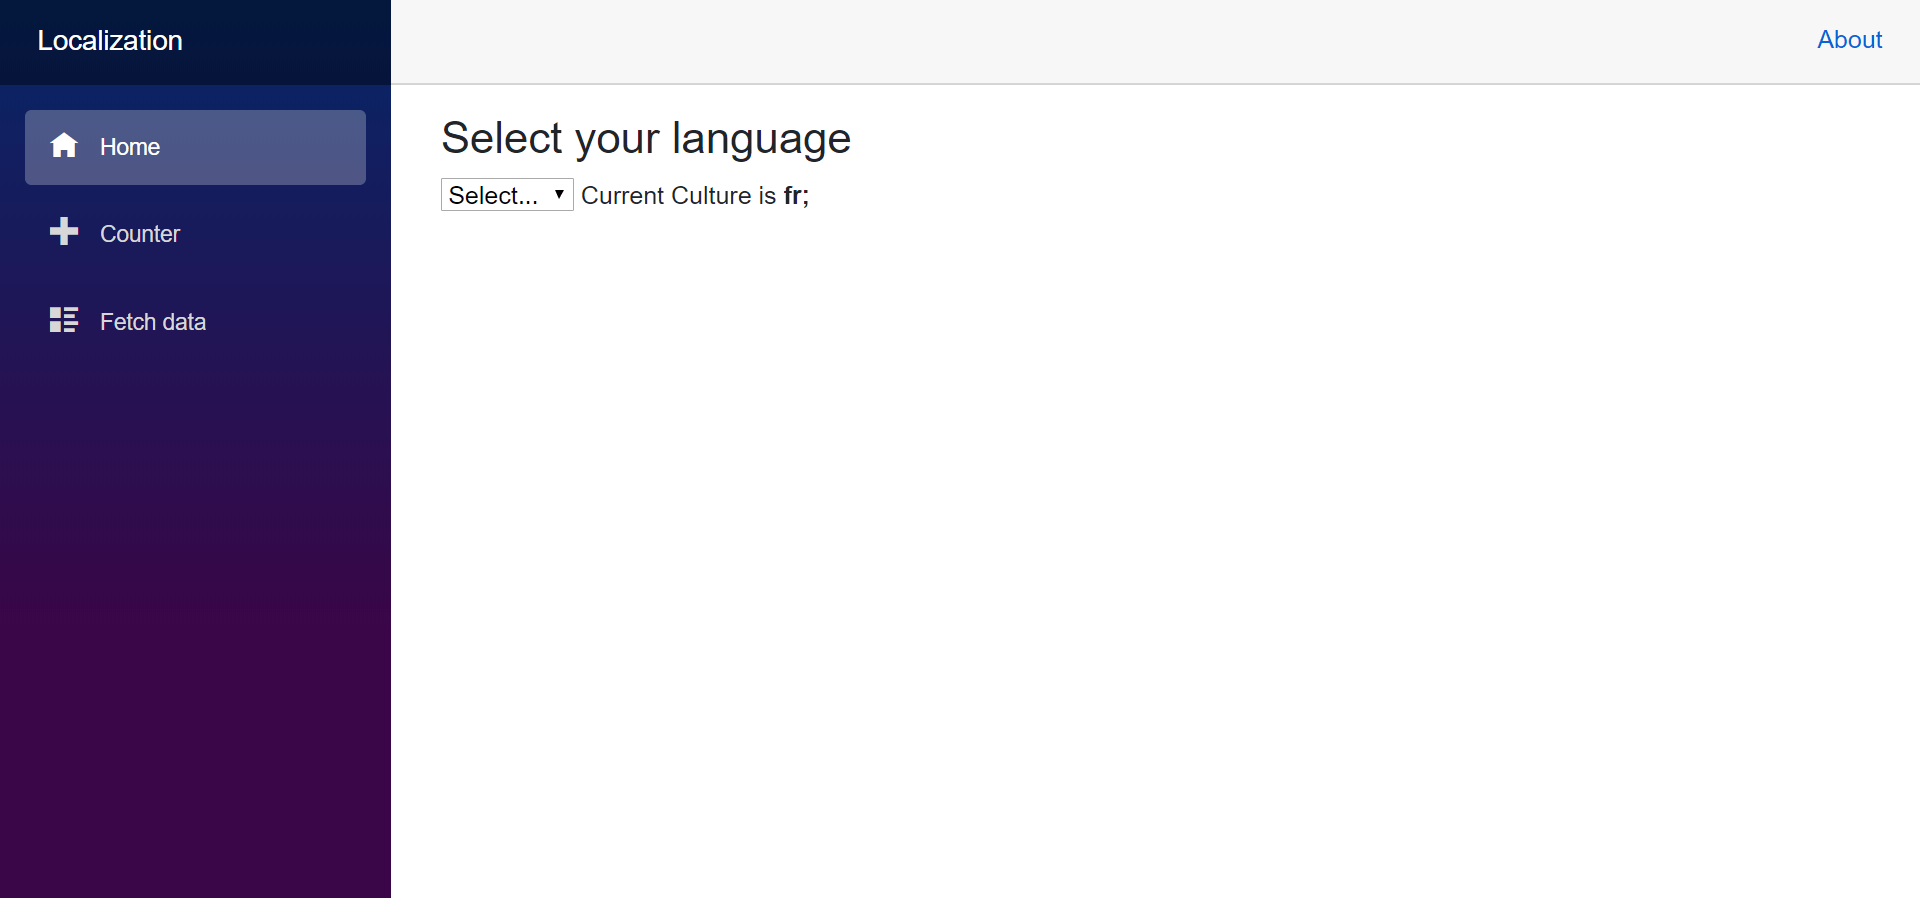
You will get the output as shown in the following screenshot. You can see that the culture has been changed to French.
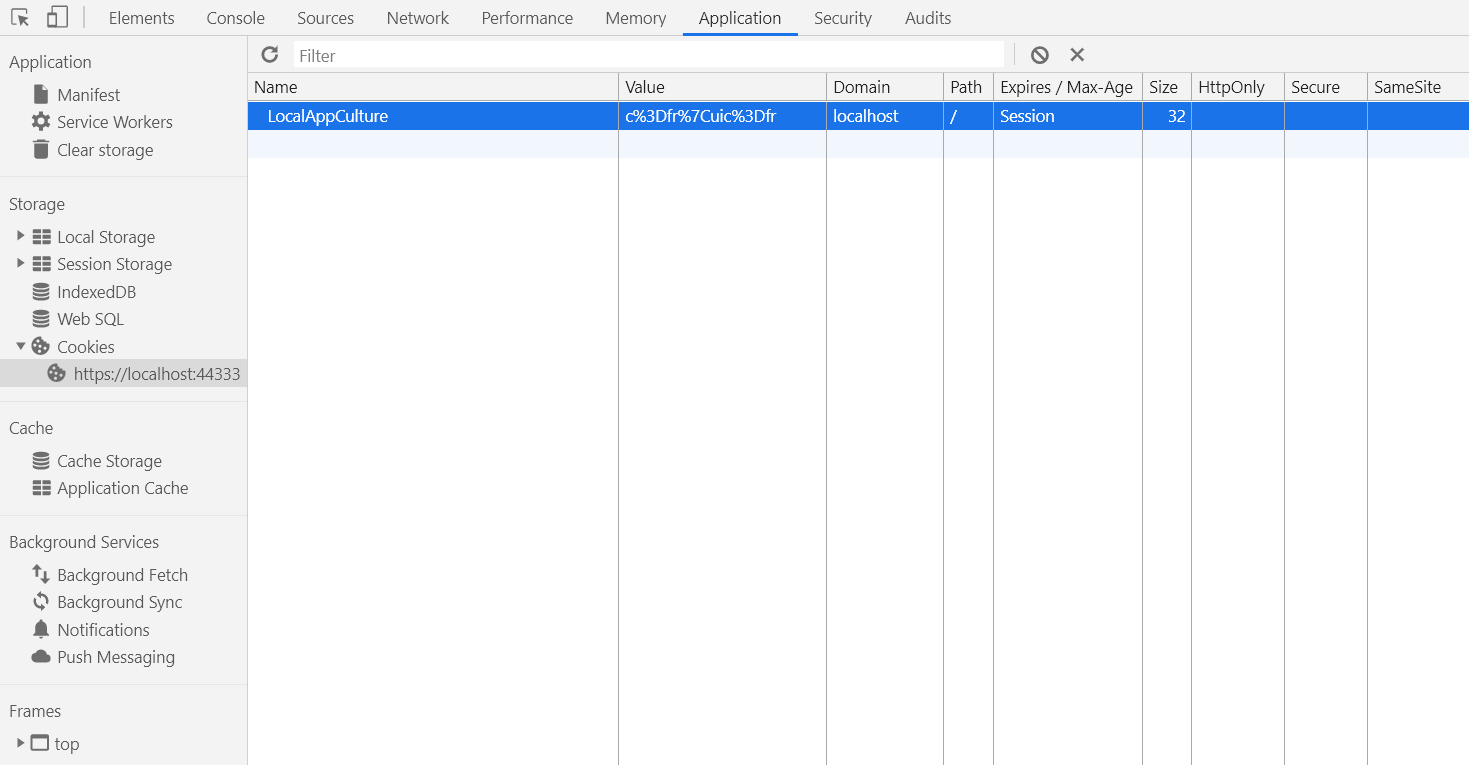
Note:You can cross-check the cookie name in the application tab of the browser console window.

Switch among different cultures in an application
Follow these steps to switch among different cultures in a multi-lingual application.
Configure the cultures in an application
Step 1: In the startup.cs page, make the following changes in the code snippet of the application.
#startup.cs

public void ConfigureServices(IServiceCollection services)
        {
            services.AddRazorPages();
            services.AddServerSideBlazor();
            services.AddSingleton<WeatherForecastService>();

            #region Localization
            services.Configure<RequestLocalizationOptions>(options =>
            {
                // Define the list of cultures which support your app
                var supportedCultures = new List<CultureInfo>()
                {
                    new CultureInfo("en-US"),
                    new CultureInfo("fr-FR")
                };

                // Set the default culture
                options.DefaultRequestCulture = new RequestCulture("en-US");

                options.SupportedCultures = supportedCultures;
                options.SupportedUICultures = supportedCultures;
            });
            #endregion
        }
In this code example, we have added a list of cultures that we are going to experiment with in this application and we have also set the default culture to en-US.
SupportedCultures is defined for formatting the date, time, numbers, and so on.
SupportedUICultures is defined for the UI string that we have localized.
Step 2: Next, we need to add controllers in the endpoint of the application, as shown in the following code example. We are using the controllers to set the cookie and redirect the page in secure mode. Please remember, we should do the same localization cultures changes in the application configuration, too.
#startup.cs

public void Configure(IApplicationBuilder app, IWebHostEnvironment env)
        {
            -----
            -----
                app.UseRequestLocalization(app.ApplicationServices.GetService<IOptions<RequestLocalizationOptions>>().Value);
            app.UseEndpoints(endpoints =>
            {
                endpoints.MapControllers();
                endpoints.MapBlazorHub();
                endpoints.MapFallbackToPage("/_Host");
            });
        }
Add Controller to set cookie
Follow these steps to add a controller to set a cookie in an application.
Step 1: Use the SetCulture method to set the culture of the application on each drop-down value change.
Step 2: Use the culture name and URL parameters to redirect after setting the culture, as done in the following code example.
#CultureController.cs

[Route("[controller]/[action]")]
    public class CultureController : Controller
    {
        public IActionResult SetCulture(string culture, string redirectUri)
        {
            if (culture != null)
            {
                HttpContext.Response.Cookies.Append(
                    CookieRequestCultureProvider.DefaultCookieName,
                    CookieRequestCultureProvider.MakeCookieValue(
                        new RequestCulture(culture)));
            }

            return LocalRedirect(redirectUri);
        }
    }
Note:
1. Add the Controllers folder and then add the CultureController.cs file.
2. Set the cookie using cookieRequestCultureProvider as discussed earlier in this blog.
Adding drop-down to switch cultures
Follow these steps to add a drop-down list box to switch among cultures in your application:
Step 1: In the index razor page, you have to add a drop-down to switch cultures on value changes.
Step 2: Redirect the cultureController, setCulture action result to set the cookie with culture name and current page URL like in the following code example.
#index.razor

@page "/"
@using System.Globalization

@inject NavigationManager NavigationManager

<h3>Select your language</h3>

<select @onchange="OnSelected">
    <option>Select...</option>
    <option value="en-US">English</option>
    <option value="fr-FR">Français</option>
</select>

Current Culture is <b> @CultureInfo.CurrentCulture.Name</b>

@code {
    private void OnSelected(ChangeEventArgs e)
    {
        var culture = (string)e.Value;
        var uri = new Uri(NavigationManager.Uri)
            .GetComponents(UriComponents.PathAndQuery, UriFormat.Unescaped);
        var query = $"?culture={Uri.EscapeDataString(culture)}&" +
            $"redirectUri={Uri.EscapeDataString(uri)}";

        NavigationManager.NavigateTo("/Culture/SetCulture" + query, forceLoad: true);
    }
}
Run the application
Now, run the application. Use the drop-down list box in the page to set the culture in your application as you like.

GitHub samples
You can download the sample project to update the culture of the application here.
Conclusion
In this blog, we learned how to enable localization support and switch between different cultures in your Blazor web application. Please refer to this documentation page to fully enjoy the features of the localization support.
Try our 65+ Blazor UI components by downloading the free 30-day trial or NuGet package, and feel free to have a look at our GitHub and online examples and to explore other available features.
If you have any questions about our products, please let us know in the comments below. You can also contact us through our support forum, Direct-Trac, or feedback portal. We are always happy to assist you!


