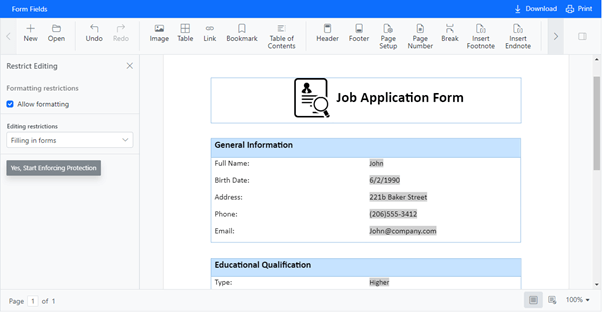
This blog illustrates how to create and fill a form in a Word document using the Syncfusion JavaScript Word Processor (document editor) component. It is a user interface component that allows you to compose, edit, view, and print Word documents interactively in your web app. It provides all the standard word processing features, including editing text, formatting contents, resizing images and tables, finding and replacing text, creating a table of contents, printing, and more. It requires server-side dependencies to perform some operations.
Note: If you are new to our Word Processor component, it is highly recommended that you follow our Getting Started guide.
Form fields in JavaScript Word Processor
The JavaScript Word Processor component supports legacy form fields like text, checkboxes, and dropdown form fields to create fillable forms in a Word document. These form fields are supported in both DOC and DOCX formats.
The component enables authors to protect their documents with several editing restrictions. One such editing restriction is FormFieldsOnly. It allows users only to fill the form fields in a Word document and prevents all other edits.

Note: For more details, refer to the protecting the document in form filling mode documentation.
Create a fillable form in JavaScript Word Processor
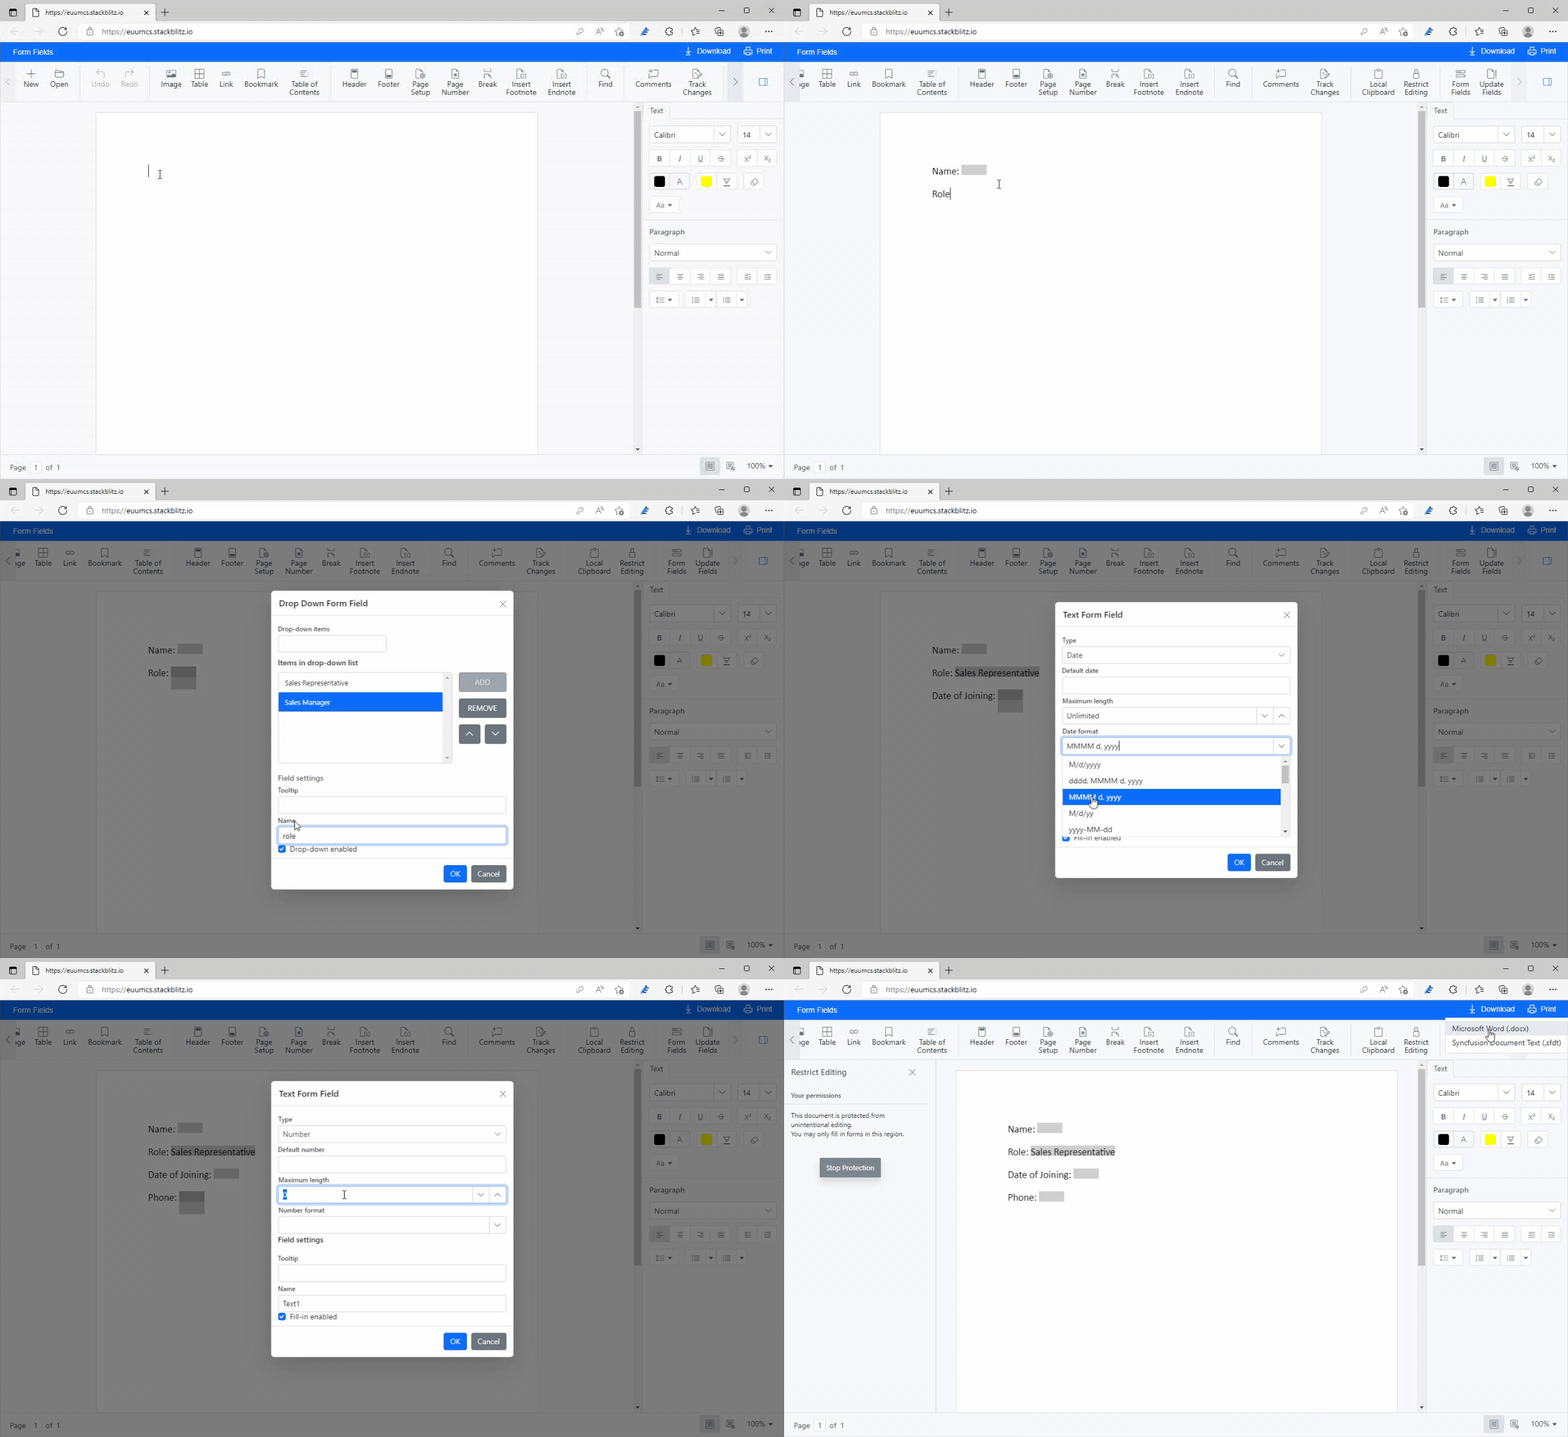
The JavaScript Word Processor component comes with an intuitive UI for designing a fillable form in a Word document by inserting legacy form fields, like in Microsoft Word apps. The legacy form fields allow you to design a form with:
- Text form fields with text type to fill any string value.
- Text form fields with number type to fill a numeric value.
- Text form fields with date type to fill a date or time.
- Checkbox form fields to answer a simple yes-or-no question.
- Dropdown form fields to choose one value from a list of strings.
The following GIF illustrates how to design a fillable form in the Word Processor component.

If you want to prevent the filling of a specific form field, uncheck the Fill-in enabled option for the required form field in the properties dialog. (To do so, double-click on the form field or choose the properties option from the context menu.)
Use the formFieldSettings API to customize the appearance (enable/disable shading, shading and selection of colors) of form fields.
You can automate retrieving and modifying the form field properties in a Word document using the getFormFieldInfo and setFormFieldInfo APIs. For more details, refer to the Form fields in JavaScript Word Processor documentation.
Fill a form in JavaScript Word Processor
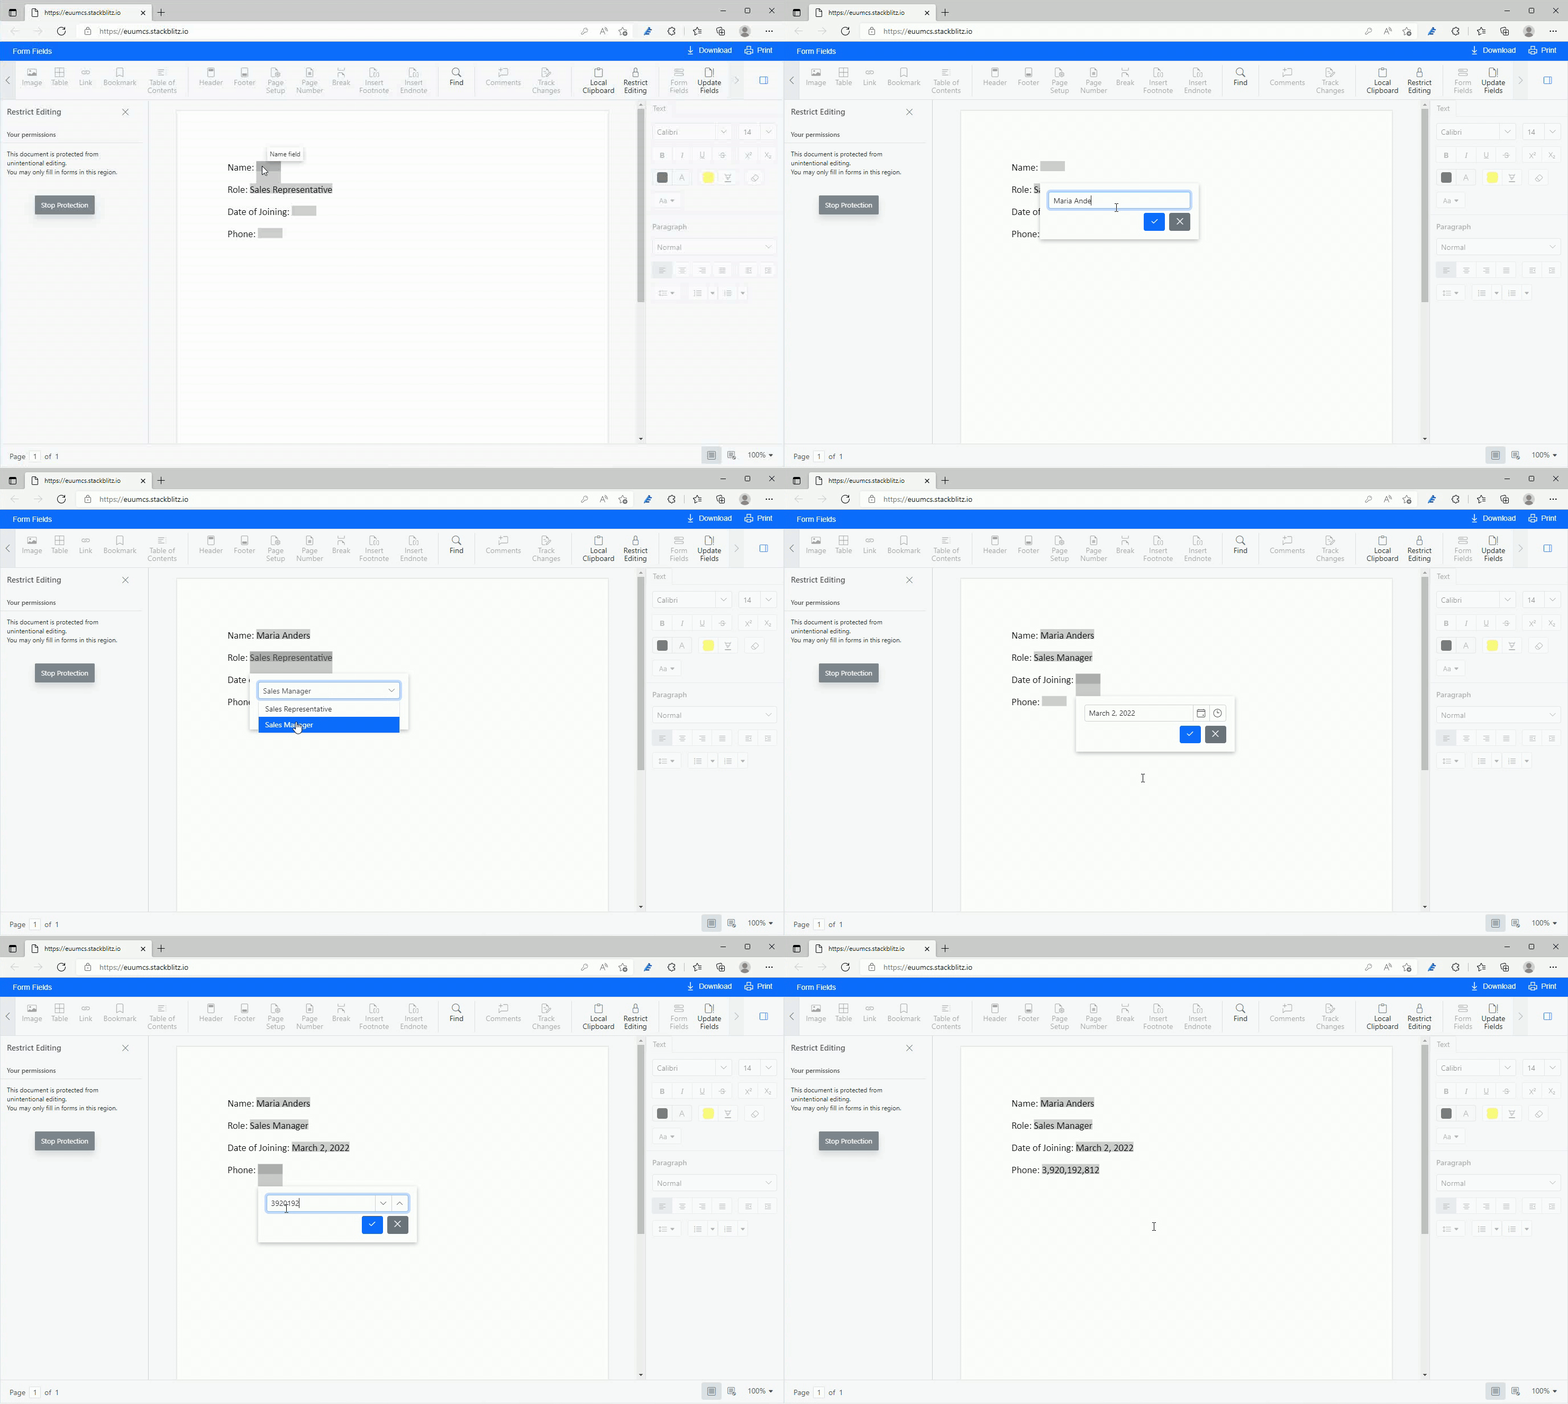
Once you create a fillable form and protect it with the editing restriction type FormFieldsOnly, your form is ready for filling.
The Syncfusion Word Processor component provides two form-filling modes:
- PopUp: Opens a pop-up with an in-place editor to fill the form field when you click on or navigate to a form field. This mode is enabled by default.
- Inline: This allows users to fill the form fields directly without any pop-up.
The following GIF illustrates how to fill a form in the JavaScript Word Processor component.

Use the resetFormFields API to reset all the form fields in a Word document to their default value.
Export filled form data in JavaScript Word Processor
The Word Processor has an exportFormData API that returns the names and values of all the form fields in a document. You can easily save the exported form data to a database.
Refer to the following code example.
let formFieldDate: FormFieldData[] = documentEditor.exportFormData();
Import form data into a fillable form in JavaScript Word Processor
The component comes with an importFormData API that sets a specified value to the respective form field in a document. You can automatically fill the values from the database into the form fields while opening a document in Word Processor component.
Refer to the following code example.
let textformField: FormFieldData = { fieldName: 'Text1', value: 'Hello World' };
let checkformField: FormFieldData = { fieldName: 'Check1', value: true };
let dropdownformField: FormFieldData = { fieldName: 'Drop1', value: 1 };

//Import form field data
this.container.documentEditor.importFormData([textformField, checkformField, dropdownformField]);
GitHub repository
Refer to the complete working example of Creating a Fillable Form Using Syncfusion JavaScript Word Processor.
Conclusion
Thanks for reading! With the help of the form fields in the JavaScript Word Processor component, you can provide form-filling capability in Word documents to your web app with ease. The Word Processor component is available for JavaScript (ES5 and ES6), Angular, React, Vue, ASP.NET MVC, ASP.NET Core, and Blazor web platforms.
Are you already a Syncfusion user? You can download the product setup. If you are not yet a Syncfusion user, you can download a 30-day free trial.
If you have any questions about these features, please let us know in the comments below. You can also contact us through our support forum, support portal, or feedback portal. We are always happy to assist you!

