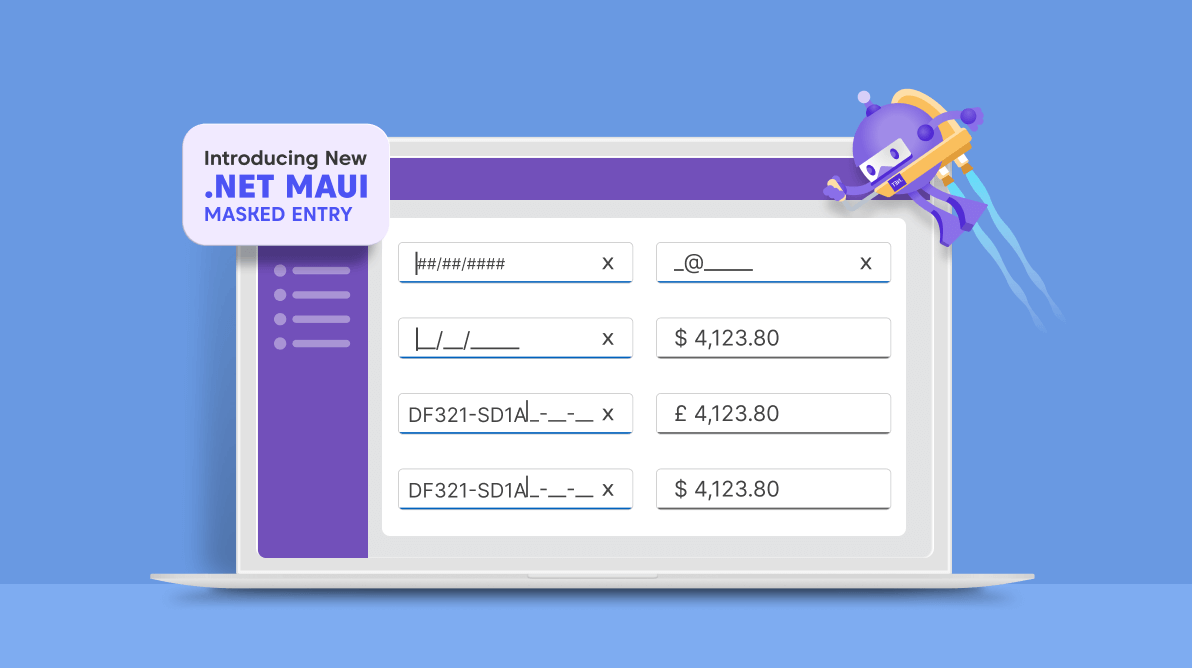
In Syncfusion’s Essential Studio® 2023 Volume 1 release, we introduced a new Masked Entry control for the .NET MAUI platform. This control is designed specifically for .NET MAUI apps, making it a perfect fit for developers building cross-platform mobile apps.
The new .NET MAUI Masked Entry is a text input control that restricts the user’s input to certain characters using a mask pattern. As the user types, the control applies the mask to the input, automatically formatting it according to the pattern. It is used to create templates for providing information such as telephone numbers, email IDs, IP addresses, and product keys.
In this article, we will see the key features of the new .NET MAUI Masked Entry control and the steps to get started with it.
Key features
The .NET MAUI Masked Entry control supports many user-friendly features:
Mask types
There are two types of masks, simple and regex. Each has a different set of mask elements that combine to form a mask expression.
Simple
You can generate expressions with simple mask elements. This is mainly used for fixed-length inputs.
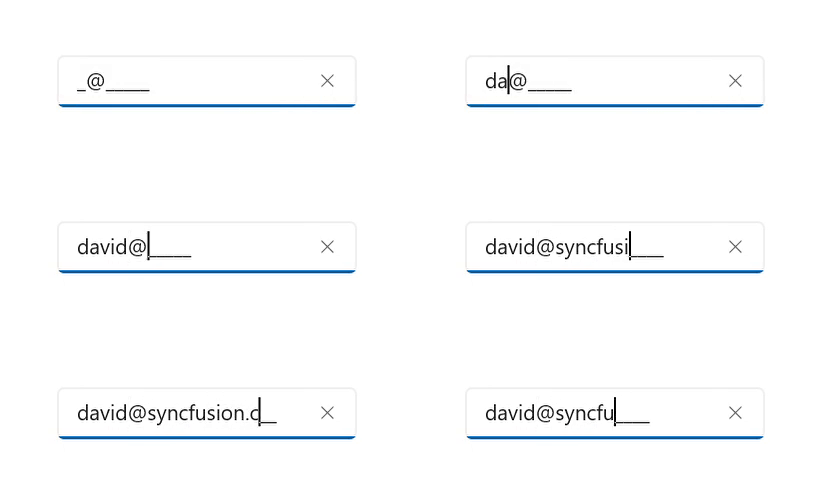
Regex
Use regex masks to create more complex expressions for input data.
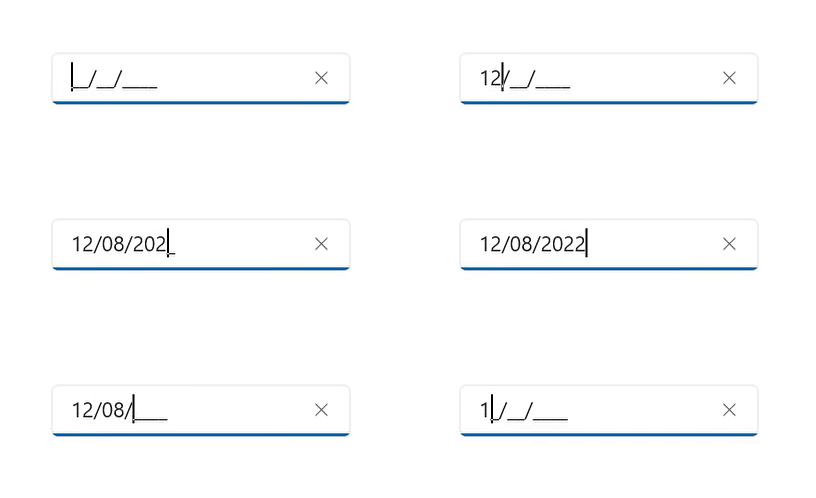
PromptChar
You can customize the default prompt character (_), which is displayed in the absence of input.

Formatting value
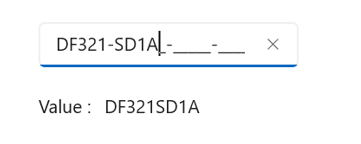
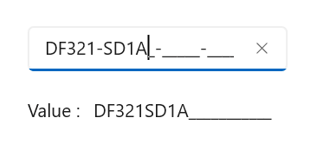
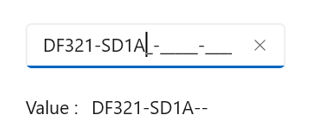
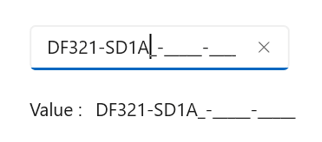
The Masked Entry control provides the following options to format the input values with literals, prompts, and typed characters:
- ExcludePromptAndLiterals: Excludes the prompt and literal characters, preserving only the typed characters.
- IncludePrompt: Keeps typed and prompt characters and excludes the literals.
- IncludeLiterals: Keeps typed and literal characters and excludes the prompt characters.
- IncludePromptAndLiterals: Keeps typed, prompt, and literal characters in the input.
Refer to the following images.
Cultures
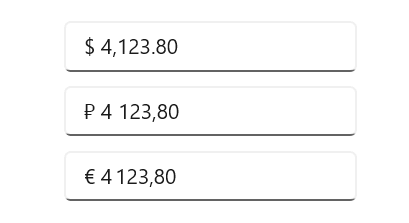
You can set a supported culture for special symbols like currency, date, time, group, and decimal separators.
Note: For more details, refer to the .NET MAUI Masked Entry control documentation.
Getting started with the .NET MAUI Masked Entry control
We have seen the key features of the .NET MAUI Masked Entry control. Let’s see how to integrate it into your .NET MAUI app and utilize its basic features.
Step 1: First, create a .NET MAUI application.
Step 2: The Syncfusion .NET MAUI controls are available on the NuGet Gallery. To add the .NET MAUI Masked Entry control to your project, open the NuGet package manager in Visual Studio. Search for Syncfusion.Maui.Inputs and then install it.
Step 3: Register the handler for the Syncfusion core in the MauiProgram.cs file. Refer to the following code.
using Microsoft.Maui;
using Microsoft.Maui.Hosting;
using Microsoft.Maui.Controls.Compatibility;
using Microsoft.Maui.Controls.Hosting;
using Microsoft.Maui.Controls.Xaml;
using Syncfusion.Maui.Core.Hosting;
namespace MaskedEntrySample
{
  public static class MauiProgram
  {
        public static MauiApp CreateMauiApp()
        {
               var builder = MauiApp.CreateBuilder();
               builder
               .UseMauiApp<App>()
               .ConfigureSyncfusionCore()
               .ConfigureFonts(fonts =>
               {
                   fonts.AddFont("OpenSans-Regular.ttf", "OpenSansRegular");
               });
               return builder.Build();
         }
  }
}
Step 4: Add the Syncfusion.Maui.Core and Syncfusion.Maui.Inputs namespaces to your XAML page.
xmlns:inputs="clr-namespace:Syncfusion.Maui.Inputs;assembly=Syncfusion.Maui.Inputs"
Step 5: Then, initialize the Syncfusion .NET MAUI Masked Entry control. For this demo, we are going to use the regex mask type for an email ID field.
<inputs:SfMaskedEntry x:Name="maskedEntry"
                      WidthRequest="300"
                      MaskType="RegEx"
                      Mask="[A-Za-z0-9._%-]+@[A-Za-z0-9]+\.[A-Za-z]{2,3}"/>
After executing the previous code examples, we will get a Masked Entry control like the following image.

GitHub reference
Check out the .NET MAUI Masked Entry control demos on GitHub.
Conclusion
Thanks for reading! In this blog, we have seen the features of the new .NET MAUI Masked Entry control rolled out in the 2023 Volume 1 release. Check out our release notes and What’s New pages to see the other updates in this release. Try them out and leave your feedback in the comments section below.
If you are not yet a Syncfusion customer, download the Essential Studio® for .NET MAUI free trial to start evaluating its controls immediately.
For questions, you can contact us through our support forum, support portal, or feedback portal. We are always happy to help you!
Related blogs
- Syncfusion Essential Studio® 2023 Volume 1 Is Here!
- Streamline MAUI Projects with the Syncfusion .NET MAUI Template Studio
- What’s New in 2023 Volume 1: .NET MAUI Charts
- Introducing the 7th Set of .NET MAUI Controls and Features
