In this blog, we are going to walk through the steps to integrate unit testing for ASP.NET Core 3.1 projects. This includes implementing sample business logic, creating mock objects for database calling using Moq, and verifying the method call using NUnit asserts.
What is unit testing?
Unit testing is a level of software testing that is implemented and executed by software developers to ensure implemented logic meets its requirement and behaves as expected.
Purposes of unit testing
The purposes of unit testing are:
- To segregate and test that each part of a program is working as expected.
- To increase confidence while modifying logic when maintaining code.
- To easily identify the defects in an application since unit testing data is closed to production.
- To verify the accuracy of each program unit.
Choosing the right framework
Based on the selected implementation language need to find the tool or framework for unit testing. Here we have chosen NUnit and Moq to implement test methods.
NUnit
NUnit is one of the most widely used open-source testing tools for .NET Framework. It supports building static asserts to ensure testing results. It has a console runner, which is used for batch execution of test cases.
Setup method
The Setup method will be called once, before the execution of all test cases within a test class. This method arranges common mocking logic for all test methods.
The following image is an example.
Test attribute
The Test attribute to a method indicates that it should be run by the Test Runner application when there is a call to run test cases. The following are the criteria for adding the Test attribute to a method:
- The method must be declared public.
- The method’s return type should be void.
The following image is an example.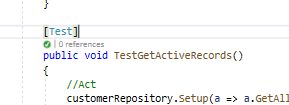
Moq
A mock object allows us to copy or clone the behavior of a class and interface. This is used when interacting with test cases.
With the use of mocks, we can set up the object, including setting parameters and return values on the function calls. Also, we can verify that the methods we set up are being called during the execution of the tested cases.
Refer to this Moq example on GitHub.
Create a sample ASP.NET Core application
Follow these steps to create a .NET Core project in Visual Studio 2019:
Step 1: In Visual Studio 2019, select File -> New -> Project.
Step 2: In the Create New Project dialog, select the ASP.NET Core Web Application template and click Next.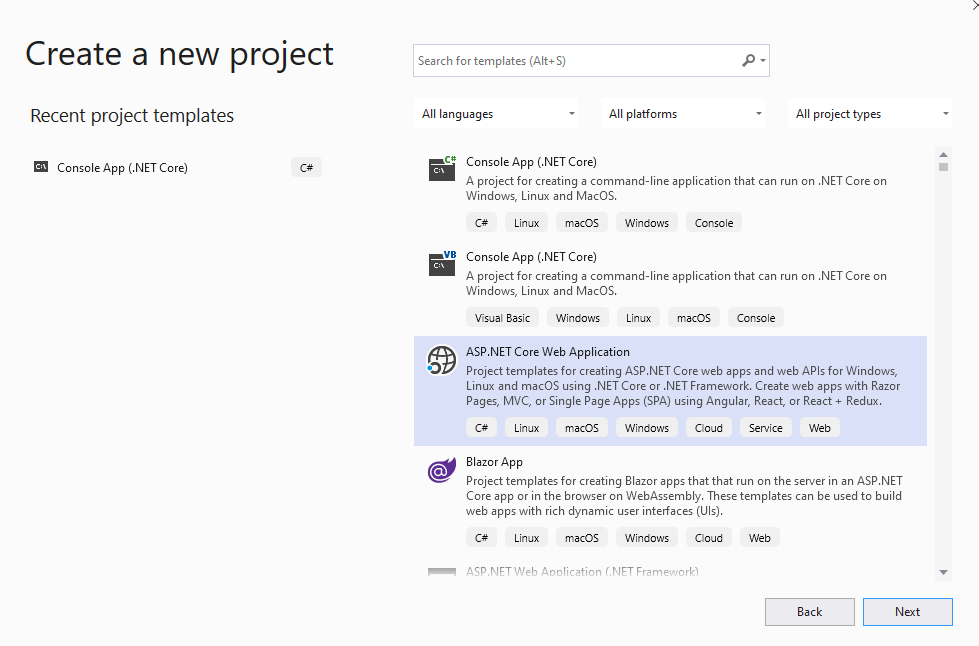
Step 3: Enter the project name, and then click Create. The Project template dialog will be displayed.
Step 4: Select .NET Core, ASP.NET Core 3.1, and the API template (as shown in the following screenshot).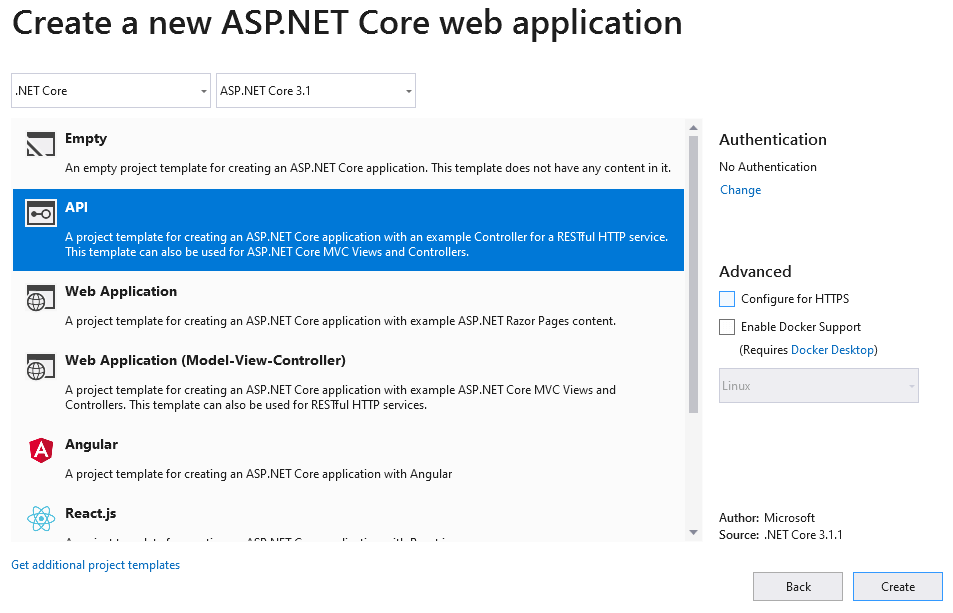
Create unit test project with Moq and NUnit integrated
Follow these steps to add the test project:
Step 1: Right-click on the project solution and select the Add -> New Project option.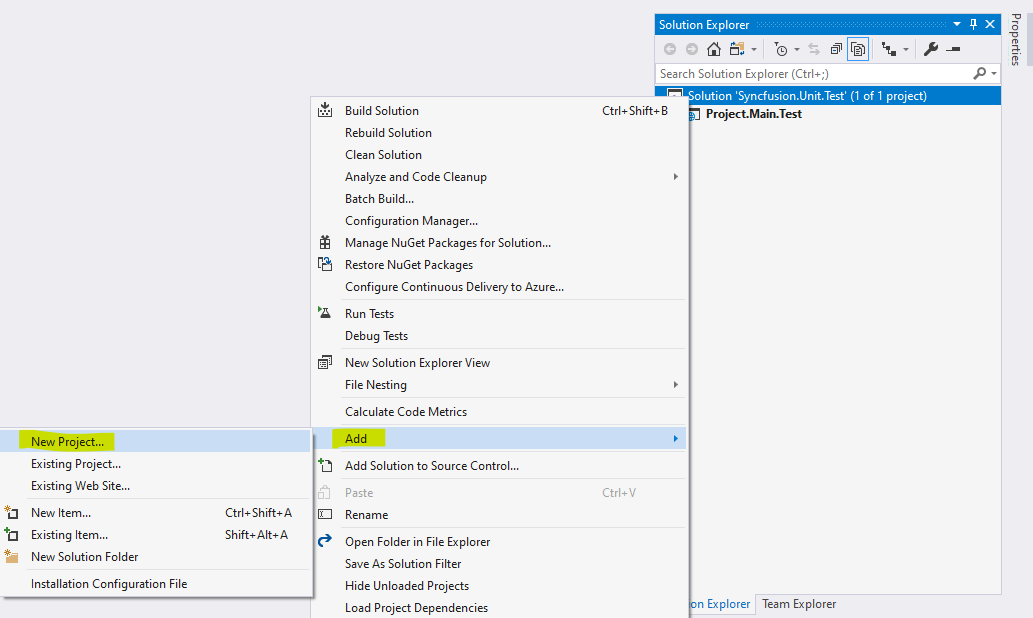
Step 2: Select NUnit test project (.NET Core) and click Next.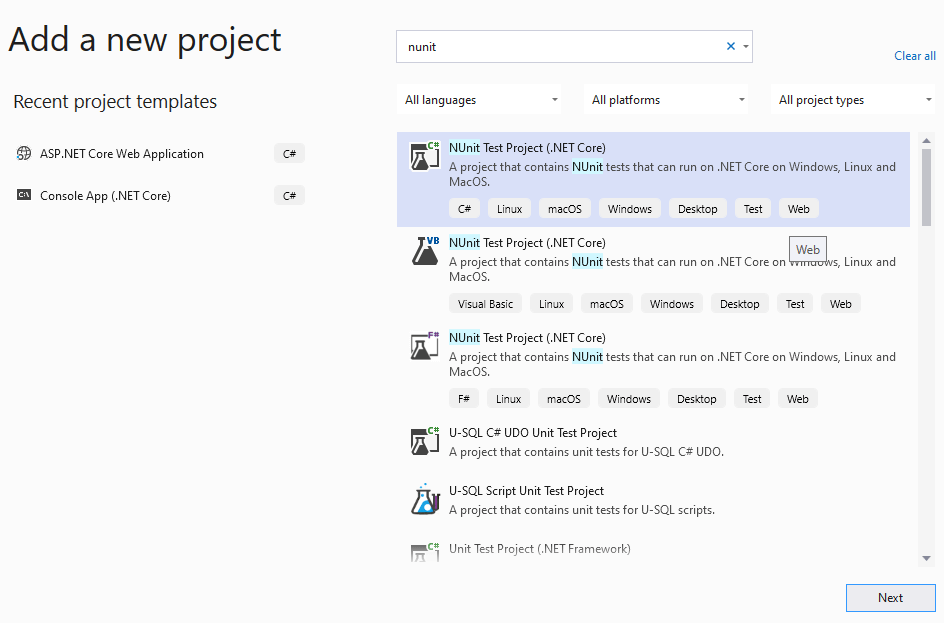
Step 3: Enter the project name, and then click Create. The created project will be displayed like the following.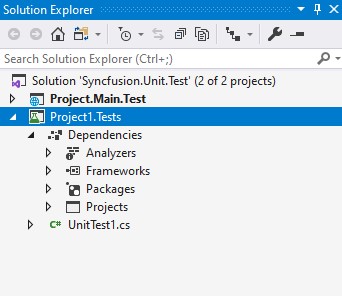
Step 4: Open NuGet manager for Project1.Tests and search with keyword Moq. The result will be displayed like in the following screenshot. Select Moq and o install it.
Step 5: Ensure that the NuGet package is installed.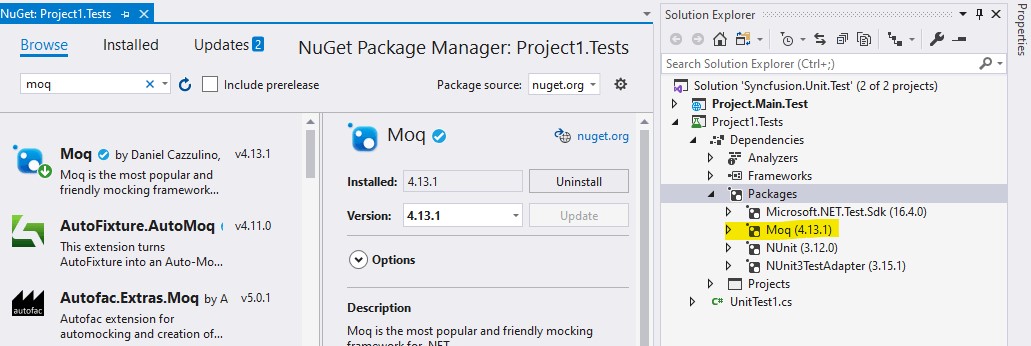
Create your first, super simple unit test case
We are going to write a test case for a method that returns an addition of two numbers.
Step 1: Add the class file MathBL.cs with the method Sum() in Project.Main.Test.
Step 2: Select the Project1.Test project and add class file MathTestBL.cs.
Step 3: Add the methods Setup() and TestSum() inside the MathTestBL.cs class.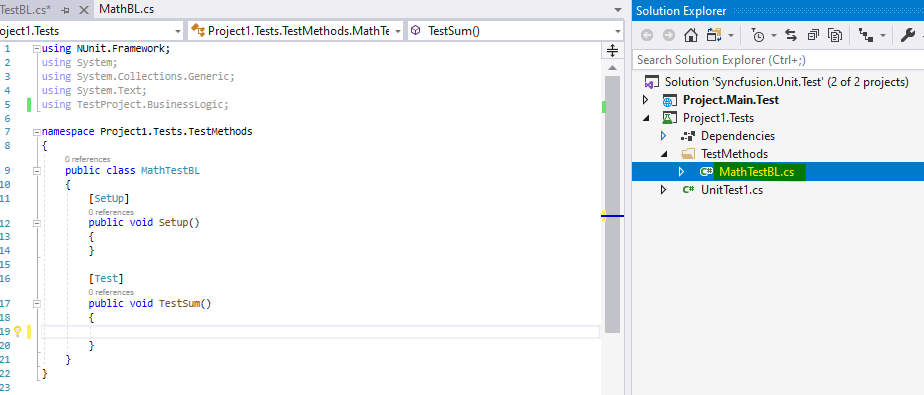
Step 4: Right-click on Project1.Test project dependencies and add the project reference Project.Main.Test
Step 5: Write the following code to call the Sum() method.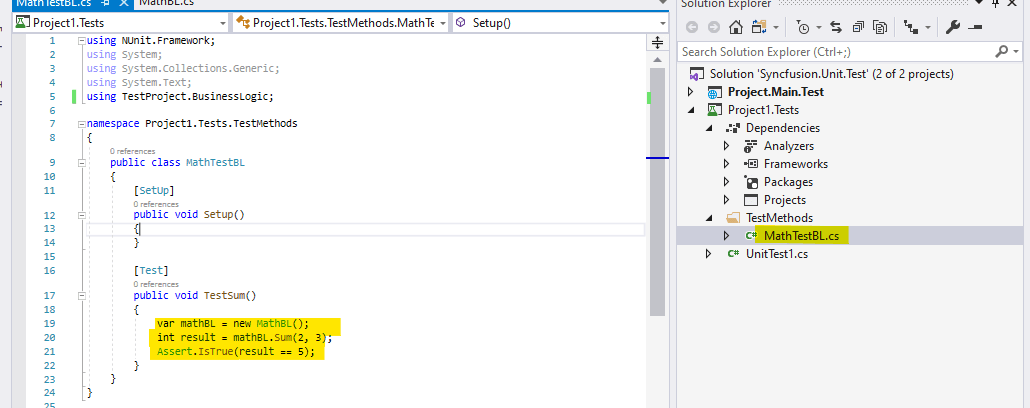
Sample code:
Step 6: Build the project and ensure the build succeeds. Then select View -> Test Explorer.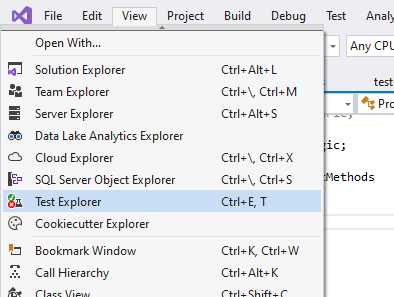
Steps 7: You will see the list of test methods. Right-click on MathTest.BL and then click Run.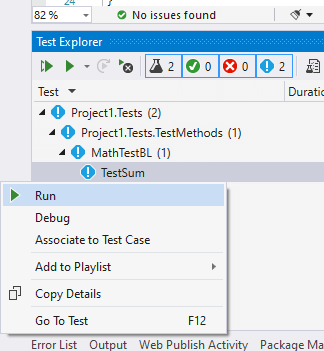

The test run is successful, and the test case passed. You can alter the test result to seven or so to see if it fails.
Unit test case for mock database and data access service call
Implement business logic and database context
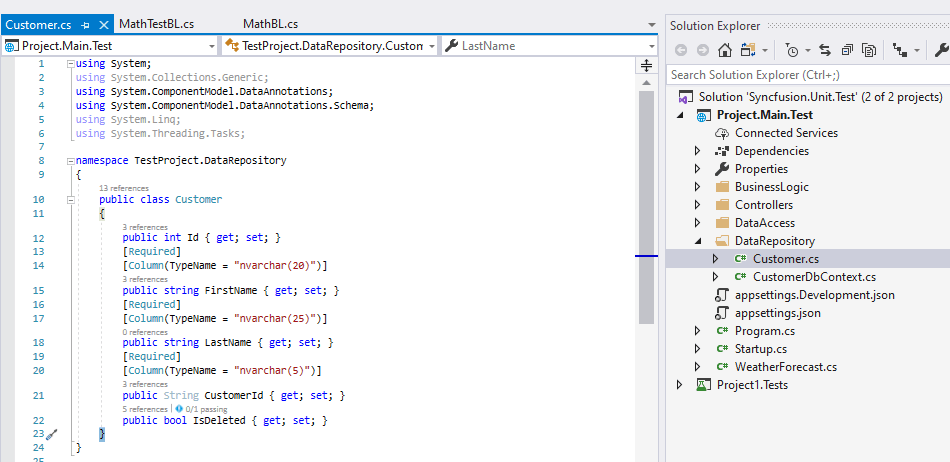
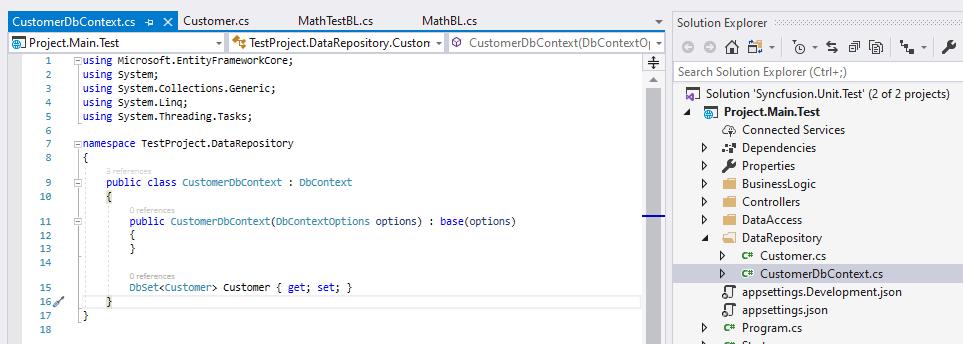
We have followed a code-first approach and created a database context with the modal class Customer.cs.
Take a look at the following, where the database context and business logic already exist.
Modal class and database context
Data access logic
The following image demonstrates implemented generic data access logic (EntityRepository.cs) with an interface (IEntityRepository.cs).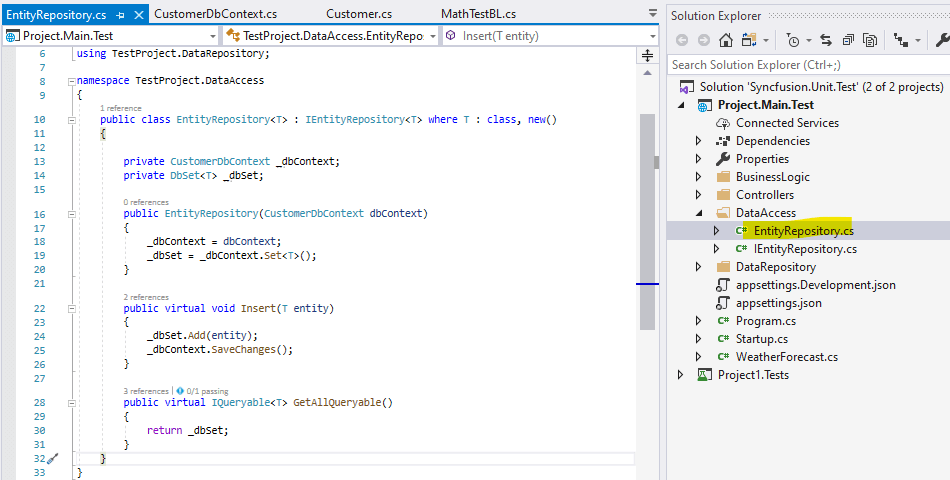

Business logic
I created CustomerBL.cs class with the following methods:
- GetActiveCustomer()
- SaveCustomer()
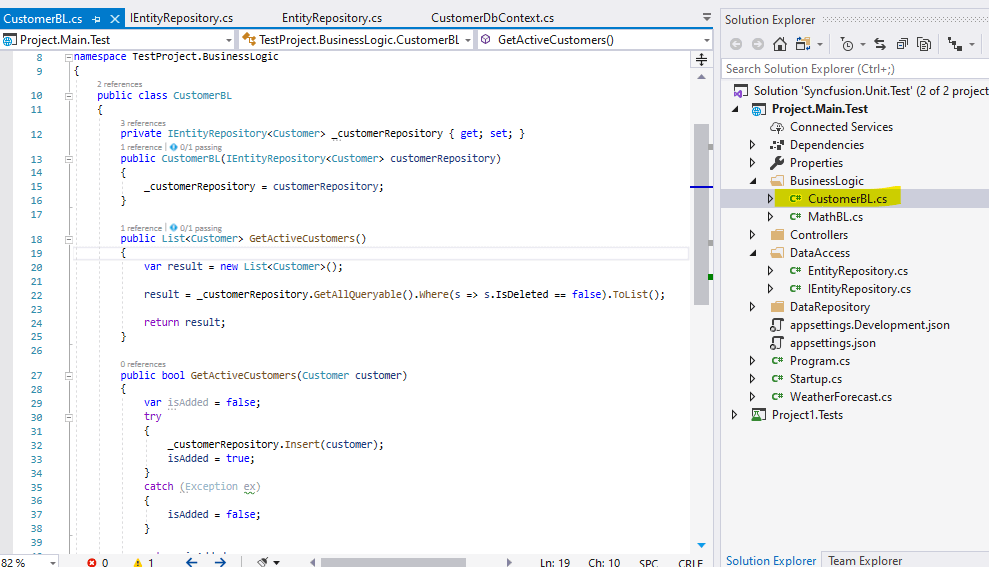 This is the sample source code (CustomerBL.cs).
Unit test for business logic
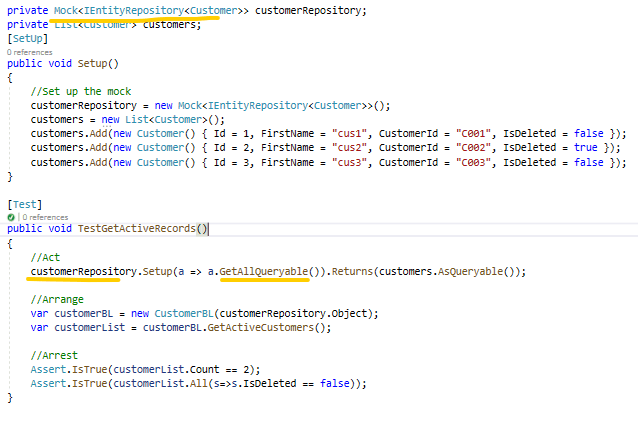
I created CustomerTestBL.cs and implemented TestGetActiveCustomers() test method like in the following image.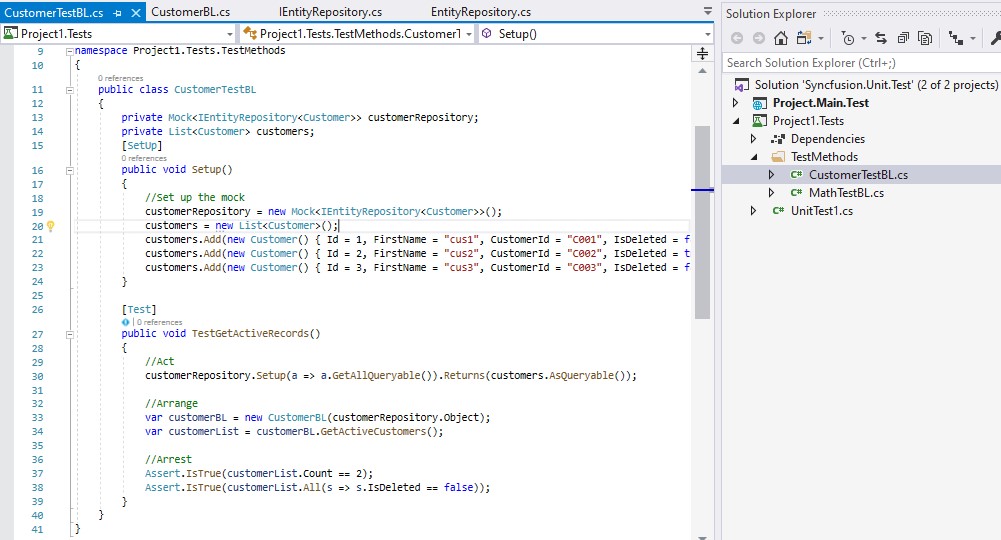
Mock and test asserts
The following steps have been implemented:
- Mock instance was created for IEntityRepository<Customer>.
- Setup has been configured to return a defined static customer list. Now whenever the repository method GetQueriable() is invoked, a static customer list will be returned.
- The test case is verified using assert checking after the method call result.
Run test
Step 1: Select View -> Test Explorer. This will display the list of test case methods.
Step 2: Right-click on the TestGetActiveCustomer() method and click Run.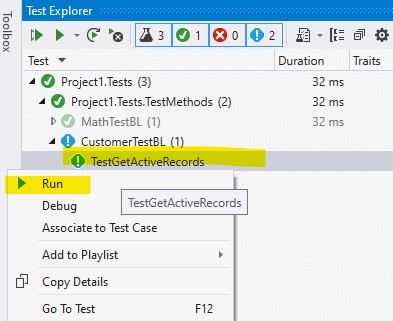
Step 3: We can see the successful execution of the test case result.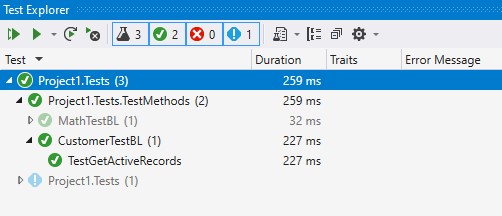
Conclusion
In this blog, we have learned how to integrate a test project with a .NET Core application. Also, we learned about Mock method calls and the verification of the returned result using NUnit asserts. I hope you found this blog useful.
Syncfusion provides 70+ high-performance, lightweight, modular, and responsive ASP.NET Core UI controls such as DataGrid, Charts, and Scheduler. You can use them to improve your application development.
Please provide your feedback in the comments section. You can also contact us through our support forum, support portal, or feedback portal. As always, we are happy to assist you!

Comments (6)
very simple and good way of teaching
Happy to hear that this blog helped you.
Thanks,
Vijayaraj A.
Hi Vijay,
This blog is very informative, with to the point approach.
How can you be accessed, if someone wants to get in contact with you?
Hi Danish,
Thanks for your feedback.
You can use below comment section to contact me regarding this blog.
Thanks,
Vijayaraj A.
Hi VIJAYARAJ A,
Thanks for this very informative blog.
Can I download the demo application somewhere, like github.
Thanks in advance
Hi RENE,
Thanks for your feedback.
Find sample application in following link https://www.syncfusion.com/downloads/support/directtrac/general/ze/Project.Main.Test-2103506502
Thanks,
Vijayaraj A.