
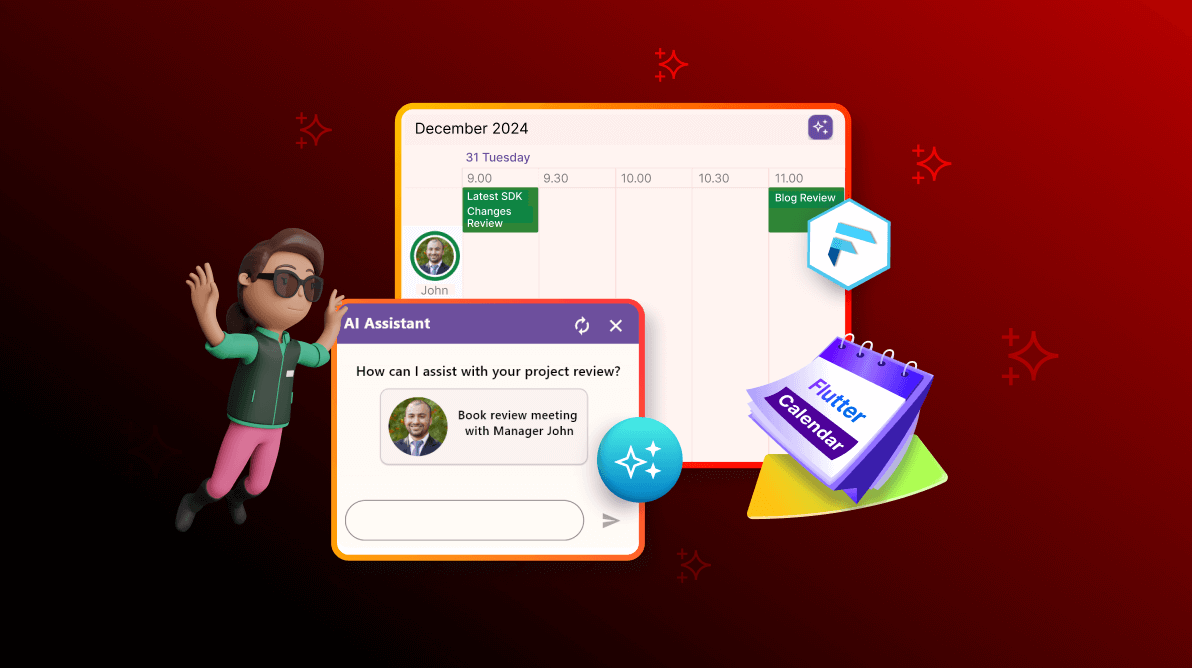
TL;DR: Let’s see how to integrate AI with the Flutter Calendar for easy project review scheduling. This tool helps you schedule meetings better with chat-based bookings and automated scheduling using Google Generative AI. The Calendar organizes appointments well, improves interaction through chatbots, and checks everything in real-time. Dive into the detailed guide to implement an efficient and user-friendly scheduling system for enhanced productivity in project management.
The Syncfusion Flutter Calendar widget enhances scheduling in Flutter apps with powerful features for managing appointments, events, and tasks. Integrating AI takes scheduling to the next level by streamlining project review meetings and offering smart, customized solutions.
In this blog, we’ll explore how to create an AI-powered scheduling experience using the Flutter Calendar and AI AssistView chatbox. With Google Generative AI, simple conversations can seamlessly turn into calendar appointments, making scheduling effortless and intuitive.
Let’s get started!
Step 1: Set up the Flutter environment
First, ensure you have the latest Flutter SDK, an IDE like Android Studio or Visual Studio Code, and the required dependencies for Syncfusion Flutter widgets and Google Generative AI. Update your pubspec.yaml file with the following dependencies:
Note: For the Google generative package, your API key is not stored in Syncfusion. Instead, it is sent to Google to obtain a response to your request. Once your session ends, both the API key and the request and response messages are deleted.
Step 2: Implement the Flutter Calendar
In this step, we’ll set up the Flutter Calendar widget to manage and display appointments efficiently. This widget will create the core of our scheduling app, enabling an organized view of meetings and project reviews.
Define appointment and resource lists
First, initialize the lists to hold appointments and resources. These lists will store all scheduled meetings and available resources, making them accessible for the Calendar to display.
final List<Appointment> _scheduledAppointments = <Appointment>[];
final List<CalendarResource> _resources = <CalendarResource>[];
late _EventDataSource _events;
Specify subjects, resource details, and event color
Let’s set up the details for the subject of each appointment, resource information like name and image, and define a color for appointments.
final List<String> _subjects = <String>[
  'Latest SDK support',
  'Blog Review',
  'User Guide'
];
final String _name = 'John';
final String _userImage = 'images/People_Circle8.png';
final Color _appointmentColor = const Color(0xFF0F8644);
Initialization in the initState method
Now, set up the CalendarDataSource, add resources, and populate initial appointments in the initState lifecycle method.
@override
void initState() {
 _addResources();
  _addAppointments();
  _events = _EventDataSource(
    _scheduledAppointments,
    _resources,
  );
  super.initState();
}
Add resources
A helper method, addResources, is used to initialize and add resources, which include display name, ID, color, and an optional image using a list of CalendarResource.
void _addResources() {
  _resources.add(
    CalendarResource(
      displayName: _name,
      id: 'SF0001',
      color: _appointmentColor,
      image: ExactAssetImage(_userImage),
    ),
  );
}
Add appointments
The addAppointments method populates the appointments list with scheduled events, setting times and associating them with resources defined earlier.
void _addAppointments() {
  const List<int> appointmentTime = [9, 11, 14];
  final DateTime date = DateTime.now();
  final List<Object> resourceIds = <Object>[_resources[0].id];
  for (int i = 0; i < _subjects.length; i++) {
    final int startHour = appointmentTime[i];
    final DateTime meetingStartTime =
        DateTime(date.year, date.month, date.day, startHour);
    _scheduledAppointments.add(
      Appointment(
        startTime: meetingStartTime,
        endTime: meetingStartTime.add(const Duration(minutes: 30)),
        subject: _subjects[i],
        color: _appointmentColor,
        resourceIds: resourceIds,
      ),
    );
  }
}
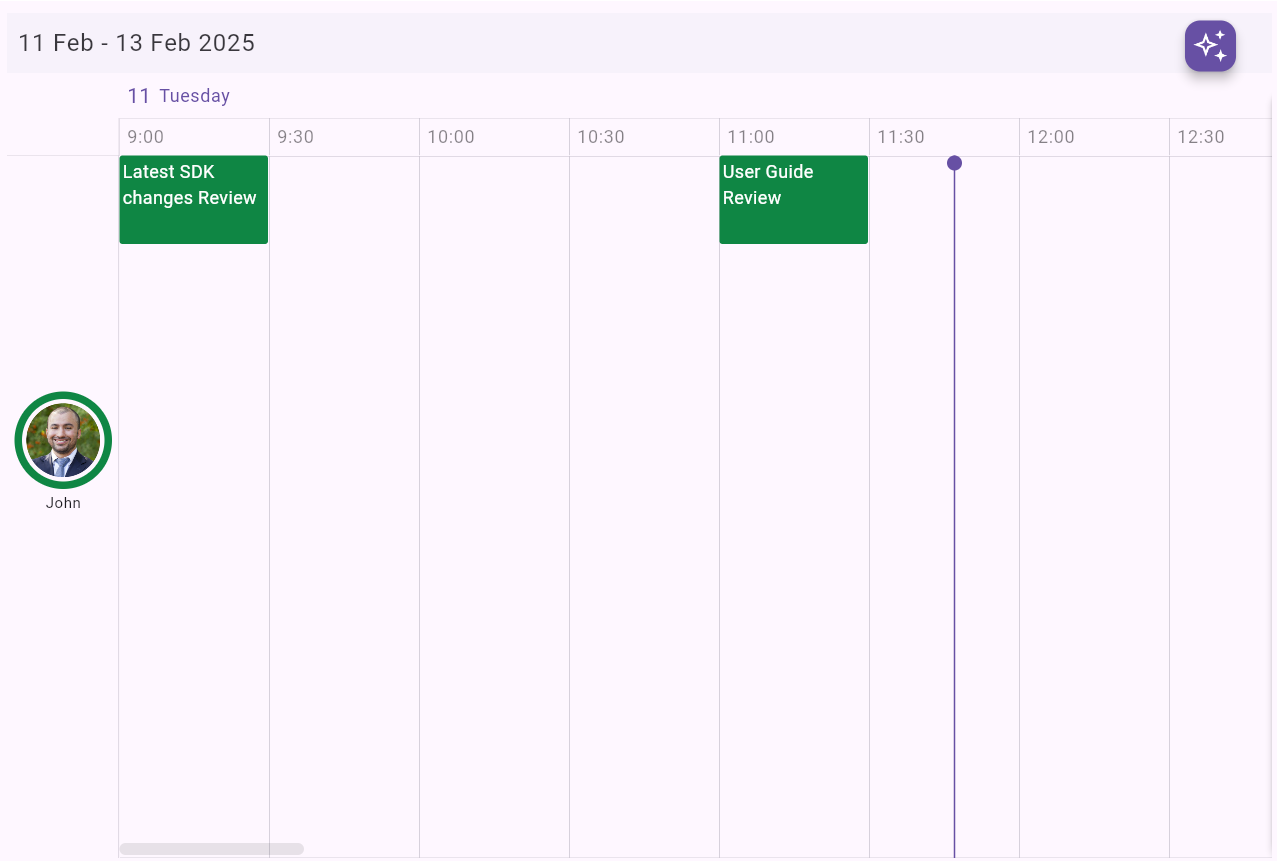
Build the Flutter Calendar widget
Use the SfCalendar widget to display scheduled appointments. Customize the view settings to visualize time slots, hours, and data formats more clearly.
SfCalendar _buildCalendar(CalendarDataSource calendarDataSource) {
  return SfCalendar(
    view: CalendarView.timelineDay,
    timeSlotViewSettings: const TimeSlotViewSettings(
      timeInterval: Duration(minutes: 30),
      timeIntervalWidth: 100,
      timeRulerSize: 25,
      timeFormat: 'h:mm',
      startHour: 9,
      endHour: 17,
      dayFormat: 'EEEE',
      dateFormat: 'dd',
    ),
    dataSource: calendarDataSource,
  );
}
Define the EventDataSource class
Create an EventDataSource class that extends CalendarDataSource, which helps maintain the list of appointments and resources in the Flutter Calendar.
class _EventDataSource extends CalendarDataSource {
  _EventDataSource(
    List<Appointment> events,
    List<CalendarResource> resourcesList,
  ) {
    appointments = events;
    resources = resourcesList;
  }
}
Refer to the following image.
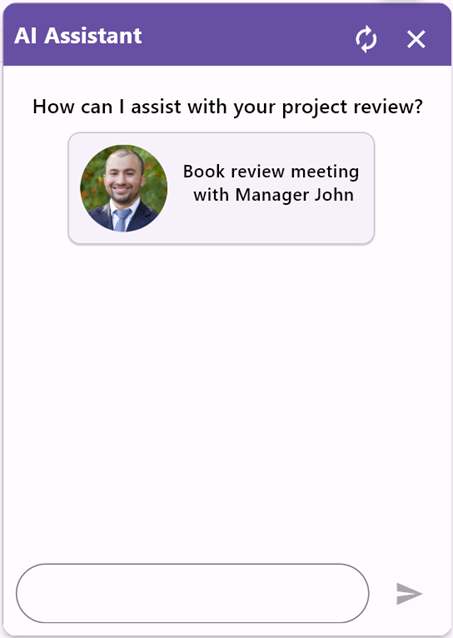
Step 3: Integrate the Flutter AI AssistView Chatbox
Integrating the Flutter AI AssistView Chatbox is a key step to making your AI-powered smart Flutter Calendar more interactive and intelligent. The SfAIAssistView widget manages user and AI messages, ensuring a smooth and visually consistent chat experience.
The Flutter AI AssistView widget is configured to communicate with AI to book a project review meeting in the Calendar. It uses responseBubbleSettings and requestBubbleSettings properties to style the chat bubbles for AI responses and user messages. The actionButton handles user input, allowing them to type messages. The send button triggers a function to add user messages to the chat and generate an AI response based on typed text.
The buildPlaceholder function defines a placeholder view displayed when no messages are present. It shows a helpful prompt and an optional button to guide the user. The placeholder’s layout is flexible and adapts to the current constraints, ensuring a responsive design.
Refer to the following code example.
final AssistMessageAuthor _user = const AssistMessageAuthor(
  id: '8ob3-b720-g9s6-25s8',
  name: 'Farah',
);
final AssistMessageAuthor _ai = const AssistMessageAuthor(
  id: '8ob3-b720-g9s6-25s0',
  name: 'AI',
);
late List<AssistMessage> _messages;

SfAIAssistView _buildAssistView(BoxConstraints constraints) {
  return SfAIAssistView(
    messages: _messages,
    placeholderBuilder: (BuildContext context) =>
       _buildPlaceholder(context, constraints),
    responseBubbleSettings: const AssistBubbleSettings(
      showUserAvatar: false,
      widthFactor: 0.95,
    ),
    requestBubbleSettings: AssistBubbleSettings(
      showUserAvatar: false,
      widthFactor: 0.95,
      actionButton: AssistActionButton(
        onPressed: (String newMessage) {
          setState(
            () {
              _messages.add(
                AssistMessage.request(
                  time: DateTime.now(),
                  author: _user,
                  data: newMessage,
                ),
              );
              _showButtons = false;
              _generateAIResponse(newMessage);
            },
          );
        },
     ),
  );
}
Refer to the following image.
Step 4: Use Google’s Generative AI for smart scheduling
The generateAIResponse method processes a user prompt, interacts with a generative AI model, and updates the user interface with the AI response. It works as follows:
- Initialization and API key check: The function first ensures whether an API key is provided or not. Without a valid key, it assigns an error message to inform the user.
- Model setup: If the API key is valid, it creates an instance of GenerativeModel, configured with a specific AI model and the provided key.
- First-time prompt adjustment: If this is the first time the method is called, it modifies the user input prompt by generating a predefined prompt; otherwise, it will handle the response based on the user message.
- Conversation management: It adds the user’s prompt to a conversationHistory list, which tracks the context for the AI to consider while generating a response.
- Generating AI response: The method sends the conversation history to the AI model’s generateContent method. It retrieves and trims the generated response text and then adds it to the conversation history to maintain context.
- Special response handling: If the AI’s response contains a booked appointment, it calls the convertAIResponse method to validate and schedule the calendar appointment.
- Error handling: Any exceptions during the process are caught, stored, and displayed in responseText.
- UI update: Finally, it uses the setState function to update the interface with the AI’s response wrapped in an AssistMessage.response constructor.
Future<void> _generateAIResponse(String prompt) async {
  String? responseText;
  try {
    if (assistApiKey.isNotEmpty) {
      final aiModel = GenerativeModel(
        model: 'gemini-1.5-flash-latest',
        apiKey: assistApiKey,
      );
      if (_isFirstTime) {
        prompt = _generatePrompt();
        _isFirstTime = false;
      }
      conversationHistory.add(Content.text('User Input$prompt'));
      final GenerateContentResponse response =
          await aiModel.generateContent(conversationHistory);
      responseText = (response.text ?? '').trim();
      conversationHistory.add(Content.text(responseText));
    } else {
      responseText =
          'API key is missing. Please provide a valid API key to generate a response.';
    }
    if (responseText.contains(_appointmentBooked)) {
      _convertAIResponse(responseText, setState);
    }
  } catch (e) {
    responseText = '$e.';
  } finally {
    // Handle finally
  }
  setState(
    () {
      _messages.add(
        AssistMessage.response(
          data: responseText!,
        ),
      );
    },
  );
}
The generatePrompt method is a utility that defines the behavior and instructions for an AI-based appointment booking assistant. This string serves as a detailed prompt to guide the AI in responding accurately and interactively with users during the booking process.
String _generatePrompt() {
  String aiPrompt = """
  You are an intelligent appointment booking assistant designed to book project review appointments step-by-step.
  Focus on the user's inputs, confirm details at each step, and proceed only after validation.
  Always remember the current step and user preferences until the appointment is finalized.
  When responding to the user:
  - Do not include any extra information, such as the phrase 'step 1', 'step 2', 'AI response', or any symbols.
  - Respond only with the relevant questions or confirmations needed to complete the booking process.
  - Ensure that the conversation flows smoothly and logically based on the user's input.

  ### Steps:
  1. **Date Confirmation**:
      Greet the user with a welcome message: "Welcome to the Project Review Appointment Booking Assistant! I’m here to help you book a project review appointment step-by-step."

     - Ask the user for a valid date (dd-mm-yyyy).
     - Compare the user selected date with today's date ($_todayDate).
       - If the selected date is in the past, politely ask the user to select today or a future date.
       - If the selected date is today ($_todayDate) or future date, proceed to the next step.
       - Ensure the date format is correct (dd-mm-yyyy). If the input is invalid or the wrong format is used, ask the user to correct it.

  2. **Project Reviewer Selection**:
     Do not ask for the project reviewers name, because its always $_name. Validate the input using the following logic:
       - Convert the input to lowercase for comparison.
       - If the input does not match $_name (after converting and stripping), kindly inform the user like $_name only available for project review.

  3. **Time Slot Generation**:
     Generate 5 slots alone evenly spaced 30-minute slots between 9 AM and 5 PM for the project review and do not share 1PM to 2PM, because its lunch time and list them below. After the user selects a time slot, validate that the selection is one of the generated options. If the input is invalid, kindly prompt the user to choose a valid time slot.

  4. **Time Slot Confirmation**:
     After the user selects a time slot, confirm that the selected slot matches one of the generated options. If selected 1 to 2 PM, inform like it's lunchtime, so select another time. If correct, proceed; if not, ask the user to select a valid time slot.

  5. **Subject Selection**:
    Ask the user to choose from predefined subjects:

     - And List these subjects below:
       • Blog Review
       • Latest SDK support
       • Bug Review

     Validate the input using the following logic:
       - Convert the input to lowercase for comparison.
       - Ensure the input matches one of the available subjects, regardless of case.
       - If the input is invalid or unrecognized, kindly ask the user to choose from the listed subjects.

  6. **Booking Confirmation**:
     Once all steps have been successfully completed, respond with the booking confirmation:
     - If the inputs are valid:
       Respond with:
       "Your appointment with Manager $_name has been booked."
       Provide the details in this format:
       ManagerName = _managerName
       Date = _date
       Time = _appointmentTime
       Meeting Agenta = _subject

       "Your project review meeting has been successfully booked! Refresh to book a new appointment."

  ### General Rules:
  - Validate inputs step-by-step before proceeding.
  - Do not jump back to previous steps once completed.
  - For invalid inputs, respond with polite clarification and ask for the correct input.
  - Always ensure that the assistant remembers the current step and doesn't make assumptions.
  - After the booking is completed, if the user tries to request anything unrelated, respond with: "Your previous appointment has already been booked successfully. To book a new appointment, please refresh and start the process again."
  """;
  return aiPrompt;
}
The convertAIResponse function processes the AI’s response to extract and validate appointment details, such as the manager’s name, date, time, and subject. It parses the response into a key-value map, cleans data, and combines the date and time for accurate parsing into a DateTime object. Using the setState method, it updates the relevant properties and ensures all fields are valid before confirming the appointment with the employee.
void _convertAIResponse(String response) {
  {
    final List<String> lines = response.split('\n');
    final Map<String, String> appointmentDetails = {};

    for (final String line in lines) {
      if (line.contains('=')) {
        final List<String> parts = line.split(' = ');
        appointmentDetails[parts[0].trim()] = parts[1].trim();
      }
    }
    String startTime;
    String date;
    setState(
      () {
        _managerName = appointmentDetails['ManagerName']!;
        _appointmentTime = appointmentDetails['Time']!;
        startTime = _appointmentTime.split(' - ')[0].toUpperCase();
        _appointmentTime = startTime;
        date = appointmentDetails['Date']!;
        final DateFormat dateFormat = DateFormat('dd-MM-yyyy h:mm a');
        _selectedDateTime = dateFormat.parse('$date $startTime');
        _subject = appointmentDetails['Subject']!;
        if (_managerName.isNotEmpty &&
            _appointmentTime.isNotEmpty &&
            _subject.isNotEmpty) {
          _confirmAppointmentWithEmployee(setState);
        }
      },
    );
  }
}
Step 5: Manage appointments
The confirmAppointmentWithEmployee function confirms and schedules the appointment with the selected manager. It begins by finding the matching resource (e.g., the manager) from the resources list based on the manager’s name.
Using the setState method, the confirmAppointmentWithEmployee function checks if an appointment has already been booked. If not, it creates a new Appointment object with the selected date and time, subject, and the manager’s resource details. The appointment is then added to the calendar’s events, and the listeners are notified. The new appointment is also assigned to selectedAppointment for further reference.
void _confirmAppointmentWithEmployee() {
  final selectedResource = _resources.firstWhere(
      (resource) => resource.displayName == _managerName,
      orElse: () => _resources.first);
  setState(
    () {
      final List<Appointment> appointmentList = <Appointment>[];
      if (_selectedAppointment == null) {
        _subject = _subject.isEmpty ? '(No title)' : _subject;
        final newAppointment = Appointment(
          startTime: _selectedDateTime,
          endTime: dateTime.add(const Duration(minutes: 30)),
          resourceIds: [selectedResource.id],
          color: selectedResource.color,
          subject: _subject,
        );
        appointmentList.add(newAppointment);
        _events.appointments!.add(newAppointment);
        SchedulerBinding.instance.addPostFrameCallback(
          (Duration duration) {
            _events.notifyListeners(
                CalendarDataSourceAction.add, appointmentList);
          },
        );
        _selectedAppointment = newAppointment;
      }
    },
  );
}
Refer to the following output image.
GitHub reference
For more details, refer to the AI-powered smart Flutter Calendar for easy project review scheduling GitHub demo.

Conclusion
Thank you for reading! AI-powered assistants streamline the appointment booking process, offering seamless user interaction and real-time validation. By integrating tools like the Syncfusion Flutter Calendar, we ensure an efficient and error-free scheduling experience. This approach enhances productivity, making project review appointments quick and effortless.
The newest version of Essential Studio® is available from the License and Downloads page. for existing Syncfusion customers. If you are not a customer, try our 30-day free trial to test these new features.
If you need a new widget for the Flutter framework or new features in our existing widgets, you can contact us through our support forum, support portal, or feedback portal. As always, we are happy to assist you!


 No spam, just valuable updates.