
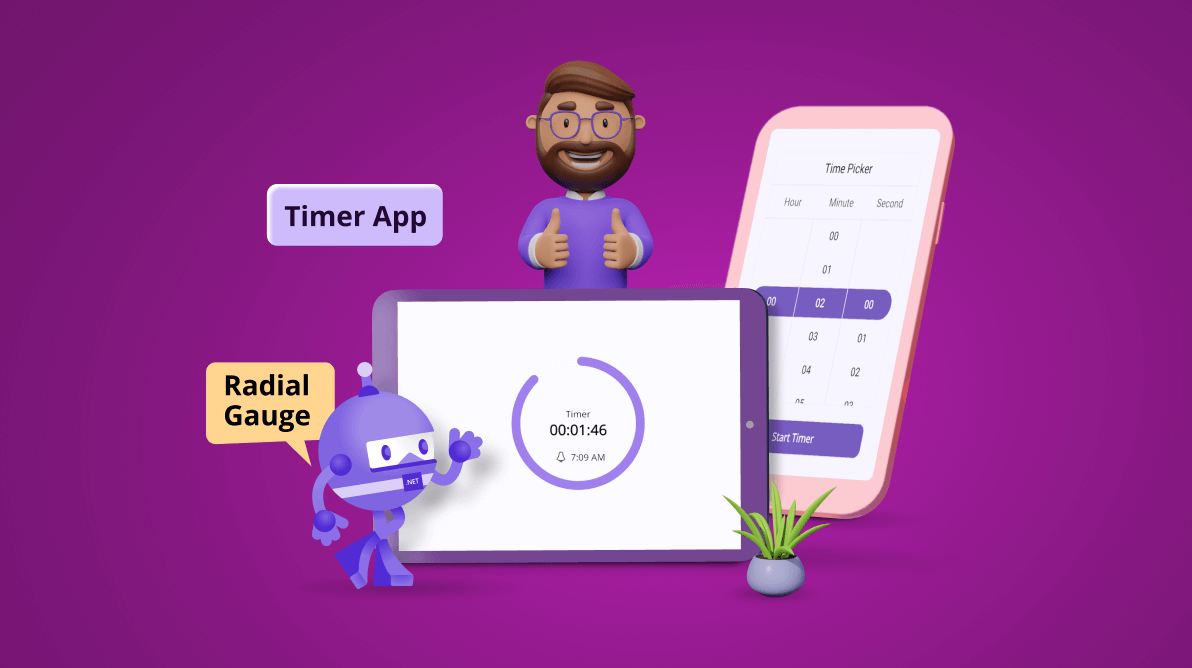
TL;DR: Learn to design a timer app using Syncfusion .NET MAUI Radial Gauge and Time Picker controls. This guide covers creating a .NET MAUI app, integrating and customizing the controls, and adding functionalities like start, pause, and cancel for the timer. Visually represent timer progress efficiently with customizable axes, pointers, and annotations.
A timer app measures time intervals and typically displays the elapsed time in hours, minutes, and seconds. This versatile tool is designed to help you manage time more efficiently. Whether you want to stay productive, execute workouts, or even cook the perfect meal, a timer app can be your best companion.
In this blog, we’ll see how to design a timer app using the Syncfusion .NET MAUI Radial Gauge and Time Picker controls.
Create a .NET MAUI app
First, create a new .NET MAUI application in Visual Studio.
Register the handler for Syncfusion Core
Syncfusion.Maui.Core NuGet is a dependent package for all Syncfusion .NET MAUI controls (in this case, Radial Gauge and Time Picker). Register the handler for Syncfusion core in the MauiProgram.cs file.
using Syncfusion.Maui.Core.Hosting;
builder
   .UseMauiApp<App>()
   .ConfigureSyncfusionCore()
Integrate the .NET MAUI Timer Picker to set the duration of the timer
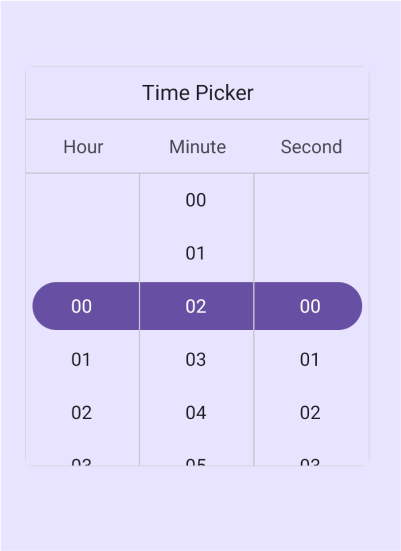
The Syncfusion .NET MAUI Time Picker allows you to select the time and visualize its items inside a popup or a drop-down UI element. Here, we’ll use it to set the duration for the timer app.
Refer to the following code example to initialize and customize the Time Picker.
MainPage.xaml
xmlns:picker="clr-namespace:Syncfusion.Maui.Picker;assembly=Syncfusion.Maui.Picker"

<picker:SfTimePicker Background="#E8E4FF" HorizontalOptions="Fill">
  <picker:SfTimePicker.HeaderView >
   <picker:PickerHeaderView Background="#E8E4FF" Height="40" Text="Time Picker">
   </picker:PickerHeaderView>
  </picker:SfTimePicker.HeaderView>
  <picker:SfTimePicker.ColumnHeaderView >
   <picker:TimePickerColumnHeaderView Background="#E8E4FF">
   </picker:TimePickerColumnHeaderView>
  </picker:SfTimePicker.ColumnHeaderView>
</picker:SfTimePicker>
Refer to the following image.
Designing a timer app using .NET MAUI Radial Gauge
Follow these steps to design a timer app that displays the time selected in the .NET MAUI Time Picker to the Radial Gauge control:
Step 1: Define a model class to bind the values to the Radial Gauge and Time Picker
Let’s create a Timer model class to bind the values to the Radial Gauge and Time Picker. Refer to the following code example where the,
- SelectedTime property updates the selected time in the Time Picker in two-way mode.
- TimerPointerValue property updates the elapsed timer value in the Radial Gauge pointer.
- TimerTime property displays the elapsed time in the Radial Gauge annotation.
- ReminderTime property displays the reminder time of the timer duration in the Radial Gauge annotation.
TimerModel.cs
public class TimerModel : INotifyPropertyChanged
{
    private string reminderTime;
    private string timerTime;
    private double timerPointerValue;
    private TimeSpan selectedTime;

    public TimeSpan SelectedTime
    {
        get
        {
            return selectedTime;
        }
        set
        {
            selectedTime = value;
            this.OnPropertyChanged(nameof(SelectedTime));
        }
    }

    public string ReminderTime
    {
        get
        {
            return reminderTime;
        }
        set
        {
            reminderTime = value;
            this.OnPropertyChanged(nameof(ReminderTime));
        }
    }

    public string TimerTime
    {
        get
        {
            return timerTime;
        }
        set
        {
            timerTime = value;
            this.OnPropertyChanged(nameof(TimerTime));
        }
    }

    public double TimerPointerValue
    {
        get
        {
            return timerPointerValue;
        }
        set
        {
            timerPointerValue = value;
            this.OnPropertyChanged(nameof(TimerPointerValue));
        }
    }

    public event PropertyChangedEventHandler? PropertyChanged;

    public void OnPropertyChanged(string propertyName)
    {
        PropertyChanged?.Invoke(this, new PropertyChangedEventArgs(propertyName));
    }
}
Step 2: Determining the timer app time from the .NET MAUI Time Picker’s selected time
The IDispatcherTimer provides a timer integrated into the Dispatcher queue. It is executed at specified intervals to determine the elapsed time and pointer value of the Radial Gauge based on the time selected in the Time Picker.
Using the CreateTimer method, create an instance of the IDispatcherTimer object associated with the Dispatcher and set the Interval value to run.
Refer to the following code example.
TimerViewModel.cs
public class TimerViewModel : INotifyPropertyChanged
{
  private TimeSpan timerTick;
  private IDispatcherTimer timer;
  public TimerModel TimerModel { get; set; }

  public TimerViewModel()
  {
     timerTick = new TimeSpan();
     var dispatcher = Dispatcher.GetForCurrentThread();

     if (dispatcher != null)
     {
        this.timer = dispatcher.CreateTimer();
        this.timer.Interval = new TimeSpan(0, 0, 1);
        if (this.timer != null)
        {
           this.timer.Tick += Timer_Tick;
        }
     }
  }

  private void Timer_Tick(object? sender, EventArgs e)
  {
      if (timerTick > TimeSpan.Zero)
      {
          timerTick = timerTick.Subtract(new TimeSpan(0, 0, 1));
          var time = (timerTick / this.TimerModel.SelectedTime) * 100;
          this.TimerModel.TimerPointerValue = time;
          this.TimerModel.TimerTime = timerTick.ToString(@"hh\:mm\:ss");
      }
      else
      {
          this.TimerModel.TimerPointerValue = 0;
      }
  }
}
Step 3: Bind the Time Picker selected time
Once time is selected in the .NET MAUI Time Picker, we can use the selected time to determine the Timer time and reminder time to the Radial Gauge.
Refer to the following code example. Here, we’ll set the BindingContext and bind the Time Picker’s SelectedTime property using the SelectedTime property of the TimerModel class from the TimerViewModel class.
<ContentPage.BindingContext>
 <local:TimerViewModel/>
</ContentPage.BindingContext>

<picker:SfTimePicker Background="#E8E4FF" HorizontalOptions="Fill" SelectedTime="{Binding TimerModel.SelectedTime,Mode=TwoWay}">
Step 4: Initialize the .NET MAUI Radial Gauge
The Syncfusion .NET MAUI Radial Gauge can be used to display the elapsed time on a circular scale and includes customizable axes, pointers, and annotations to show the timer details.
Refer to the following code example to initialize the Radial Gauge control.
MainPage.xaml
xmlns:gauge="clr-namespace:Syncfusion.Maui.Gauges;assembly=Syncfusion.Maui.Gauges"

<gauge:SfRadialGauge Background="#E8E4FF"/>
Step 5: Customize the Radial Gauge axis angle
To design the timer app, we’ll set the Radial Gauge axis’ StartAngle and EndAngle to 270 degrees. By default, the Radial Gauge axis’ start angle is zero and updates clockwise.
Refer to the following code example.
MainPage.xaml
<gauge:SfRadialGauge Background="#E8E4FF">
 <gauge:SfRadialGauge.Axes>
  <gauge:RadialAxis ShowLabels="False"
         StartAngle="270"
         EndAngle="270"
         ShowAxisLine="False"
         ShowTicks="False">
  </gauge:RadialAxis>
 </gauge:SfRadialGauge.Axes>
</gauge:SfRadialGauge>
Step 6: Customize the Radial Gauge axis pointer value
Let’s add a RangePointer to display the elapsed timer value in the Radial Gauge Pointers.
Refer to the following code example to bind the pointer value to the Radial Gauge axis using the TimerPointerValue property of the TimerModel class from the TimerViewModel BindingContext class.
MainPage.xaml
<ContentPage.BindingContext>
 <local:TimerViewModel/>
</ContentPage.BindingContext>

<gauge:SfRadialGauge Background="#E8E4FF">
 <gauge:SfRadialGauge.Axes>
  <gauge:RadialAxis ShowLabels="False"
         StartAngle="270"
         EndAngle="270"
         ShowAxisLine="False"
         ShowTicks="False">
   <gauge:RadialAxis.Pointers>
    <gauge:RangePointer Value="100" Fill="#EEEEEE" CornerStyle="BothCurve" PointerWidth="14"/>
    <gauge:RangePointer Value="{Binding TimerModel.TimerPointerValue}" CornerStyle="BothCurve" Fill="#6750A4" PointerWidth="14"/>
   </gauge:RadialAxis.Pointers>
  </gauge:RadialAxis>
 </gauge:SfRadialGauge.Axes>
</gauge:SfRadialGauge>
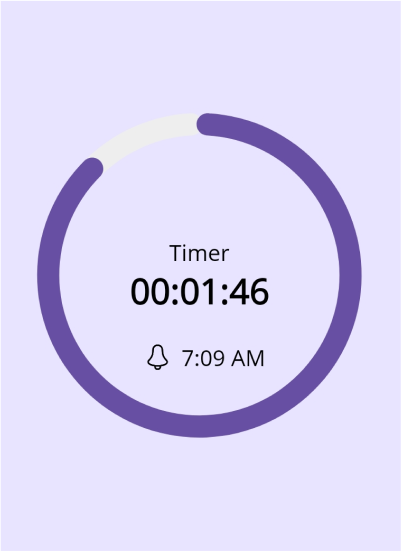
Step 7: Customize the Radial Gauge axis annotation
The elapsed time and reminder can be displayed in the Radial Gauge axis using the annotations.
Refer to the following code example. Here, we’ll add the elapsed time and reminder time text to the Radial Gauge using the TimerTime and ReminderTime properties of the TimerModel class from the TimerViewModel BindingContext class.
MainPage.xaml
<ContentPage.BindingContext>
 <local:TimerViewModel/>
</ContentPage.BindingContext>

<gauge:SfRadialGauge Background="#E8E4FF">
 <gauge:SfRadialGauge.Axes>
  <gauge:RadialAxis ShowLabels="False"
         StartAngle="270"
         EndAngle="270"
         ShowAxisLine="False"
         ShowTicks="False">
   <gauge:RadialAxis.Annotations>
    <gauge:GaugeAnnotation>
     <gauge:GaugeAnnotation.Content>
      <VerticalStackLayout>
       <Label Text="Timer" HorizontalOptions="Center"/>
       <Label Text="{Binding TimerModel.TimerTime}"
              FontSize="22"
              TextColor="Black"
              FontAttributes="Bold"/>
      </VerticalStackLayout>
     </gauge:GaugeAnnotation.Content>
    </gauge:GaugeAnnotation>
    <gauge:GaugeAnnotation DirectionUnit="Angle"
           DirectionValue="90"
           PositionFactor="0.65"
           VerticalAlignment="Start">
     <gauge:GaugeAnnotation.Content>
      <HorizontalStackLayout BindingContext="{Binding}" IsVisible="{Binding IsReminderTimeVisible}">
       <Image Background="#E8E4FF" Source="notification.png"  VerticalOptions="Center"  HeightRequest="30" WidthRequest="30"/>
       <Label Text="{Binding TimerModel.ReminderTime}" HorizontalOptions="Start" VerticalOptions="Center"/>
      </HorizontalStackLayout>
     </gauge:GaugeAnnotation.Content>
    </gauge:GaugeAnnotation>
   </gauge:RadialAxis.Annotations>
  </gauge:RadialAxis>
 </gauge:SfRadialGauge.Axes>
</gauge:SfRadialGauge>
Refer to the following image.
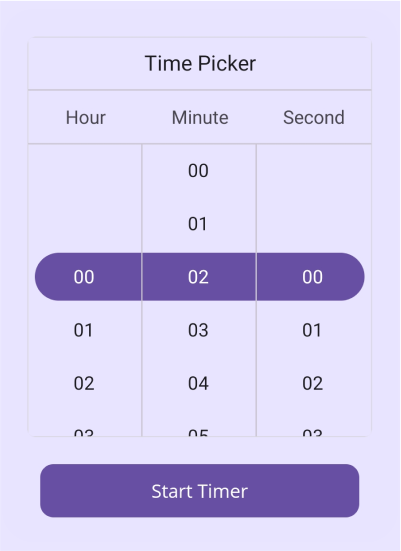
Step 8: Start the timer
Once the time is selected in the Time Picker control, the Start Timer Button is enabled to Start the IDispatcherTimer, which executes the dispatcher queue to determine the elapsed time and Radial Gauge pointer value.
Refer to the following code example to design and add the Start Timer button.
MainPage.xaml
<Button Text="Start Timer" CornerRadius="10" HeightRequest="40" Margin="10,20,10,0" VerticalOptions="Center" IsEnabled="{Binding IsStartButtonEnabled}" Command="{Binding StartButtonCommand}"/>Refer to the following code example to Start the IDispatcherTimer and change the visibility of the .NET MAUI Time Picker and Radial Gauge based on the Time Picker’s selected time.
TimerViewModel.cs
public class TimerViewModel : INotifyPropertyChanged
{
   private bool isStartButtonEnabled;
   public Command StartButtonCommand { get; set; }
   public bool IsStartButtonEnabled
   {
     get
     {
         return isStartButtonEnabled;
     }
     set
     {
         this.isStartButtonEnabled = value;
         this.OnPropertyChanged(nameof(IsStartButtonEnabled));
     }
   }

   public TimerViewModel()
   {
       this.StartButtonCommand = new Command(OnStartButtonClick);
       this.IsStartButtonEnabled = false;
   }

   private void OnStartButtonClick()
   {
      this.TimerModel.TimerPointerValue = 100;
      this.IsReminderTimeVisible = true;
      this.timerTick = this.TimerModel.SelectedTime;
      this.TimerModel.TimerTime = this.TimerModel.SelectedTime.ToString(@"hh\:mm\:ss");
      this.ButtonText = "Pause";

      if (this.TimerModel.SelectedTime > TimeSpan.Zero)
      {
          this.PickerIsVisible = false;
          this.RadialGaugeIsVisible = true;
          this.StartTimer();
      }
  }

  private void StartTimer()
  {
      this.TimerModel.ReminderTime = DateTime.Now.AddSeconds(this.TimerModel.SelectedTime.TotalSeconds).ToShortTimeString();
      if (!this.timer.IsRunning)
          this.timer?.Start();
  }
}
Refer to the following image.
Step 9: Stop the timer
Let’s design the Cancel button to stop the timer.
MainPage.xaml
<Button Text="Cancel" CornerRadius="10" Background="#6750A4" WidthRequest="85" HeightRequest="40" Command="{Binding CancelButtonCommand}"/>Then, we need to set the value of the IDispatcherTimer to Stop and reset the TimerModel properties value to the default.
Refer to the following code example to stop the IDispatcherTimer and change the visibility of the .NET MAUI Time Picker and Radial Gauge when clicking the Cancel button.
TimerViewModel.cs
public Command CancelButtonCommand { get; set; }
public TimerViewModel()
{
    this.CancelButtonCommand = new Command(OnCancelButtonClick);
}

private void OnCancelButtonClick()
{
    this.TimerModel.SelectedTime = new TimeSpan();
    this.PickerIsVisible = true;
    this.RadialGaugeIsVisible = false;
    this.TimerModel.TimerPointerValue = 100;
    this.TimerModel.TimerTime = string.Empty;
    this.timerTick = new TimeSpan();
    this.StopTimer();
}

private void StopTimer()
{
    if (this.timer.IsRunning)
         this.timer?.Stop();
}
Refer to the following image.
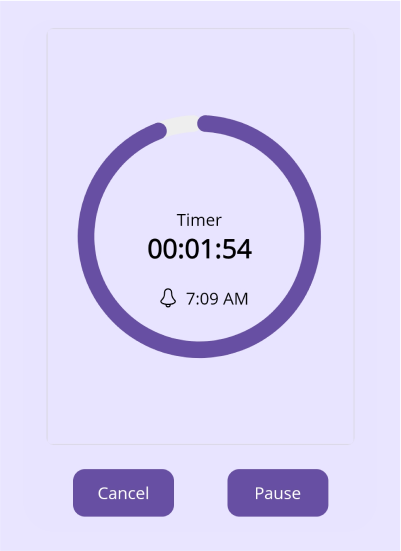
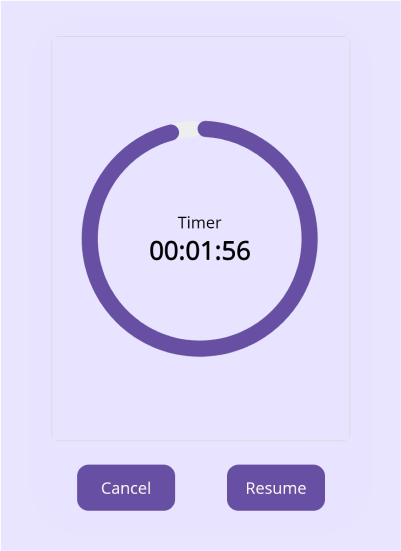
Step 10: Pause or resume the timer
Let’s design the Pause or Resume button.
MainPage.xaml
<Button Text="{Binding ButtonText}" Background="#6750A4" WidthRequest="85" HeightRe-quest="40" Grid.Column="1" CornerRadius="10" Command="{Binding PauseButtonCommand}"/>Then, we need to set the value as Stop or Start in the IDispatcherTimer and the Reminder time based on the Pause or Resume click action.
TimerViewModel.cs
public class TimerViewModel : INotifyPropertyChanged
{
  public Command PauseButtonCommand { get; set; }
  private string buttonText;

  public string ButtonText
  {
      get
      {
          return buttonText;
      }
      set
      {
          buttonText = value;
          this.OnPropertyChanged(nameof(ButtonText));
      }
  }

  public TimerViewModel()
  {
       this.PauseButtonCommand = new Command(OnPauseButtonClick);
       this.ButtonText = "Pause";
  }

  private void OnPauseButtonClick()
  {
      this.TimerModel.ReminderTime = DateTime.Now.AddSeconds(this.timerTick.TotalSeconds).ToShortTimeString();
      if (this.ButtonText == "Pause")
      {
          this.StopTimer();
          this.ButtonText = "Resume";
          this.IsReminderTimeVisible = false;
      }
      else if (this.ButtonText == "Resume")
      {
          this.StartTimer();
          this.ButtonText = "Pause";
          this.IsReminderTimeVisible = true;
      }
  }
}
Refer to the following images.

GitHub reference
For more details, download the complete example of Designing a timer app using .NET MAUI Radial Gauge and Time Picker.

Conclusion
Thanks for reading! In this blog, we’ve learned how to design a timer app using the Syncfusion .NET MAUI Radial Gauge and Time Picker controls. Give it a try, and leave your feedback in the comment section below.
For our customers, the latest version of Essential Studio is available from the License and Downloads page. If you’re not a Syncfusion customer, try our 30-day free trial to evaluate our components.
You can also contact us through our support forum, support portal, or feedback portal. We are always happy to assist you!


Related blogs
- Making Payments Easy: Using .NET MAUI Radio Button for Payment Apps and Digital Wallets
- Mastering Shopping: Enhancing Your Product Search with the .NET MAUI CheckBox
- How to Zoom and View the Desired Area in a PDF using .NET MAUI PDF Viewer?
- Enhance PDF Viewing and Editing with the New Built-in Toolbar in .NET MAUI PDF Viewer

