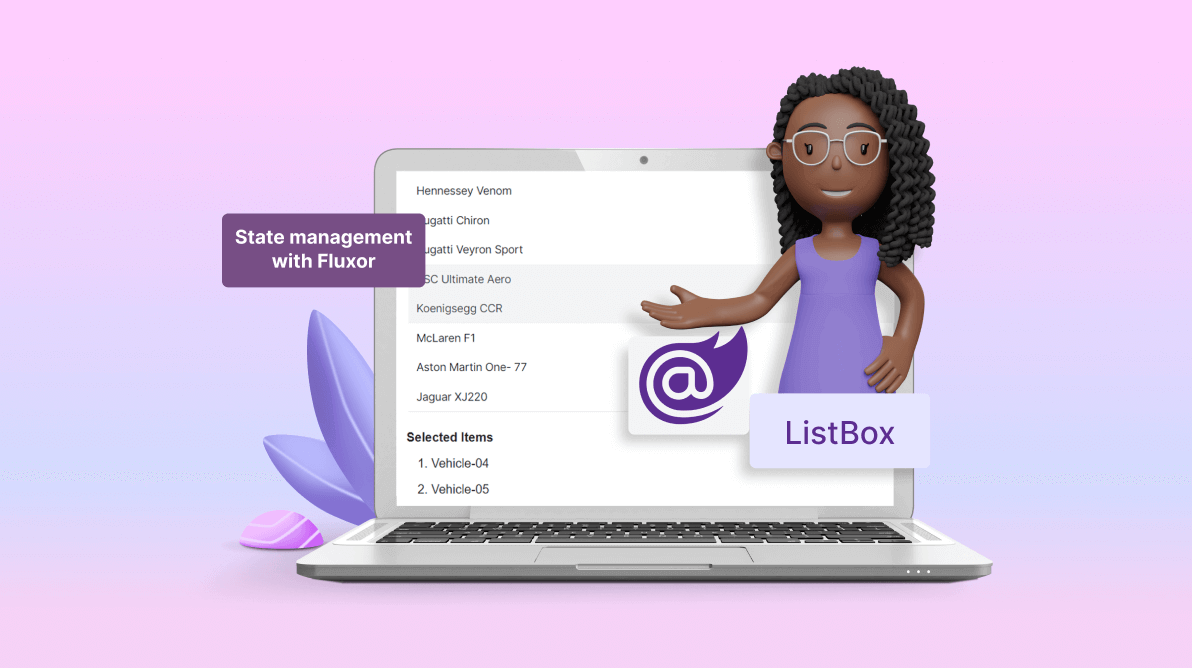
TL;DR: Learn how to maintain state in the Syncfusion Blazor ListBox using the Fluxor state management library. This guide covers setting up Fluxor, integrating it with the ListBox, and managing selected items for a smooth user experience.
The Syncfusion Blazor ListBox is a feature-rich component that provides excellent functionalities rather than just displaying a list of items. It allows users to select one or more items using check boxes, with a mouse, or through keyboard interactions. It can be populated using an array of strings or objects.
The Fluxor is a state management library heavily inspired by the Flux architecture and popularized by Facebook’s React library. It provides a predictable and efficient way to manage your app’s state by enforcing unidirectional data flow and promoting a reactive programming style.
In this blog, we’ll learn how to maintain the state in the Syncfusion Blazor ListBox using Fluxor. We’ll store the selected items (current state) of the ListBox, i.e., the selected item values, in the Fluxor. Then, we’ll load the values from the Fluxor and display them at the end of the ListBox while scrolling through a huge volume of items. This will provide a smooth navigation and user experience.
Getting started with Blazor ListBox
First, refer to the getting started with Blazor ListBox component documentation.
Now, refer to the following code example demonstrating how to render a ListBox component in a Razor page.
@using Syncfusion.Blazor.DropDowns

<SfListBox TValue="string[]" DataSource="@Vehicles" TItem="VehicleData">
 <ListBoxFieldSettings Text="Text" Value="Id" />
</SfListBox>
@code {
    public string[] value = new string[] { “Vehicle-01” };
    public List<VehicleData> Vehicles = new List<VehicleData> {
        new VehicleData { Text = "Hennessey Venom", Id = "Vehicle-01" },
        new VehicleData { Text = "Bugatti Chiron", Id = "Vehicle-02" },
        new VehicleData { Text = "Bugatti Veyron Super Sport", Id = "Vehicle-03" }
    };

    public class VehicleData {
      public string Text  { get; set; }
      public string Id  { get; set; }
    }
}
Getting started with Fluxor
Fluxor helps you manage the state of your app in a predictable and organized manner. Follow these steps to get started with it:
Step 1: Installation
To add the Fluxor NuGet package to your Blazor server project, use the following command in the Package Manager Console window.
Install-Package Fluxor.Blazor.Web
Step 2: Register the store
Add the following code to your App.razor file. This code is an essential setup for Fluxor state management in your Blazor app. It initializes the Fluxor store and ensures your app can manage state and actions effectively.
<Fluxor.Blazor.Web.StoreInitializer />
Step 3: Register the Fluxor
To integrate Fluxor into your Blazor app, navigate to the Program.cs file. Inside the Main method, add the following code to register Fluxor.
builder.Services.AddFluxor(options =>
{
    options.ScanAssemblies(typeof(Program).Assembly);
});
This registration ensures Fluxor is properly integrated, allowing efficient state management throughout your app.
Step 4: Set up the feature/state
Now, create a Store folder within your project, and inside it, create a subfolder named ValueUseCase. Add a new class called ValueState.cs within this subfolder.
Refer to the following code example.
using Fluxor;

namespace SyncfusionBlazorApp.Store.ValueUseCase
{
    [FeatureState]
    public record ValueState(string[] Items)
    {
        public ValueState() : this(new string[0])
        {
            //default constructor
        }
    }
}
Step 5: Defining actions
Create an action class named SetValueAction to update items from the Blazor ListBox in the Store folder. In the following code example, we’ll define the following two records within the SyncfusionBlazorApp.Store namespace. These records are used to manage actions and states within a Blazor app.
- EventValueClicked: It accepts an array of strings, likely conveying a list of items or values, and it is typically dispatched to trigger state updates within a state management system.
- SetValueAction: It also takes an array of strings as its input parameter and updates the application’s state.
Refer to the following code example.
using SyncfusionBlazorApp.Store.ValueUseCase;
namespace SyncfusionBlazorApp.Store
{
    public record EventValueClicked(string[] Items);
    public record SetValueAction(string[] Items);
}
Step 6: Defining reducers
To manage state changes effectively in a Fluxor-based app, create a Reducer.cs class within the ValueUseCase folder. This class will contain ReduceSetValueItem, specifically designed to handle state changes when the SetValueAction is dispatched.
Refer to the following code example. When the SetValueAction is triggered, the ReduceSetValueItem method generates a new state object. This new state object’s Items property is updated with the values provided in the action. This process ensures that the state is kept up to date in a predictable and immutable manner, following a common pattern in Fluxor-based state management.
using Fluxor;

namespace SyncfusionBlazorApp.Store.ValueUseCase
{
    public class Reducers
    {
        [ReducerMethod]
        public static ValueState ReduceSetValueItem(ValueState state, SetValueAction action)
        {
            return state with { Items = action.Items };
        }
    }
}
Step 7 Defining effects
In the ValueUseCase folder, let’s create an Effects.cs class to handle effects. Within this class, we’ll define the HandleEventCounterClicked method, which listens for EventValueClicked actions. Upon detection, it dispatches a SetValueAction to update the application’s state potentially.
Refer to the following code example.
using Fluxor;

namespace SyncfusionBlazorApp.Store.ValueUseCase
{
    public class Effects
    {
        private readonly IState<ValueState> _valueState;
        public Effects(IState<ValueState> valueState)
        {
            _valueState = valueState;
        }
        [EffectMethod]
        public Task HandleEventCounterClicked(EventValueClicked action, IDispatcher dispatcher)
        {
            dispatcher.Dispatch(new SetValueAction(action.Items));
            return Task.CompletedTask;
        }
    }
}
Step 8: Integrate Fluxor in the Blazor ListBox component
Now, connect the Fluxor state to your ListBox component’s Value property. Then, trigger the dispatch of the SetItemsAction within the ValueChange event of the ListBox.
This ensures that whenever there is a change in the selection of the ListBox, an update is automatically initiated in the Fluxor state, guaranteeing synchronization between the UI and the application state.
Refer to the following code example.
@page "/"
@using Syncfusion.Blazor.DropDowns
@using Fluxor
@using SyncfusionBlazorApp.Store;
@using SyncfusionBlazorApp.Store.ValueUseCase
<SfListBox TValue="string[]" Value="@valueState.Value.Items" DataSource="@Vehicles" TItem="VehicleData">
<ListBoxFieldSettings Text="Text" Value="Id" />
<ListBoxEvents TValue="string[]" TItem="VehicleData" ValueChange="@valueChange"></ListBoxEvents>
</SfListBox>
<span><b>Selected Items</b></span>
<ol>
@foreach (var item in valueState!.Value.Items)
{
<li>@item</li>
}
</ol>
@code {
[Inject]
private IDispatcher? dispatcher { get; set; }
[Inject]
protected IState<ValueState>? valueState { get; set; }
public List<VehicleData> Vehicles = new List<VehicleData> {
new VehicleData { Text = "Hennessey Venom", Id = "Vehicle-01" },
new VehicleData { Text = "Bugatti Chiron", Id = "Vehicle-02" },
new VehicleData { Text = "Bugatti Veyron Sport", Id = "Vehicle-03" },
new VehicleData { Text = "SSC Ultimate Aero", Id = "Vehicle-04" },
new VehicleData { Text = "Koenigsegg CCR", Id = "Vehicle-05" },
new VehicleData { Text = "McLaren F1", Id = "Vehicle-06" },
new VehicleData { Text = "Aston Martin One- 77", Id = "Vehicle-07" },
new VehicleData { Text = "Jaguar XJ220", Id = "Vehicle-08" }
};
private void valueChange(ListBoxChangeEventArgs<string[], VehicleData> args)
{
dispatcher?.Dispatch(new EventValueClicked(args.Value));
}
public class VehicleData {
public string Text { get; set; }
public string Id { get; set; }
}
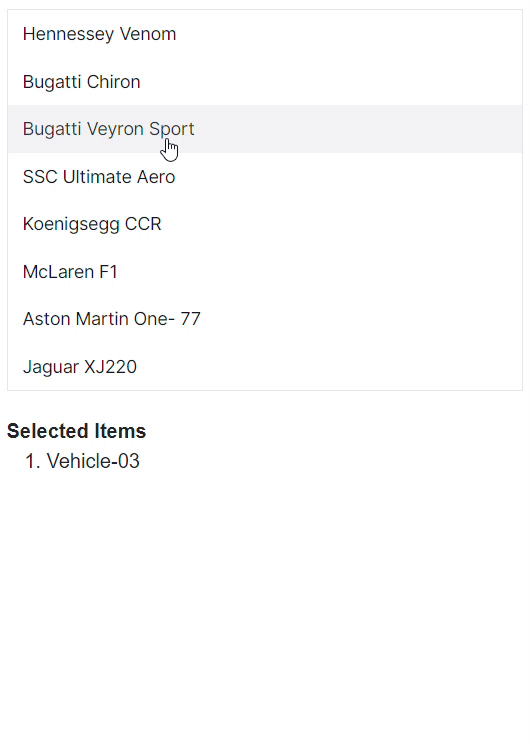
}After executing the above code examples, we will get the output in the following image.
GitHub reference
For more details, refer to state management in Blazor ListBox using the Fluxor GitHub demo.
Conclusion
Thanks for reading! In this blog, we’ve seen how to maintain the state in the Syncfusion Blazor ListBox component using Fluxor. Try out the steps discussed in this blog, and leave our feedback in the comments section below!
Our existing customers can download the new version of Essential Studio from the License and Downloads page. If you are not a Syncfusion customer, try our 30-day free trial to check out our incredible features.
If you have any questions or need assistance, our support team is always here to help. Feel free to contact us through our support forum, support portal, or feedback portal. We look forward to hearing from you!


